I had an inkling that the naval battle we were going to fight was going to be a big one ... but it wasn't until I actually entered the room, we were going to fight in that I realised that the ship models were set up for the opening moves of the Battle of Jutland!
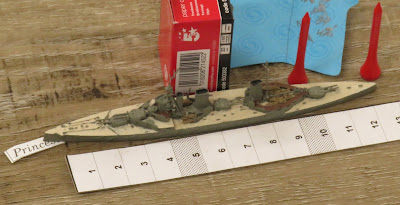
Before trying to write a battle report, I must point out a few things. Firstly, the ship models used belong to the vast collections of two of my long-term wargaming friends and that the location was the floor of an empty office that we were able to access thanks to another member of the Jockey's Fields Irregulars. Secondly, that the mix of players included experienced naval wargamers who had used the rules before and a couple of total novices. Thirdly, that no ships below the size of a capital ship (i.e. battleships and battlecruisers) was used in order to speed up play. Fourthly, that the usually tedious measuring of gun ranges was speeded up by the use of laser measuring tapes by the umpires ... hence the appearance of little red boxes (i.e. the 'targets' for the lasers) in the following photographs. Finally, my battle report (which is written from the point of view of the British fleet commander) is very photo heavy, and I recommend that readers click on the images if they need to see them in a larger size.
The Battle of Jutland: Opening situation
The action opened when the 1st and 2nd Battlecruiser Squadrons (HMS Princess Royal, HMS Queen Mary, & HMS Tiger and HMS New Zealand & HMS Indefatigable respectively, led by HMS Lion) ...
Left to right: HMS Lion, HMS Princess Royal, and HMS Queen Mary.
Left to right: HMS Tiger, HMS New Zealand, and HMS Indefatigable.
... came in sight of the German 1st Scouting Group (SMS Derfflinger, SMS Seydlitz, SMS Moltke, and SMS Von der Tann, lead by SMS Lutzow).
The German 1st Scouting Group.
Turn 1
My initial orders were for the two Battlecruiser Squadrons to follow HMS Lion in line, by turning 10 degrees to port in order to close the range on the German ships. Almost immediately, HMS Lion was bracketed by fire for the leading German battlecruisers.
HMS Lion in the lead.
The two Battlecruiser Squadrons open fire ...
... HMS Lion, HMS Princess Royal, ...
... HMS Queen Mary, HMS Tiger, ...
... HMS New Zealand, and HMS Indefatigable.
Getting the range and direction of fire right is a vital task ... but one that has to be completed within a very short time frame! The players write the range at which they are firing on the blue arrows, which they must point at the target they are firing at.
Then the process of measuring ranges begins ...
... using the laser measuring tapes.
The players await the results of the first exchange of fire. This photograph gives some idea of the size of the room (and floor) used for this battle.
Turn 2
I ordered the two Battlecruiser Squadrons to turn to starboard 5 degrees in order to position them so that they would be in a better placed to 'cross the T' of the German battle line later in the battle. In response, the Germans seemed to turn to port by approximately 5 degrees.
Turn 3
The opposing battlecruisers continued to sail on slightly converging courses, exchanging fire as they did.
HMS Lion is bracketed by many shells ... and hit once!
Turn 4
This continued during the next turn, and ships began to suffer damage.
Like her sistership HMS Lion, HMS Queen Mary was also hit by several 12-inch shells fired by the German battlecruisers.
Turn 5
At this point the Germans did something unexpected ... and their line of battlecruisers began to split. Some maintained their existing course, but others turned to starboard, bringing them closer to the British ships.
The German battlecruiser squadron ... apparently in total disarray!
I ordered the 1st and 2nd Battlecruiser Squadrons to turn 40 degrees to starboard in order to position them to deal with the apparently errant German battlecruisers ... and one of them began to suffer serious damage.
SMS Von der Tann was repeatedly hit by 13.5-inch shells fired by some of the 'Big Cats' (i.e. the larger of the British battlecruisers).
The smoke of the 5th Battle Squadron was then seen coming from some distance behind the line of British battlecruisers.
Turn 6
I ordered the 1st and 2nd Battlecruiser and 5th Battle Squadrons to maintain their current course and to engage the enemy as best they could. The results were devastating for the SMS Von der Tann, which came under galling and effective gunfire yet again.
The number of shell splashes (i.e. upturned golf tees) shows just how much gunfire the two errant German battlecruisers came under.
The SMS Von der Tann was hit four times. This is indicated by the upturned red golf tees.
Turn 7
Whilst the 5th Battle Squadron continued on its existing course, the 1st and 2nd Battlecruiser Squadrons turned 10 degrees to port to shorten the range to the closest German battlecruisers.
Turn 8
Smoke was seen behind the the furthest German battlecruiser ... and this meant that the High Seas Fleet was approaching!
The leading German battleships of the High Seas Fleet emerging from the North Sea gloom. As can be seen, the grey flooring really helped to make it difficult to see ships at any distances.
The leading squadrons of the German High Seas Fleet.
The appearance of the main body of the German fleet did little to influence the fighting that was taking place between the battlecruisers.
HMS Princess Royal ...
... and HMS Lion were both hit by enemy shells.
Turn 9
As the leading battleships of the High Seas Fleet came into range and began firing with great effect at the British battlecruisers, ...
HMS Lion under fire from both the German battlecruisers and the leading battleships of the High Seas Fleet. She suffered twelve hits, which caused her considerable damage ... and would eventually lead to her sinking.
HMS Queen Mary was also damaged, but not as badly.
... it seems appropriate that the ships of the 1st Battlecruiser Squadron should begin to turn away by executing a 90 degree turn to starboard.
The carefully choreographed 'battle turn away' performed by the 1st Battlecruiser Squadron.
Turn 10
The ships of the 2nd Battlecruiser Squadron also began to turn away from the oncoming High Seas Fleet, ...
The 1st and 2nd Battlecruiser Squadrons complete their 'battle turn away' and begin their run back towards the Grand Fleet.
The leading units of the German High Seas Fleet. Two of the German battlecruisers are in the foreground.
... hopefully drawing them towards the 5th Battle Squadron and the Grand Fleet.
The 5th Battle Squadron continued to engage any enemy ships that came within range.
Turn 11
Whilst the High Seas Fleet continued to sail into sight, ...
The main body of the German High Seas Fleet!
... both sides ships continued to suffer damage.
A German battlecruiser is hit three times ...
... and HMS Princess Royal also suffers serious damage.
Turn 12
By this time, British reinforcements came into sight. The 3rd Battlecruiser Squadron (HMS Invincible, HMS Inflexible, and HMS Indomitable) had arrived!
The 3rd Battlecruiser Squadron has arrived!
Just behind them, the leading units of the Grand Fleet began to emerge from the gloom.
British super-dreadnaughts of the Grand Fleet.
Left to right: Two King George V-class super-dreadnaughts following two Orion-class super-dreadnaughts into battle.
Turn 13
Whilst the main bodies of both fleets sailed towards each other, HMS Barham came under fire from the leading dreadnaughts of the High Sees Fleet ... and suffered further damage.
HMS Barham is hit twice by German heavy shells.
HMS Lion, which had suffered very heavy damage earlier in the fighting, finally sank.
Turn 14
As more and more battleships of the Grand Fleet hove into sight ...
More ships of the Grand Fleet come into view.
... some of the German dreadnoughts began to suffer damage at the hand of the 5th Battle Squadron.
A German battleship of the Helgoland-class is hit three times by 15-inch shells.
At this point, we ran out of time and the battle came to an end. We all wish that we could have continued fighting this incredible wargame, but it left us all wanting to do it again.
The situation at the end of the wargame
The following photographs show the positions of the two fleets at the end of the wargame.
The positions of the opposing fleets at the end of the battle.
The positions of the opposing fleets at the end of the battle with labels.
Please note that these two photographs are quite large (1.6 Mb each) and are best viewed by clicking on them.
