I have finally managed to fight my version of 'The Attack on Morobad', and here is the battle report.
Note: Special rules for this battle:
- If a section of wall or a tower receives three direct hits from artillery fire, it is deemed to have been demolished.
- If two sections of wall are demolished, the Hauserians must take a morale test. If they fail, the Sultan will surrender.
- The morale test is repeated every time a further section of wall is demolished.
- If an enemy unit manages to enter the city of Morobad, the Hauserians must take a further morale test. If they fail, the Sultan will surrender.
The forces involved
The British sent an Infantry Brigade to attack the Hauserian capital, Morobad.
The Brigade consisted of:
- 1st Battalion, The Cambridgeshire Light Infantry Regiment
- 1st Battalion, The Royal Essex Regiment
- 1st Battalion, The Mackay Highlanders
- A & B Field Batteries, the Regiment of Royal Artillery
- Machine Gun Battery, The Loyal Kent Regiment
The outnumbered Hauserian defenders were all riflemen armed with slightly obsolete single-shot rifles.
The terrain
The approach to Morobad was across a flat plain that was dotted with clumps of palm trees.
As can be seen, Morobad was surrounded by a considerable wall that the British artillery would have to breach if they were to be able to capture the city.
The battle
Turn 1
The Hauserian defenders were already manning the Great Wall of Morobad ...
... as the British approached.
Turn 2
The British force advanced ...
Turn 3
... until the artillery was in range of the Great Wall of Morobad.
Turn 4
The fighting began when the two Field Batteries of the Regiment of Royal Artillery opened fire on the Great Wall of Morobad ...
... and caused some damage to the corner tower and inflicted a casualty on the defenders. Under cover of the artillery fire, the British infantry continued to advance on the flanks whist those in the centre began to form up into an assault column.
In spite of this growing threat, the Hauserians stayed behind their defences and patiently waited.
Turn 5
The British artillery failed to hit anything of significance with its second salvo ...
... and the Mackay Highlanders and the Machine Gun Battery continued to move forward on the British right flank.
Turn 6
The third salvo of British artillery fire hit a section of city's wall twice, and although no casualties were inflicted, this gave the Hauserians some cause for concern.
Whilst this was happening the Mackay Highlanders and the Machine Gun Battery deployed into line to meet any potential threat from within the city.
Turn 7
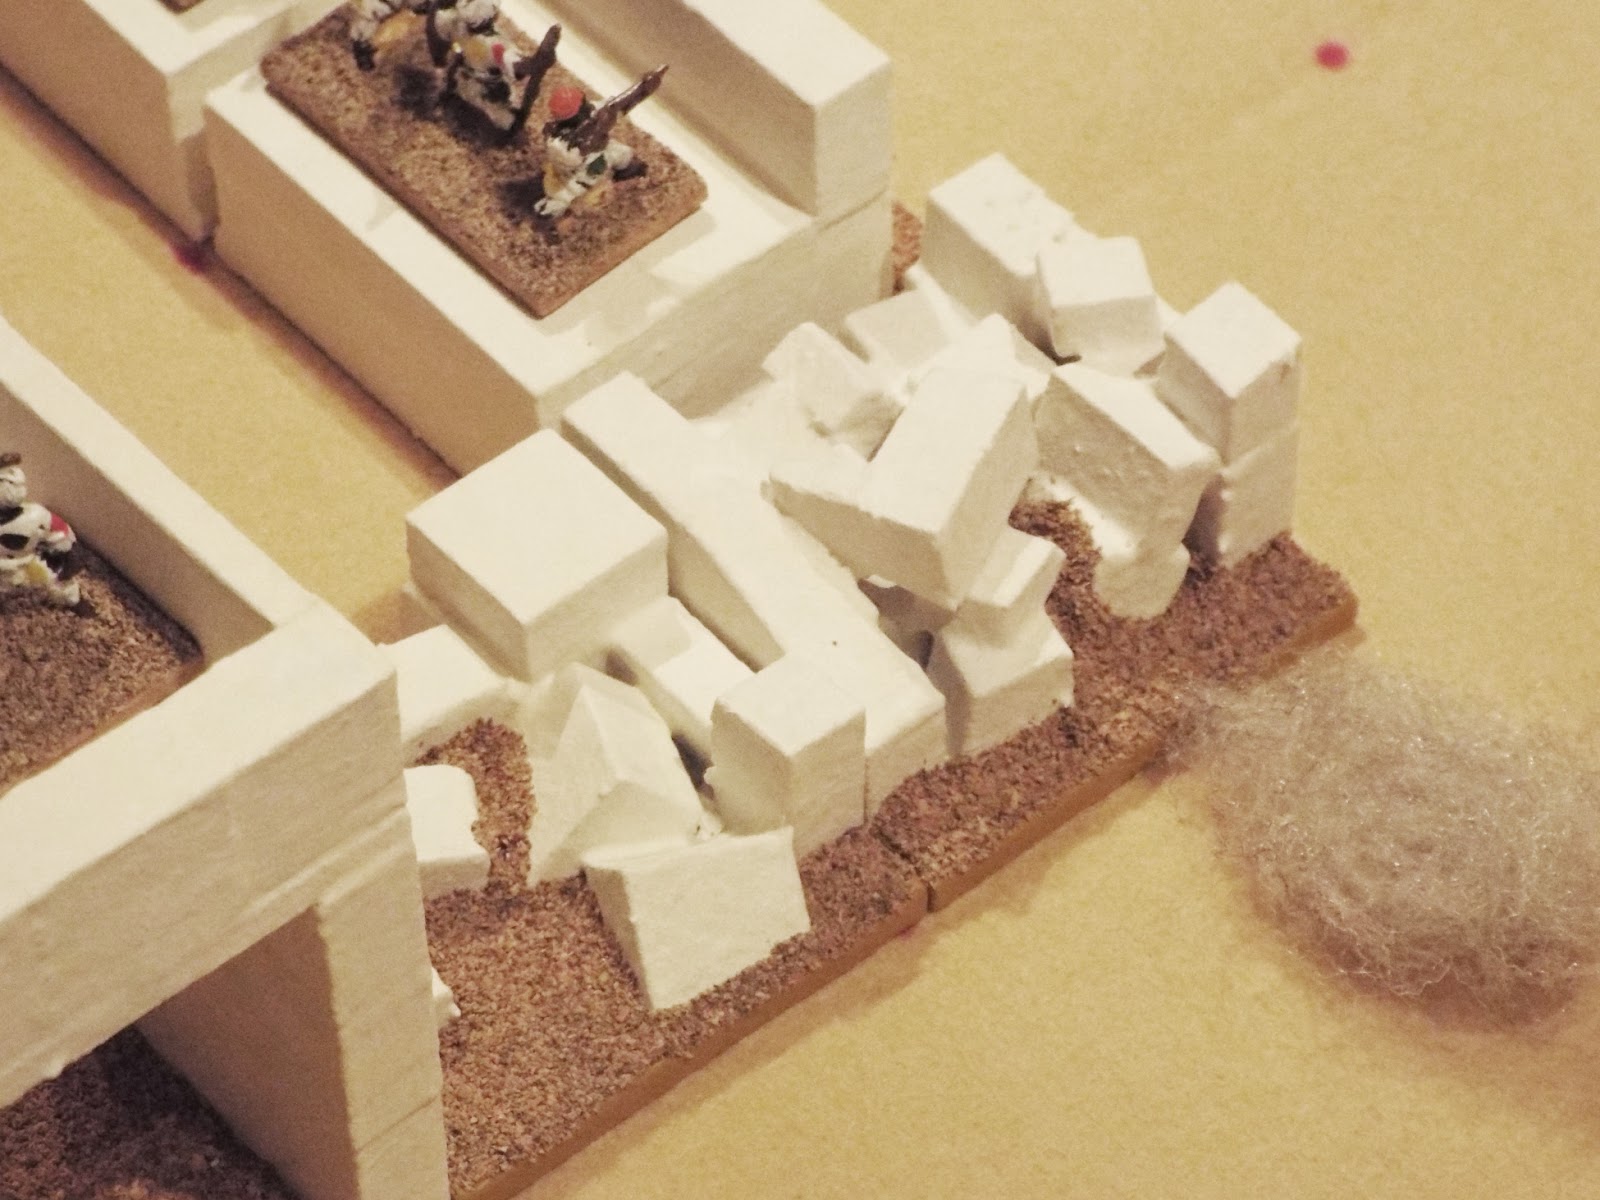
A further salvo of British artillery fire hit the same section of city wall for a third time, inflicting a casualty and causing the wall to collapse. It also hit the city's gateway and caused a further casualty on the defenders.
Stung by this some the Hauserian defenders rushed forward to attack the oncoming British ...
... who countered by moving the Royal Essex Regiment forward. Such was the ferocity of the Hauserian attack that the Royal Essex Regiment suffered three casualties!
Turn 8
Because the presence of the foremost Hauserian troops masked the city's gateway from further artillery fire, the British artillery fired at the corner tower ...
... which they hit once, causing further casualties on the defenders.
(The British artillery batteries did not want to risk hitting their own troops if they fired at the Hauserian infantry!)
The infantry melee continued, with the initiative first going to the Hauserians, ...
... who wiped out a company of the Royal Essex Regiment, ...
... and then to the Cambridgeshire Light Infantry, who attacked one of the Hauserian infantry units from the rear ...
... inflicting two casualties on the Hauserians in the process.
The Royal Essex Regiment managed to gain some degree of revenge on the Hauserians when they forced the main attackers to fall back.
Turn 9
The deadly accurate British artillery fire hit the corner tower yet again ...
... causing it to collapse and killing all the defenders who were on it.
The initiative in the infantry melee was now firmly in British hands. The Royal Essex Regiment pressed forward, ...
... causing further casualties on the Hauserians and forcing them to retreat.
The Cambridgeshire Light Infantry Regiment likewise pressed home their advantage ...
... and also inflicted casualties that forced some more of the Hauserians to fall back.
The Hauserians were now faced with an almost total collapse of their morale, and failed to counter-attack the British.
Turn 10
Faced with almost inevitable defeat, the Sultan of Hauser considered surrendering the city of Morobad to the British ... but he didn't.
The British artillery now switched their fire to the walls facing the Mackay Highlanders ... and two lucky shots hit adjoining sections of wall, causing casualties on the defenders.
The Hauserians who were outside the walls of the city now withdrew back through the city gateway ...
... whilst the British reorganised themselves prior to making their next move.
Turn 11
The British artillery continued to bombard the Great Wall of Morobad, ...
... and forced some of the defenders to abandon them for fear of suffering further casualties.
The British began a general advance ...
... and the Hauserian defenders prepared to meet them.
Turn 12
Yet again the British artillery fired at the Great Wall of Morobad and hit it in two different places.
Further casualties were inflicted on the defenders, who had now begun to assemble in the open area behind the Great Wall.
The British halted, and waited for the Field Batteries to do more damage to the Great Wall before making their final assault.
Turn 13
The British artillery fired at the Great Wall of Morobad for what they hoped would be the last time ... and missed their target with both shells!
Although only two sections of the Great Wall had been demolished, the British infantry surged forward and began their assault.
The fighting was intense, and both sides suffered casualties ...
... but eventually numbers prevailed, and the British managed to enter Morobad ...
... at which point the Sultan surrendered and ordered his troops to lay down their weapons!
The result
The Sultan was allowed to remain on his throne, as long as he accepted British control of Hauser. As one of the conditions of his acceptance was a sizeable annual annuity, the Sultan was only too keen to accept ... although some of his subjects were less happy to have the benefits of European civilisation (i.e. a British garrison, regular and efficient tax collection, and Christian missionaries) thrust upon them. Only time will tell if they will remain acquiescent or not.
I fought this battle after a period of three months during which I had done no actual wargaming ... and I thoroughly enjoyed getting troops back onto the tabletop! It also allowed me to fulfil a long-held ambition; to re-fight Joseph Morschauser's 'The Attack of Morobad' wargame using my interpretation of his 'Frontier' wargame rules.
Preparing for and fighting this battle has revived my interest in both wargaming in general and Colonial wargaming in particular. It has also left me with a modular fortress that I can use in further wargames, so it has been a 'win-win' all around for me!


.jpg)


