I was recently asked how I drew the map of Laurania that has been featured on several of my previous blog entries. I tried to explain the process, but I decided that a simple 'how to' explanation with suitable images would make it much easier to understand. So here goes ...
The computer programs I used
I am a great believer in the KISS Principle (Keep It Simple Stupid), and applied it to the choice of computer programs I used to create my map of Laurania. The programs I used are widely available ... and cheap! I used the following programs to create my map:
Step 1: Finding an outline map
The first thing I did was to trawl through the Internet to find a suitable basic map upon which to base my map. Albania fitted the bill, and so I downloaded a black and white map of that country into MS Paint.
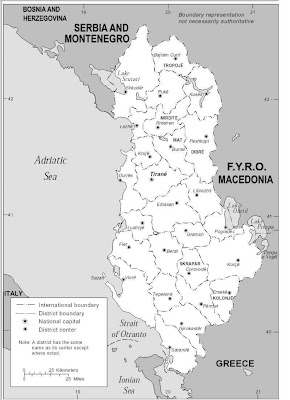 I 'cropped' the image to remove some of the detail I did not need, saved it as a bitmap image, and opened the image in Serif PhotoPlus. I then used the 'Image' and 'Image Size' tools (having unticked the 'Maintain aspect ratio' option) to make the map wider whilst keeping the height the same. I then enlarged the image using the 'Image' and 'Image Size' tools (this time making sure that the 'Maintain aspect ratio' option was ticked).
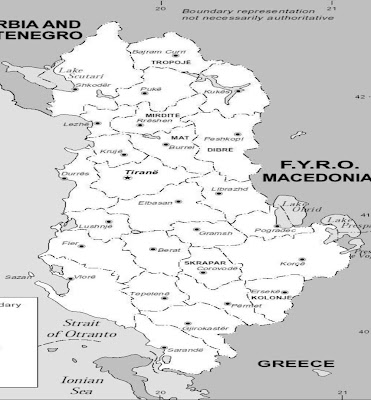 I then 'exported' the new image, making sure that I saved it as a new bitmap image with a different name. I did this so that if anything went wrong I could go back to my original version.
Step 2: Creating the basic outline
I then opened the new image in MS Paint, and used the 'Select', 'Cut', and 'Eraser' tools to remove some of the unwanted detail (e.g. the names of bordering countries, sea areas etc.).
I then saved the image (again using another different name) as a Monochrome Bitmap. This had the effect of removing all the grey areas on the map and reducing it to a very basic outline.
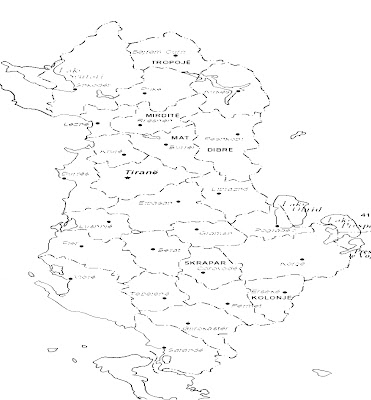 Once this was done I re-saved the image, this time as a 24-bit Bitmap. I did this so that I could use colour during the next step of the process.
Step 3: Creating the map of Laurania
I then used MS Paint to draw over the existing boundary lines on the map in red. I then drew over the outline of the sea and lakes, and filled them with blue. I followed this by drawing grey circles over the existing towns and cities, and added several new ones as well. Finally I removed and place names that were still on the map using the smallest setting on the 'Eraser' tool.
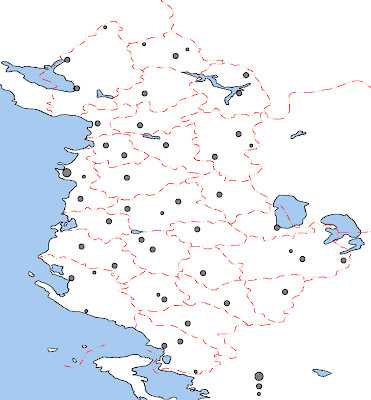 I then saved the image ... yet again ... using another new name! I know that this sounds very anally retentive but I knew that if I made a mistake at any stage in this process I could always go back a stage and start again, and would only lose part rather than all my work to date.
I then drew in the contours, using a different but appropriate colour for each contour line. I then used the 'Fill With Color' tool to fill in the areas between each contour line. I also drew in the national boundaries in red, and filled in the non-Lauranian land in grey.
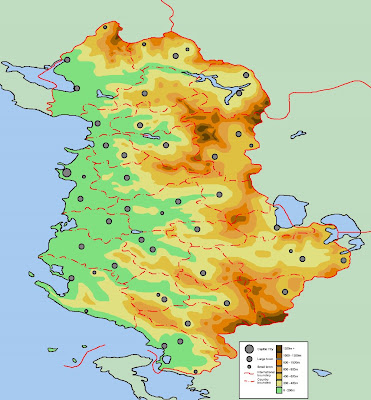 At this stage the map looks almost complete, but there is still some way to go yet.
The next stage was to use MS Paint to draw in the rivers and railways ...
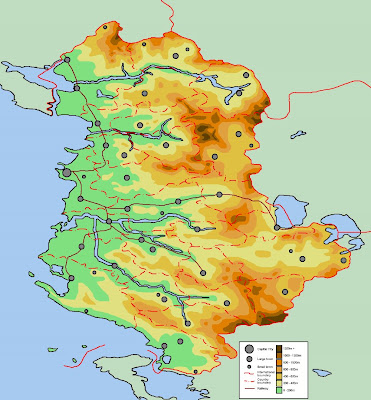 ... followed by the roads. This takes more time than one would expect, and again I saved the image at each stage of the process.
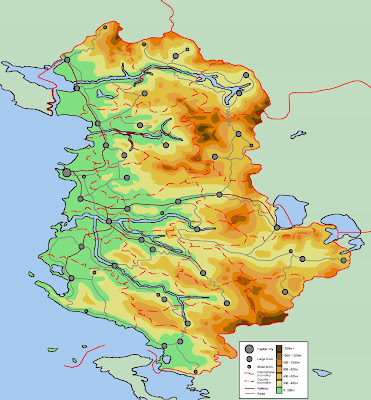 Finally I added the place names.
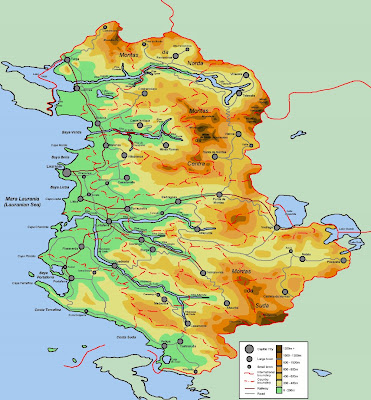 This has to be done carefully. Each place name was created using the 'Text' tool in MS Paint. It was then cut around using the 'Select' tool, and placed in the appropriate position. The important thing that I had to remember was to create the text against a white background and to ensure that the 'Draw Opaque' setting under the 'Image' tools was not ticked.
In conclusion
This method for creating maps may sound a lot more complicated than it actually is. If you are going to try this process, I would suggest that you start with something small ... and practice the techniques.
It did take quite a lot of time to create the final map, but the end result was worth it. I wanted to make something that looked like it had come from an atlas, and I think that I managed to achieve what I set out to do.
The computer programs I used
I am a great believer in the KISS Principle (Keep It Simple Stupid), and applied it to the choice of computer programs I used to create my map of Laurania. The programs I used are widely available ... and cheap! I used the following programs to create my map:
- Serif PhotoPlus 6.0
- Microsoft Paint
Step 1: Finding an outline map
The first thing I did was to trawl through the Internet to find a suitable basic map upon which to base my map. Albania fitted the bill, and so I downloaded a black and white map of that country into MS Paint.
 I 'cropped' the image to remove some of the detail I did not need, saved it as a bitmap image, and opened the image in Serif PhotoPlus. I then used the 'Image' and 'Image Size' tools (having unticked the 'Maintain aspect ratio' option) to make the map wider whilst keeping the height the same. I then enlarged the image using the 'Image' and 'Image Size' tools (this time making sure that the 'Maintain aspect ratio' option was ticked).
 I then 'exported' the new image, making sure that I saved it as a new bitmap image with a different name. I did this so that if anything went wrong I could go back to my original version.
Step 2: Creating the basic outline
I then opened the new image in MS Paint, and used the 'Select', 'Cut', and 'Eraser' tools to remove some of the unwanted detail (e.g. the names of bordering countries, sea areas etc.).
I then saved the image (again using another different name) as a Monochrome Bitmap. This had the effect of removing all the grey areas on the map and reducing it to a very basic outline.
 Once this was done I re-saved the image, this time as a 24-bit Bitmap. I did this so that I could use colour during the next step of the process.
Step 3: Creating the map of Laurania
I then used MS Paint to draw over the existing boundary lines on the map in red. I then drew over the outline of the sea and lakes, and filled them with blue. I followed this by drawing grey circles over the existing towns and cities, and added several new ones as well. Finally I removed and place names that were still on the map using the smallest setting on the 'Eraser' tool.
 I then saved the image ... yet again ... using another new name! I know that this sounds very anally retentive but I knew that if I made a mistake at any stage in this process I could always go back a stage and start again, and would only lose part rather than all my work to date.
I then drew in the contours, using a different but appropriate colour for each contour line. I then used the 'Fill With Color' tool to fill in the areas between each contour line. I also drew in the national boundaries in red, and filled in the non-Lauranian land in grey.
 At this stage the map looks almost complete, but there is still some way to go yet.
The next stage was to use MS Paint to draw in the rivers and railways ...
 ... followed by the roads. This takes more time than one would expect, and again I saved the image at each stage of the process.
 Finally I added the place names.
 This has to be done carefully. Each place name was created using the 'Text' tool in MS Paint. It was then cut around using the 'Select' tool, and placed in the appropriate position. The important thing that I had to remember was to create the text against a white background and to ensure that the 'Draw Opaque' setting under the 'Image' tools was not ticked.
In conclusion
This method for creating maps may sound a lot more complicated than it actually is. If you are going to try this process, I would suggest that you start with something small ... and practice the techniques.
It did take quite a lot of time to create the final map, but the end result was worth it. I wanted to make something that looked like it had come from an atlas, and I think that I managed to achieve what I set out to do.


.jpeg)


