Pages

Thursday 30 November 2023

Military History Plus bonus podcast

Professor Gary Sheffield recently announced that there was going to be a bonus Military History Plus podcast entitled SPECIAL – WHAT DO HISTORIANS ACTUALLY DO – A REPLY TO RIDLEY SCOTT.

In a recent interview about his latest film – NAPOLEON – the film director Ridley Scott is reported to have said in reply to criticism by some historians as to its accuracy, ‘Excuse me, mate, were you there? No? Well, shut the f*ck up then’. This podcast examines this very dismissive attitude of historians and then moves on to look at what role historians – and particularly military historians – perform.

Although I do not agree with everything Professor Gary Sheffield and Dr Spencer Jones say during the podcast, I fundamentally agree that the argument put forward by Ridley Scott is completely wrong. In the National Archives I have read original first-hand accounts and official reports written by participants in several military actions … and although they may have been there, they did not always agree on even some of the most basic facts. The role of the historian is to read those accounts and arrive in their own mind at some sort of overall view of what appears to have happened and to come to some sort of conclusions … and all this is done in the knowledge that another document or piece of evidence may well surface at some time in the future that proves their conclusions to be in some way erroneous.

In the field of military history, research is not just done in the dusty libraries and archives of academic institutions. It takes place on the actual battlefields, usually with a detailed map in hand ... and in my experience, not always in the best of weather! Often it is only then that one can gain the necessary insight and understanding into what happened and why it did so.

A case in point. Some years ago I had the opportunity to visit Pourville in Normandy. Before going, I read James Leasor’s GREEN BEACH, which described fighting that took part in Pourville during the Dieppe Raid on 19th August 1942. It was only when I actually walked around the village and looked at the terrain that all the events and problems fell into place.

The shingle beach – which is made up of large pebbles – was impossible to run up without risking serious injury (I know, because I tried!) and the River Scie, which divides the village in two, can only be crossed via the bridge. On the map the river looks quite narrow and appears to be relatively easy to cross … but when you see that it has been canalised and has deep vertical sides, you realise why the Canadians didn’t just wade across it. (By mistake they had been landed on the west side of the river and their objectives were on the eastern side.) If I had not visited the site of the fighting, I would not have realised how important these factors were in the failure of the Canadians to reach their objectives.

The latest series of these podcast begins very soon, and I am looking forward to listening to them.

Wednesday 29 November 2023

Nugget 358

I collected the latest issue of THE NUGGET from the printer (Macaulay Scott Printing Company of Welling, Kent) this morning, and I will be posting it out to members as soon as I can.

I have sent the PDF copy to the webmaster, and members should be able to read this issue of THE NUGGET online as soon as he can upload it.


IMPORTANT: Please note that this is the fourth issue of THE NUGGET to be published for the 2023-2024 subscription year.

If you have not yet re-subscribed, an email reminder was sent to you some time ago with the relevant information you require to do so. If you have lost this and wish to re-subscribe or you are a new subscriber, please request a PayPal invoice or the bank transfer information from the Treasurer or follow the instructions on the relevant page of the website.

Tuesday 28 November 2023

The MF&FMLR model railway project: Starting the terrain

Once my baseboard was ready, I began the process of adding terrain by covering it with a layer of A4-sized foamcore boards that were trimmed to size. (I used A4-sized boards as I had a stack of them in my wargame/toy room). I did this because I wanted a soft surface for the track pins to go into and I thought that the hardboard would be too hard!

These were glued to the hardboard using a spray adhesive and any excess foamcore was cut away carefully using a sharp craft knife.

I then overlaid this with a second layer of foamcore boards that I temporarily fixed in place using masking tape. I then reassembled my track on top and using a marker pen, I marked on where the track went and the rough locations of the buildings and marshy area. I also numbered each sheet of foamcore from 1 to 9, starting in the top left-hand corner. This was so I knew where each one should go when I had glued them to the bottom layer. (It is worth noting that I laid this second layer of foamcore at right-angles to the first in order to ensure that any gapping was minimised.)

I then disassembled my track and trimmed the nine foamcore boards according to the markings that were drawn onto them. I then glued each of them in place using PVA glue.

To make sure that the foamcore did not move whilst the PVA glue dried, I started with the top row of foamcore boards and used heavy weights to hold them in place until the glue had dried. This took between and hour and two hours. I then repeated this process with the middle row of foamcore boards, and when they had dried, the last row was glued and weighted down.

You will note that I also added a few 'islands' inside the marshy areas as well as a few hummocks to break up the otherwise rather flat terrain. I also changed the edge of the River Thames in 8 to allow for the the Brennan Torpedo launching slipway and in 9 to reinforce the weak bottom right-hand corner of the layout baseboard.


The white foamcore board I used has taken on a yellow-brownish in the photographs due to the artifical light in my toy/wargame room. I did not correct this as I think that it makes it easier to see what I have done.

Monday 27 November 2023

Nugget 358

The editor of THE NUGGET recently sent me the latest issue, and I sent it to the printer earlier this morning. Hopefully, it will be ready to be collected and posted out to members by the end of the week.


IMPORTANT: Please note that this is the fourth issue of THE NUGGET to be published for the 2023-2024 subscription year.

If you have not yet re-subscribed, an email reminder was sent to you some time ago with the relevant information you require to do so. If you have lost this and wish to re-subscribe or you are a new subscriber, please request a PayPal invoice or the bank transfer information from the Treasurer or follow the instructions on the relevant page of the website.

Sunday 26 November 2023

The MF&FMLR model railway project: Designing the track plan

Having completed the baseboard, I decided to try out a number of track plans. The joy of using Kato Unitrack is that it is designed to be clipped together, used, then dismantled for storage. This means that one can play around with various track plans to see if one’s grandiose plans will fit onto a 22” x 35” (56cm x 89cm) board.

Needless to say, my initial ideas wouldn’t work on my small board. I could just about fit in a small oval of track with two sets of points/turnouts … but it was a very tight squeeze and just didn’t look right. Part of the problem was the radius of the curved part of the points/turnouts, which were a much larger radius than the rest of the curves on my projected track design. In the end I settled for a simple long oval of track that looks like this:

Click on the photograph of the track plan to enlarge it.

The large space along one side of board is going to be the bank of the River Thames, and is where the Brennan Torpedo launching station and its defences (a small fort or gun battery) will be located. I also intend to have a couple of small halts where trains can stop to collect building material and supplies and to drop off and collect military personnel.

For the more technically minded, the curves are tight 6-inch radius ones, which means that my larger 0-6-2 locomotives can operate on the track at slow speed ... but tend to derail anything that they are pulling on the curves. As a result, I'll have to use my smaller 0-6-0 and 0-4-0 locomotives and/or shorter or articulated wagons and carriages.


PS. I have ordered some small radius points/turnouts, and if they arrive before I lay the track, I’ll see if I can add some short sidings to the layout.

Saturday 25 November 2023

I now own a facsimile copy of ShamBattle

Thanks to The Saint Bookshop, I now own a facsimile copy of SHAMBATTLE.

The book is actually longer than I expected as I had previously relied on extracts from the Thortrains blog, Phil Dutre's webpage, and the Tiny Tin Men blog. The cover is a generic one produced by the publisher, Literary Licensing ...

... and in no way replicates the cover of the original book. However, the text is a replica of the original, including all the wonderful line drawings and maps.

The contents of the book is split up as follows:

CHAPTER I. SHAMBATTLE IS A GAME

  • Safety
  • Fairness
  • Officers
  • Military Terms

A LIEUTENANT'S GAME

CHAPTER II. A LIEUTENANT'S TRAINING

  • Redina and Bluvia
  • The Reason for Using a Map
  • Symbols for a Military Map
  • A Lieutenant's Map
A Lieutenant's Map
  • Directions for Making a Lieutenant's Map

CHAPTER III: RULES FOR A LIEUTENANT'S GAME

  • The Armies
  • The Spinner*
  • Choosing an Army
  • The Curtain
  • Placing the Troops
  • Time Limit
  • An Introduction to SHAMBATTLE Rules
  • General Rules
  • Rules on Movement
  • Rules on Combat
  • Bayonet Combat
  • Artillery Fire
  • Making an Artillery Square
  • Using an Artillery Square
  • Rules on Capture

CHAPTER IV. MINOR TACTICS IN A LIEUTENANT'S GAME

  • A Game Between Lt. Williams and Lt. Blackmore
  • Positions of the Troops
The positions of the troops at the beginning of the Lieutenant's Battle.
  • THE BATTLE, PLAY BY PLAY
    • Bluvian Troops Started Attack in the West
    • Redinan Cavalry Rushed to Stop Bluvian Attack
    • Bluvian Soldiers in Blue City Deployed
    • Weak Redinan Defense Retreated
    • Attacking Bluvians Entered Redina
    • Small Redinan Force Met Bluvian Attack
    • Bluvian Attack Approached Redton
    • Redinan Cavalry Turned Back Toward Redton
    • Bluvian Cavalry Divided
    • The Turning Point
The positions and movements of the troops at the turning point of the Lieutenant's Battle.
    • Comments

A CAPTAIN'S GAME

CHAPTER V. A CAPTAIN'S TRAINING

  • More Than Two Boys Can Play
  • A Captain's Map
A Captain's Map
  • Forests and Swamps
  • Directions for Making a Captain's Map
  • Effect of the New Map
  • The Final Test in Map-Making

CHAPTER VI. RULES FOR A CAPTAIN'S GAME

  • Placing the Troops
  • The Task
  • General Rules
  • Rules on Movement
  • Rules on Combat
  • Bayonet Combat
  • Artillery Fire
  • Rules on Capture

CHAPTER VII. OFFICERS, MEDALS AND SPIES

  • Selecting Officers
  • Medals for Bravery
  • Spies
  • Spy Papers
  • Punishing Spies
  • Claiming a Spy

CHAPTER VIII. MINOR TACTICS IN A CAPTAIN'S GAME

  • A Model Battle
  • Positions of the Troops
  • Choice of Spies
The positions of the troops at the beginning of the Captain's Battle.
  • THE BATTLE, PLAY BY PLAY
    • Bluvia Invaded by Redinans
    • Capt. Holcomb Remains Inactive
    • Redinans Made Effective Cannon Fire
    • Capt. Holcomb Refused to Issue Orders for Movement
    • Combats in Blueburg Caused Heavy Casualties
    • Bluvian Officers Conferred on Strategy
    • Bluvian Forces Overcome in Blueberg
    • Bluvian Troops Ordered into Action
    • Bluvian Attack Weakened by Cannon Fire
    • Bluvian Infantry Attack Recalled
    • Redinans Unable to Fire Cannon
    • Bluvian Cavalry Force Divided
    • Aid Rushed to Capt. Wright
    • Bluvian Cannon Brought into Blueford
    • Redinan Artillery Fire Resumes
    • Capt. Wright Made a Casualty
    • Redinan Defense Weakened
    • Redinan Spy Claimed
    • The Turning Point
The positions and movements of the troops at the turning point of the Captain's Battle.
    • Comments
    • Useless Troops
    • Veterans in Minor Tactics

A GENERAL'S GAME

CHAPTER IX. A GENERAL'S TRAINING

  • A General's Problems
  • A General's Map
A General's Map. This is almost identical to the Captain's Map save for the addition of hills.
  • Hills and Contour Lines
  • Adding the Hills

CHAPTER X. RULES FOR A GENERAL'S GAME

  • Placing the Troops
  • Machine Guns and Hospitals
  • General Rules
  • Rules on Movement
  • Combat
  • Bayonet Combat
  • Machine Guns
  • Artillery Fire
  • Rules on Capture
  • Medical Corps

CHAPTER XI. STRATEGY IN A GENERAL'S BATTLE

  • The First Problem
  • The Expected Strategy
  • The Unexpected Strategy
  • Dividing the Enemy's Fire
  • The Defense
  • The Medical Corps
  • Positions of the Enemy Troops
  • Possible Strategies
  • The Duty of a General
  • SUGGESTIONS
    • Artillery Fire
    • Rifle Fire

Having read the book in its entirety rather than an abbreviated version of the General's Game, it becomes immediately apparent that players are expected to start off with the simple Lieutenant's Game, and once the rules and nuances of that game are mastered, they can move onto the Captain's Game and then the General's Game. As such, this made SHAMBATTLE an ideal way to introduce youngsters or novice wargamers to the hobby and is a pattern that we might well adopt nowadays.

There were certain things that did particularly catch my attention:

  • In the Safety section of the first chapter it states 'The safety of the players and soldiers is provided for by the rules. No cannons which might endanger the eyesight of the players are used.' I don't know if this is a reference to the dangers inherent in HG Wells' LITTLE WARS, where spring-firing cannons were used, but one has a feeling that it may well do!
  • In the Suggestions section in the last chapter the rules there are three alternative methods for resolving artillery fire:
    • First: A toy cannon may be employed. However, care must be taken that the cannon is not so strong that it will break the toy soldiers. To preserve the value of deploying, it is rules that all soldiers who fall before the fire of a cannon are casualties or partial casualties, whether they have been struck directly or are knocked over by other soldiers who have been struck. All "unprotected" soldiers falling are made casualties and all "protected" soldiers are partial casualties. (This use of firing toy cannons seems to run contrary to the warning in the earlier chapter, but it may well be the those using the General's Game rules will have understood the need for safety by then.)
    • Second: A small sandbag, one inch square, may be used. A player firing his cannon seats himself behind the cannon and tosses the bag three feet into the air in the direction of his target. The bag must never be thrown directly at the soldiers. All soldiers falling over by the descending bag are made casualties or partial casualties according to the ruling for the use of the toy cannon.
    • Third: A sandbag, such as described above, may be placed on the end of a yard stick. The player firing, raises the stick three feet above the map and holds the end with the sandbag over his target. When he thinks that the sandbag is directly above the target, he tilts the stick and allows the bag to fall. Casualties and partial casualties are made according to the ruling for the use of the toy cannon. (Interestingly, the second and third methods are not that dissimilar from some of the methods that have been used in some of the FUNNY LITTLE WARS battles I have taken part in.)
  • There is also a suggestion regarding rifle fire. It states that 'No cavalry or infantry soldiers, unless accompanied by a machine gun, can be advanced close than within 1 inch of the enemy until they have gained superiority by rifle fire. To gain superiority of rifle fire the dial is spun once. IF number 1, 2, or 3 appears, superiority of rifle fire has been gained and all soldiers are moved according to the rules,' (This suggestion makes a lot of sense to me, and I think that it would improve the rules no end if this were included in the main body of the rules.)


* The Spinner or Dial is numbered 1 to 6 and could easily be replaced by a standard D6 die of the sort most wargamers are used to using.


SHAMBATTLE: HOW TO PLAY WITH TOY SOLDIERS was written by by Lieutenant Harry G Dowdall (US Army) and Joseph H Gleason and published in 1929 by Alfred A Knoff (New York). My facsimile was published by Literary Licensing (ISBN 978 1254 6818 7).

Thursday 23 November 2023

Sixtieth anniversary of the first episode of Dr Who broadcast

Coming as it did on the day after the news of the assassination of President Kennedy, the first transmission of the first episode of 'Dr Who' could easily have been missed by many people. As it was, I saw it on that Saturday, 23rd November 1963. I remember that it was supposed to start at 5.15pm but that there was a slight delay due to a further news announcement about the assassination. I also watched the repeat on 30th November, when it was broadcast just before the second episode.

The original opening titles.

This was back in the day when BBC TC programmes were broadcast in 405-line back and white (actually monochrome, but everyone called it black and white) and by modern standards it was probably rather drab and grainy. Despite this, I was hooked from the very beginning, and although I cannot claim to have seen every episode that has broadcast, I've seen every incarnation of the Doctor onscreen ... including Peter Cushing.

When any groups of Whovians (i.e. Dr Who fans) get together, the conversation usually turns to who was their favourite Doctor. Having seen them all in action, I find this a difficult question to answer. If one splits the pack into two (i.e. the first generation from 1963 to 1989 and the second generation from 2005 onwards), I would probably select Jon Pertwee's and David Tennant's Doctors as my favourites ... but all of the other actors brought interesting nuances to the role which helped to make it such an iconic TV and film series. As to my favourite companions ... well, they must be (in order of appearance):

  • Brigadier Lethbridge-Stewart (Nicholas Courtney)
  • Sarah Jane Smith (Elizabeth Sladen)
  • Leela (Louise Jameson)
  • K9 (voiced by John Leeson and David Brierley)
  • Ace (Sophie Aldred)
  • Rose Tyler (Billie Piper)
  • Martha Jones (Freema Agyeman)
  • Wilfred Mott (the incomparable Bernard Cribbins!)
  • Amy Pond (Karen Gillan)
  • Clara Oswald (Jenna Coleman)


* I would have loved to see Paul McGann make more episodes as the Eight Doctor, but it was not to be. Likewise, I would have loved to have seen him portray Richard Sharpe, a part for which he was cast but in which he was replaced after two weeks of filming because he suffered a knee injury playing kick-about football on location. At least he managed to fill the role of Lieutenant William Bush (Hornblower's best friend and later subordinate) very convincingly in the 'Hornblower' series.

Wednesday 22 November 2023

Sixtieth anniversary of the assassination of President Kennedy

In November 1963 I was a secondary schoolboy in my third year at Palmer’s Endowed School for Boys, Grays, Essex. As far as I was concerned, 22nd November was a normal Friday. I’d left school at the normal time and travelled home on the 370 bus from Grays to Corbets Tey, and was watching the BBC with my family when, at just after 7.00pm, a newsflash announced that President Kennedy had been shot. The newsreader was someone I did not recognise. (When researching the background to this blog post, I discovered that it was John Roberts, a member of the BBC staff.) From what I can remember, my family’s reaction was total shock.

Normal BBC TV programming continued for about another twenty minutes, at which point there was another newsflash that told us that President Kennedy had been shot in the head. Before normal programming resumed, the telephone on the newsreader’s table rang, he answered it, and then stated in a very solemn voice that 'We regret to announce that President Kennedy is dead.'

Sixty years on, and in an era of rolling twenty-four-hour news programmes and instant electronic social media, it is difficult for many people to understand how slow news stories were to develop in those days. Radio news tended to be slightly quicker in keeping listeners up-to-date with developing stories, but not by much. From what I can remember, we didn’t see any images of what had happened in Dallas until the following day because the only satellite link was Telstar, and that didn’t operate on a geosynchronous orbit and was only available for about twenty minutes in every two-and-a-half hours.


Not long before President Kennedy was assassinated, I remember being asked to take part in a class quiz during an Art lesson where we were asked all sorts of questions about the modern world. (Our art teacher was a bit eccentric and sometimes did this sort of thing.) Almost universally, the class agreed that President Kennedy would be our 'man of the century' ... even though we were only just past the middle of it!

He seemed to radiate hope in a way other politicians we had heard of did not. (Don't forget, this was the time when Harold Macmillan was Britain's Prime Minister, Charles De Gaulle was President of France, and Nikita Khrushchev was Prime Minister of the Soviet Union and not averse to banging his shoe on the desk during meetings of the United Nations.) There seemed to be an air of optimism abroad, especially after the Cuban Missile Crisis of 1962, and he seemed to be in the centre of it.

This started with his inaugural address, during which he stated, 'Ask not what your country can do for you—ask what you can do for your country' as well as calling on the whole world to fight the 'common enemies of man: tyranny, poverty, disease, and war itself'. I certainly remember reading his first State of the Union address, during which he outlined his support for Civil Rights, but to someone brought up in the era of Dan Dare, it was his speech about the space race and going to the moon which probably lifted my spirits most. In it he said 'No nation which expects to be the leader of other nations can expect to stay behind in this race for space. ... We choose to go to the Moon in this decade and do the other things, not because they are easy, but because they are hard'.

Just the sort of thing an impressionable twelve-year-old wanted to hear.

Nowadays we know that he was not the perfect person that we thought he was at the time. He was, after all, a man who had the same weaknesses as other men and who had the opportunity to indulge some of them, possibly to excess ... but looking back sixty years on, I still remember the hope that he gave us that the world could be a better place, and that is something that seems to be sadly lacking in today's world.

Tuesday 21 November 2023

The MF&FMLR model railway project: The baseboard

I originally intended to use a large cork notice board as the baseboard for my model railway, but several of my regular blog readers who are also railway modellers suggested that a half of a pasting table would be better. As a result, I paid a visit to the branch of THE RANGE at the Outlet Shopping Centre near to the Historic Dockyard Chatham and bought one.

Yesterday I took the pasting table apart. The two halves were easy to separate as they were only held together by two hinges, and the legs were dismantled so that the soft pine they were made of could be reused. This left me with two sections that are constructed using a sheet of hardboard on a pine frame.

At this point I realised that the hardboard was only attached to the frame by U-shaped staples and that the corner joints of the pine frame were just pushed together. I was concerned that the pasting table baseboard might be a bit flimsy if I left it as it was, and I therefore carefully removed the staples, glued the corner joints together, and then glued and screwed the hardboard back onto to the frame. I then cut one of the legs so that it would fit inside the frame and glued it in place so that it could act as a centre brace for my baseboard.

Before doing anything else, I then sealed the hardboard and the frame using two coats of PVA glue as I find that this makes painting wooden surfaces much easier.

Monday 20 November 2023

Soldiers of the Queen (SOTQ) Issue 187

The latest issue of the Victorian Military Society's SOTQ (Soldiers of the Queen) arrived by post on Saturday, and I managed to read it yesterday.

The articles included in this issue are:

  • The Egyptian Army at the Battle of Omdurman, 2 September 1898 by Dr Keith Surridge
  • The Fleischer Omdurman Panorama by Professor Ian F W Becken
  • Clash of Empires – The 1879 Anglo-Zulu War
  • Templar Study Centre at the National Army Museum
  • An Irregular Local Corps in the Presidency of Bombay, 1825-100 by David Howell
  • Thirty Years with the Colours by Tim Rose
  • Index to main topics – Part One (of Three) Soldiers of the Queen (Journal of the Victorian Military Society) by volume number (Volumes 1 - 186)
  • Book Reviews by Roger T Stearn and Adrian Greaves
  • Officers of the Victorian Military Society

As usual, there was lots to interest anyone with even a passing interest in Britain's military history of the nineteenth and early twentieth centuries. One thing that will be extremely useful to me is the index, and although I do not have access to every copy of SOTQ that has been published, knowing where a particular article is will help me in any research I may wish to undertake in the future.

The annual cost of membership of the Victorian Military Society is:

  • UK: £30.00
  • Overseas: £40.00 [except for Australia, New Zealand, and Singapore: £43.00])

As I have written many times before, in my opinion it is well worth it.

Saturday 18 November 2023

The MF&FMLR model railway project: Some (imaginary) historical background

In 1884 the War Office adopted the Brennan Torpedo for use as part the the United Kingdom’s harbour defences. Due to the nature of the torpedo’s unique propulsion and steering system*, special launching stations had to be built, and these were located at:

  • Cliffe Fort on the Isle of Grain on the Kent side of the River Thames
  • Fort Albert on the Isle of Wight
  • Pier Cellars, Plymouth
  • Fort Camden in Cork Harbour, Ireland
  • Lei Yue Mun Fort in Hong Kong
  • Forts Ricasoli and Tigné in Malta

Because of the weapon's relatively short range (it was 2,000 yard), it was decided to build a further launch station near Coalhouse Fort, which was located on the opposite side of the River Thames from Cliffe Fort. A site on the Mucking Flats was selected, and the contract for the construction of the launching station and a small coastal artillery fort that was designed to protect it, was awarded to Alfred Bean.

Alfred had been a partner in the construction firm of Bean and Jackson, who had built the breakwater for the projected military harbour at St Catherine's Bay in Jersey. He was also an advocate of the railways and besides being the driving force behind the Bexley Heath Railway Company, he had a narrow-gauge railway on his estate, Danson House, Welling Kent. When he surveyed the site of the launch station and coastal defence fort, he decided that because the roads across the Flats were incapable of carrying the necessary building materials, that a light railway would need to be constructed.

At first the War Office was very reluctant to sanction this, but when Bean pointed out that the locomotives and rolling stock could be ‘borrowed’ from Woolwich Arsenal and that they had a supply of suitable track in store as a result of the projected Suakin-Berber Railway, they acquiesced… and the Mucking Flats & Fobbing Marsh Light Railway was born.


* The Brennan Torpedo was a wire-guided AND wire-powered weapon. Inside the torpedo were two steel drums mounted one behind the other, each of which carried several thousands of yards of high-tensile steel wire. The drums were connected via a differential gear system to twin contra-rotating propellers. Each wire was attached to a steam-powered winch that was inside the launching station so that the torpedo could be steered by speeding up or slowing down one or both winches.

The following photographs (which were taken twenty years ago) show an example of the Brennan Torpedo on display at the Royal Engineers Museum, Gillingham, Kent.

Friday 17 November 2023

Might it be possible to meld ShamBattle with the Portable Wargame?: Part 7: Different-sized grids?

The first play-test was fought on a map/tabletop that was a 6 x 8 hexed grid that measured 55cm x 85cm (21.7" x 33.5"). The battle was very enjoyable, and I had great fun trying out the first draft of the rules BUT I wonder if a bigger grid might have produced a longer and somewhat more tactically interesting battle.

This set me thinking, and I looked at what the map/tabletop might have looked like has a doubled the dimensions of the grid in both direction and ended up with a 12 x 16 hexed grid. I therefore took the original map ...

... and superimposed a red 12 x 16 hex on it.

My immediate reaction was to think that something along these lines would produce a potentially much more interesting series of battles as there was lots more to manoeuvre and the cities would be large enough for some FIBUA to take place. There would also be space to add some hills, something that was missing from my first play-test map/tabletop.

I then 'converted' this so that the main terrain elements would fit on a 12 x 16 hexed grid.

I then repeated this process, this time using an overlaying the original map with a red 12 x 20 squared grid ...

... which I then 'converted' so that the main terrain elements would fit on a 12 x 20 squared grid.

To me, the result looked a little unbalanced, and I altered the map slightly by moving everything one column to the left. The end result looked like this:

I think that this is a much better map as it looks far more balanced.

If I used 4-inch/10cm squares, this map would produce a 48-inch/120cm x 80-inch/200cm tabletop, which is a bit too large for my wargame table BUT if I used 2-inch/5cm squares, it would result in a 24-inch/60cm x 40-inch/100cm tabletop … which would easily fit on my table or even a large coffee table.


Please note that you can enlarge the maps shown above by clicking on them.

Wednesday 15 November 2023

The Mucking Flats and Fobbing Marsh Light Railway

During the recent TV series LITTLE TRAINS WITH BIG NAMES WITH PETE WATERMAN, one thread ran through all four programmes … that railway modellers often build layouts that in someway reflects an aspect of the builder’s life. Jools Holland’s layout includes many buildings that can be found in Southeast London and Eddie Izzard’s are models of Bexhill-by-Sea. In both cases, these are the areas where they grew up. All of Pete Waterman’s model railways seem to be set in the Midlands (he was born in Coventry, Warwickshire) and Francis Rossi is starting his first layout based around the railway he used to use to get to school in South London.

Following on from this lead I looked at the railways that had featured in my life as I was growing up. These include the Metropolitan Underground line, the District Underground line, the Upminster to Fenchurch Street mainline, and the single-line Upminster to Grays branch line. Only the latter was really suitable for my first railway layout … but the original was a standard-gauge railway and not a narrow-gauge one.

After giving the matter some thought, I came up with an imaginary narrow-gauge light railway that was located in the marshy area on the Essex side of the River Thames estuary. It was an area that I visited several times during my secondary school education, and the names of two places in particular had stuck in my mind, the Mucking Flats and Fobbing Marsh … and as a result, the Mucking Flats and Fobbing Marsh Light Railway (MF&FM Light Railway) was born!

What made the prospect of building a light railway in that area more interesting is the paucity of roads and the presence of a coastal defence fort (Coalhouse Fort) at the western end of the Mucking Flats.

A map showing the location of Coalhouse Fort and its relevant position to Cliffe Fort (on the Kent side of the River Thames) and the Coalhouse Battery. The Mucking Flats are just to the north of Coalhouse Fort.
Coalhouse Fort, as seen from the riverside.

Having decided on a location and a name, all I need to do now is to get myself a baseboard and I can start!


An aside ... When I used to travel on the Upminster to Fenchurch Street mainline back in the late 1960s, it was notorious for both the poor timekeeping of its trains and the quality of its old 'slam door' rollingstock. This was still the era of individual compartments seating about a dozen passengers (plus more standing) and the line was given the nickname of 'The Misery Line'. It is now run by C2C franchise, but I've still heard that some people refer to it by its old nickname.

Bearing this in mind, I decided that my model railway needed a nickname. So far, I've come up with 'The Birdwatcher Line' (it's a well-known birdwatching area) and the 'Palindrome Line' (due to its initials being the same both ways).

Tuesday 14 November 2023

I’ve been buying lots of model railway stuff

Over the past few weeks I’ve been buying up quite a lot of 009 and H09 model railway stuff. I chose this scale because it doesn’t take up a lot of tabletop space and fits in well with my 15mm figure collections.

Most of my purchases have been done via eBay and Amazon, and I have concentrated on buying a mixture of Liliput and Egger-Bahn locomotives and rolling stock as well as Kato N-gauge track because it is very quick and easy to click together, ...

... comes on a ready-ballasted plastic roadbase and looks right with 009 and H09 trains.

Not all of the locomotives are runners. These tend to be cheaper to buy, and because I want to use my model trains for both wargaming and to set up a model railway layout, I can use the non-runners for the former and the runners for the latter.

I have always wanted to own and run a model railway layout, and ever since I was diagnosed with bowel/colon cancer in 2020 and then prostate cancer in 2022, I decided that it was about time I got around to building one. I now have enough stuff to do just that … and I’ll be blogging about it as I build it.

I intend to start small with a simple oval of track that I can use to test any 'new' locomotives I acquire. This means getting hold of some sort of baseboard ... and this might be a problem as my woodworking skills are not too good and I should probably avoid making something from scratch. At the moment I am looking at the possibility of using either a cork-faced noticeboard or half of a pasting table bought from a DIY shop. What I need to do is the check that they will be robust enough for my purposes and are not too expensive.


Please note that the photograph of the Kato Unitrack featured above is © Gaugemaster.

Monday 13 November 2023

Might it be possible to meld ShamBattle with the Portable Wargame?: Part 6: The first play-test

The background to the conflict

Over the past few months there had been rumours that both Redina and Bluvia had been building defences in the demilitarised zone that stretched along the boundary between the two countries. These were unconfirmed, but tension between the two long-term enemies had been growing and the newspapers were full of stories about both countries surreptitiously mobilising their armies. It looked as war was inevitable ... and that the merest spark could easily ignite the tinderbox!

That spark was provided by a Redinan shepherd whose sheep were grazing in a field near to the river. He saw several riders on the Bluvian side of the river who appeared to be in some sort of uniform, and he reported this to the local constable when he returned to his home in Redville. The constable immediately telephoned his superior in Redton to report what the shepherd had seen, and as soon as he had heard this, the chief constable sent a messenger to the Minister of War. The Minister contacted the Prime Minister, and after an emergency Cabinet meeting, the Redinan Army was mobilised.

What the shepherd had seen was members of the Blueford Hunt scouring the countryside for some unfortunate fox the chase. However, once news of the Redinan mobilisation reached the ears of the Bluvian government, they responded by mobilising their own army. The question now was who would start the hostilities.

The mobilised Redinan Army. Click on the image to enlarge it.
The mobilised Bluvian Army. Click on the image to enlarge it.

Day 1: Morning

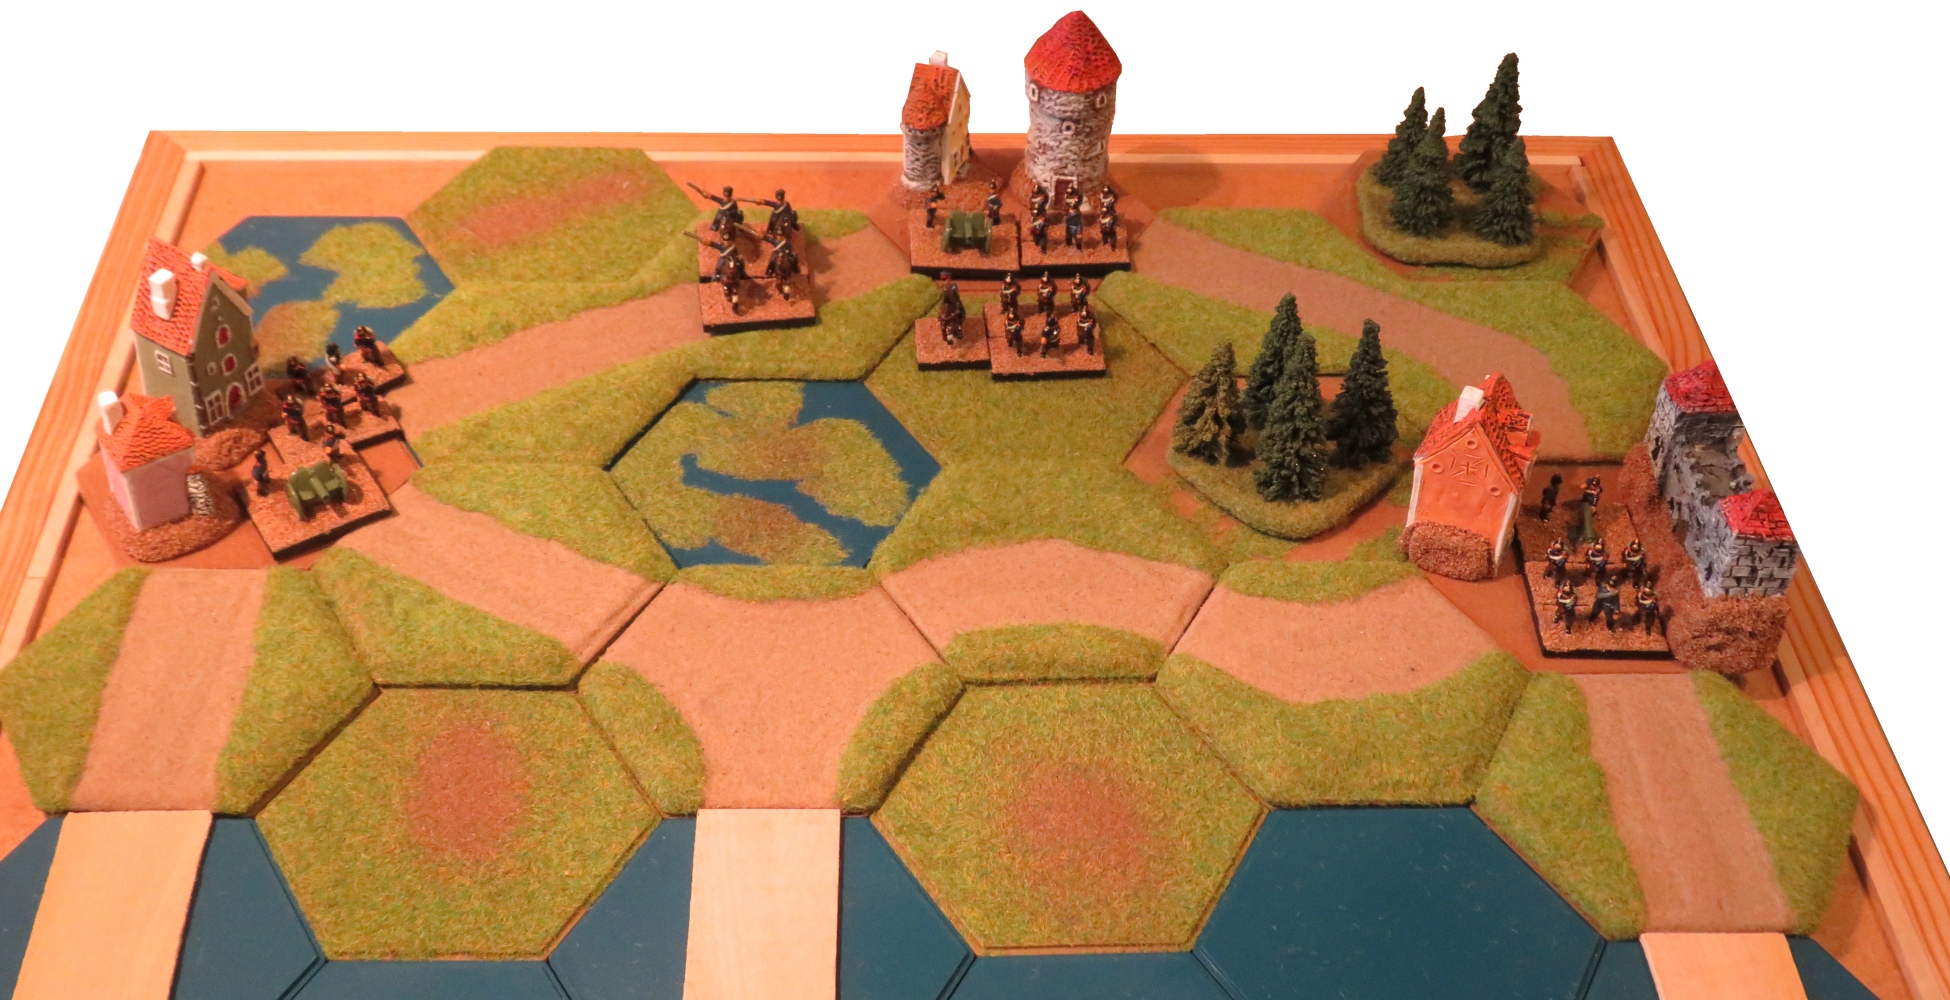
Redina moved first. Their forces surged forward and seized all three bridges over the river that was the boundary between the two countries.

In response, the Bluvian's moved their machine gun unit forward from Blueburg ...

... whilst their general moved the infantry unit (and himself) forward from the country in front of Blue City and onto the road.

This ensured that the Bluvian artillery in Blue City could fire at the Redinan column that was advancing over the middle river bridge.

The Bluvian machine gun unit inflicted two casualties on the Redinan infantry crossing the bridge between Red City and Blueburg ...

... whilst the Bluvian artillery in Blue City and Blueford both scored telling hits on the Redinan columns that were moving across the other bridges.

In the case of the central Redinan column, this also meant that the Redinan general stood a chance of being hit ... but he wasn't.

At this point, the Redinan's had lost 4 SPs and the Bluvian's had lost none.

Day 1: Midday

The Redinans continued to advance into Bluvian territory along all three roads, ...

... which resulted in several clashes.

The Bluvians countered by moving their unengaged troops forward to meet the invaders.

(It was now time for the machine gun and artillery fire phases. I decided that as these tale place before any close combat is due to occur, I would allow machine guns and artillery to fire as normal even though they might be about to take part in close combat.

The Bluvian machine gun unit fire at the Redinan infantry in the adjacent hex ...

... and inflicted the lose of 1 SP. In the centre of the battlefield, the Bluvian artillery fired at the Redinan Artillery that was moving along the Redville-Blueford road ... and wiped it out! The Redinan artillery was able to fire back before it was destroyed, but its fire was ineffective. The Bluvian artillery in Blueford was able to fire at the oncoming Redinan infantry, and cause the los of 1 SP.

Across the entire frontline, intense close combat took place.

Around Blueford, the close combat resulted in the Redinan infantry suffering further casualties and losing the close combat.

In the centre, the Redinan cavalry inflicted the los of 1 SP on the Bluvian infantry, but the Bluvian general managed to avoid any injury.

Near Blueburg, the already depleted Redinan infantry was repulsed by the Bluvian troops facing them, having suffered further casualties.

At this point, the Redinans had lost 11 SPs and the Bluvians had lost 2 SPs.

Day 1: Afternoon

Despite the high level of casualties already suffered, the Redinans continued to push forward wherever the could. They threw their remaining infantry unit and their machine gun unit into the fighting around Blueford.

This was countered by the Bluvian cavalry, which charged them in the flank.

However, before any close combat could be resolved, both sides machine guns and artillery had the opportunity to fire.

On the outskirts of Blueford, the Redinan machine gun unit's fire wiped out the Bluvian artillery unit ...

... but it and its supporting infantry suffered casualties from artillery fire from the Bluvian artillery near Blue City.

Just outside Blueburg, the Bluvian machine gun unit inflicted the loss of 2 SPs on the Redinan infantry that was facing them, which resulted in the Redinan unit's destruction.

At this point (and before any close combats could take place), the Redinans had lost 15 SPs and the Bluvians had lost 3 SPs. The Redinans had therefore reached their Exhaustion Point but could carry on fighting until the evening.

The Bluvian cavalry charge resulted in both sides losing 1 SP ...

... and in the centre, the fighting between the Redinan cavalry and Bluvian infantry likewise resulted in both sides losing 1 SP.

At this point, the Redinans had lost 17 SPs and the Bluvians had lost 4 SPs.

Day 1: Evening

During the evening, the Redinans withdrew, and the Bluvians moved forward to secure their frontier.

Day 1: Night

During the night the Redinan Army returned to its barracks and the Bluvians occupied positions along the river between the two countries. The Redinans were able to recover 2 SPs and the Bluvians recovered 1 SP, but the Redinans were still too weak to resume hostilities and the Bluvians saw no reason to invade the territory of their defeated foe. The 'One Day War' as it became known, was over.


Some afterthoughts

The rules worked quite well and I had a great deal of fun play-testing them. They still require a bit of finetuning, but in essence I am happy with the way they work.

The results of both the firing and the close combat may appear to have been a bit one-sided, but I was scrupulous when it came to what tactical decisions I made during this solo wargame, and to make sure that there was no bias in my dice rolling, I used red and blue dice and a dice tower to ensure that there were no cocked dice or any opportunity for me to influence the results.

Finally, and from a personal point-of-view probably most importantly, I had a great deal of fun and enjoyed fighting this solo wargame for several reasons.

Firstly, because it is the first time since I began having my radiotherapy in late August that I have had the inclination and motivation to set up and fight a wargame.

Secondly, for various personal reasons I have not had the opportunity to stage a wargame in my toy/wargames room since the beginning of May ... a gap of six months!

Thirdly, this is the first time these figures have faced each other in battle since they were painted nearly forty years ago!