Pages

Showing posts with label One Hour Wargames. Show all posts

Friday, 24 July 2026

Thinking about the Fifth Portable Wargame Compendium

Now that my life seems to be returning to some degree of stability after the recent upheavals due to the renovation of our main bedroom and my hospital treatment, I think that it’s time that I gave some thought to putting together the next Portable Wargame Compendium.

As those of my regular blog reader who follow the Portable Wargame Facebook page will already know, the Fourth Portable Wargame Compendium was reviewed in the August issue of MINIATURE WARGAMES magazine ... some nine months after it was published! This review – which I thought was very balanced and honest – was accompanied by an aside from John Treadaway, the magazine’s editor. A screenshot of this is shown below:

I must admit that when I first read it, this comment rather annoyed me. I thought that is was sarcastic and represented an attitude to wargaming that considers pretty – and sometimes rather tedious and unimaginative wargames that emphasis style over content – as being somehow superior to the PORTABLE WARGAME and similar wargames (e.g. The DOMINION OF ... rules and Neil Thomas's ONE-HOUR WARGAMES).

Well, I can assure my regular blog readers and purchasers of the previous compendia that I will be ignoring the 'advice' that the next issue should have a picture on the cover and sticking to the existing house-style.

The covers of the first four Portable Wargame Compendia. A 'scholarly tome'? I don't know about that ... but to date, they have sold quite well, even though the cover don't have any pretty pictures on them.

I have no idea what is going to be in the next compendium ... but I'll certainly be writing regular progress reports as it comes together.

Thursday, 17 September 2015

Polemos and the One Hour Wargame combat system

Whilst sitting at my computer today, I happened to come across a file that contained the text of the rules of POLEMOS ... so I re-read them.


These rules had no chance element in their combat resolution mechanism; casualties were inflicted automatically depending upon the type of units involved and the range at which the combat was taking place. I always thought that this must have made the resulting wargame rather sterile, and in the past I had given some thought to devising a replacement combat resolution mechanism.

Next to my computer was my copy of Neil Thomas's ONE-HOUR WARGAMES rules book ... and I was suddenly struck by the thought that the simple D6-based combat resolution mechanism in his rules could easily be be used with the POLEMOS rules.

This is not as daft as it sounds. In the POLEMOS rules the twelve units start with a strength of 10 figures ... which is not that different from the basic 15 points allotted to six units in the OHW rules.

It is certainly something for me to think about over the next few weeks and months.

Sunday, 6 September 2015

Today, I'ave mostly been ... re-drafting my own World War II variant of Neil Thomas's One Hour Wargames rules

In light of the play-test battle I fought yesterday, I have spent part of today re-drafting the rules. The main changes are:
  • Moving and Fighting: I have changed the rules so that units that move into a hex that is adjacent to a hex occupied by an enemy unit may fight the enemy unit that turn.
  • Cavalry Weapon Range: This has been increased to 2 hexes so that Cavalry Units are not obliged to move into a hex that is adjacent to a hex occupied by an enemy unit in order to fight that unit.
  • Casualty Results: These have been amended to make Artillery less devastating when firing at Infantry and Cavalry.

OHW World War II: Hexed version (Working Draft: 6th September 2015)

Unit Types
  • Infantry: Represents an infantry unit of between 500 and 1,000 men.
  • Cavalry: Represents a cavalry unit of between 350 and 700 men
  • Anti-tank Guns: Represents an anti-tank gun battalion/regiment.
  • Artillery: Represents an artillery battalion/regiment of artillery.
  • Armoured Cars: Represents an armoured car/reconnaissance unit with between 50 and 75 vehicles.
  • Tanks: Represents a tank unit with between 50 and 75 tanks.
Units are allotted a pre-battle strength. This is normally 15, but this may be increased or decreased depending upon the unit’s status (e.g. elite = 20; regular = 15; militia = 10) and/or equipment (e.g. light tanks = 12; medium tanks = 15; heavy tanks = 18).

Turn Sequence
  • When a unit is activated it follows the following sequence:
    • Movement;
    • Observation;
    • Combat (if it has not moved or if it has moved into a hex adjacent to an enemy unit);
    • Unit elimination (any unit that has been eliminated is removed immediately).
  • A unit may only be activated once per turn.
Movement
  • Movement rates:
    • Infantry: 1 hex
    • Cavalry: 2 hexes
    • Anti-tank Guns: 1 hex
    • Artillery: 1 hex
    • Armoured Cars: 2 hexes
    • Tanks: 1 hex
  • Changing direction: Units may change direction as many times as they wish during a move.
  • Terrain effects:
    • Woods: Only Infantry units may enter woods.
    • Towns: Only Infantry units may end their move in a town.
    • Marshes and Lakes: Marshes and Lakes are impassable to all units.
    • Rivers: Rivers may only be crossed via bridges or fords.
    • Roads: Units who make their entire move along a road increase their movement rate by 1 hex.
  • Moving and Fighting: Units that have moved may not fight during the same turn unless they have moved into a hex that is adjacent to a hex occupied by an enemy unit. In this case the unit that has moved may fight the enemy unit in the adjacent hex.
  • Unit Interpenetration: Units may move through friendly units without penalty.
Observation
  • Observation Range is 3 hexes.
  • With the exception of Artillery units, units may only fire at enemy units they can see.
  • Artillery units may fire at enemy units that can be seen by a friendly unit or whose position has already been identified.
  • Line-of-Sight: Line-of-sight is blocked by hills, towns, woods, and enemy units.
Combat
  • Units have a 360° arc-of-fire.
  • Weapon Ranges:
    • Infantry: 2 hexes
    • Cavalry: 2 hexes
    • Anti-tank Guns: 2 hexes
    • Artillery: 8 hexes
    • Armoured Car Guns: 2 hexes
    • Tank guns: 2 hexes
  • Casualties: One D6 per unit fighting.
  • Casualties (i.e. reductions in an enemy unit’s strength) are per the dice score as modified below:
    • Infantry vs. Infantry, Cavalry, Anti-tank Guns, & Artillery = D6; vs. Armoured Cars & Tanks = D6-2
    • Cavalry vs. Infantry, Cavalry, Anti-tank Guns, Armoured Cars, & Tanks = D6-2
    • Anti-tank Guns vs. Infantry, Cavalry, Anti-tank Guns, & Artillery = D6-2; vs. Armoured Cars & Tanks = D6+2
    • Artillery vs. Infantry & Cavalry, Anti-tank Guns & Artillery = D6; vs. Armoured Cars & Tanks = D6-2
    • Armoured Cars vs. Infantry, Cavalry, Anti-tank Guns, & Artillery = D6; vs. Armoured Cars & Tanks = D6+2
    • Tanks vs. Infantry, Cavalry, Anti-tank Guns, & Artillery = D6; vs. Armoured Cars & Tanks = D6+2
  • Cover: Units in cover or ‘hull down’ only suffer half casualties. (Fractions are rounded up.)
Unit Elimination
  • Units are eliminated once their strength is reduced to 0.

Not a lot of changes but necessary ones … I think.

Saturday, 5 September 2015

One Hour Wargames: Play-test of my own World War II version of the rules

The following battle was fought using my own World War II version of the rules, and was intended to play-test some of the changes and developments that I had incorporated.

Scenario
Things were not going well for the Morschauserlanders. The loss of the small, fortified island off the coast of Morschauserland had been a massive blow to their national pride, and to make matters worse, a column of Eastland troops had crossed the border and were heading for the town of Essenburg. Essenburg was the location of one of Morschauserland's largest armaments factories, and its loss would be a further major blow to the country.

The only troops immediately available to defend Essenburg were:
  • 1 x Regular Infantry Unit (full strength)
  • 2 x Militia Infantry Units (starting strength of 10 points each)
  • 1 x Militia Artillery Unit (starting strength of 10 points)
  • 1 x Militia Anti-tank Gun Unit (starting strength of 10 points)
The Eastland column included:
  • 2 x Cavalry Units
  • 1 x Artillery Unit
  • 2 x Tank Units
The Terrain


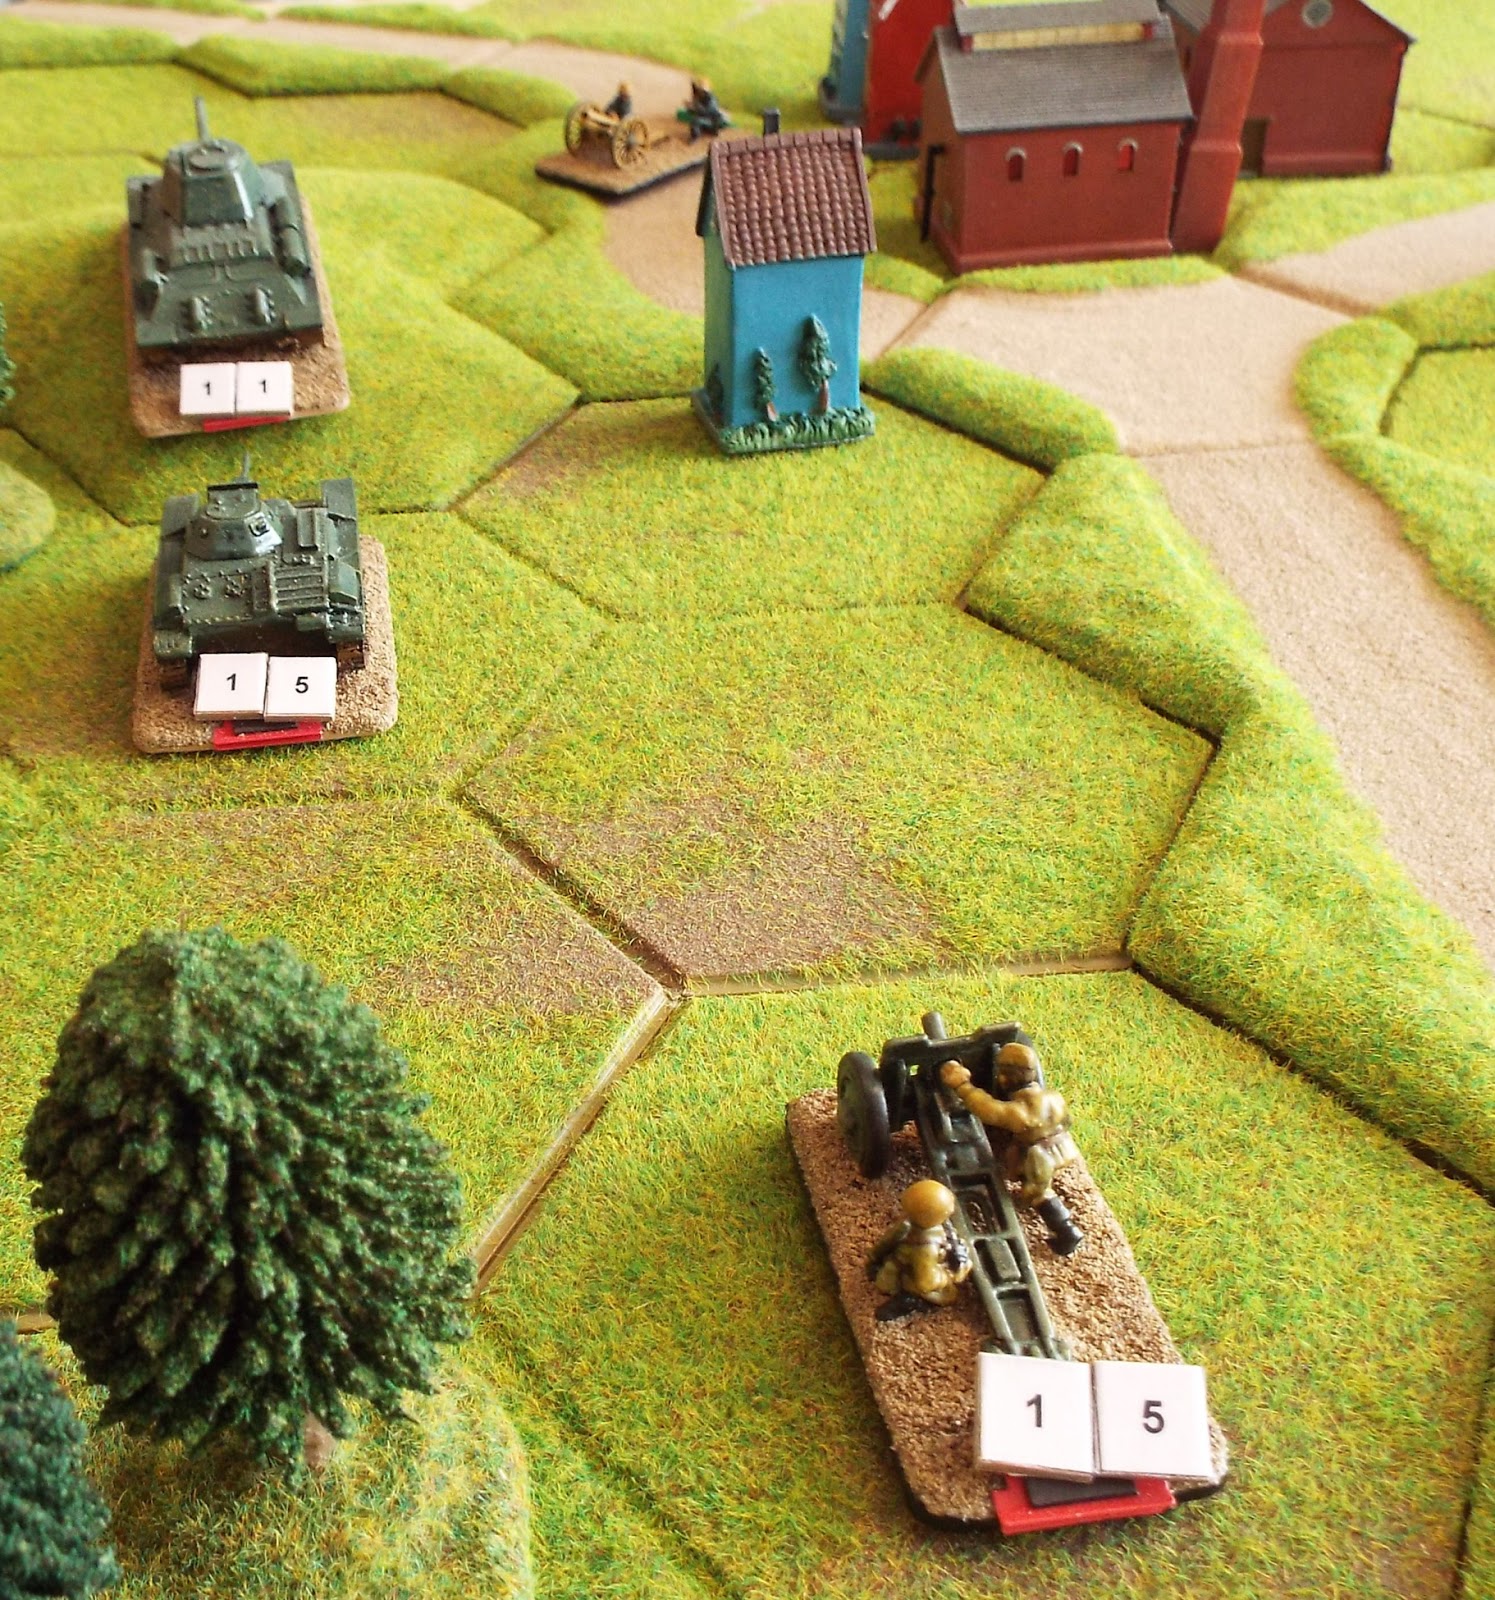
The Defenders
The local commander had ordered his Militia Infantry and Anti-tank Gun Units to take up positions that enabled them to spot and engage any Eastland troops that advanced up the road towards Essenburg. He kept his regular Infantry Unit in reserve in order to counter any breakthroughs and placed his Militia Artillery Unit where it could fire in support of his other troops.


Turn 1
The leading elements of the Eastland column advance up the road to Essenburg ...


... and were immediately spotted and engaged by the foremost Morschauserland troops.

The Morschauserland Militia Artillery Unit was in range of the leading Eastland Cavalry Unit, and opened fire upon it ...


... inflicting terrible casualties on the already weakened Cavalry Unit.


Turn 2
The Eastlanders reacted swiftly to the threat to their advance. Their Cavalry Units moved to the right and away from the threat posed by the Morschauserland Militia Anti-tank Gun and Militia Artillery Units ...


... whilst the leading Eastland Tank Unit swung to the left to advance and engage the foremost Morschauserland Militia Infantry Unit in the nearby woods.


Unfortunately the Morschauserland Militia Infantry Unit was well ensconced, and the Eastland Tank Unit was forced to fall back.


At the same time that this was happening, the remaining Eastland Units entered the field of battle.


Fighting between the Morschauserland Militia Infantry Unit and the Eastland Tank Unit that had attacked it continued ...


... and the leading Eastland Cavalry Unit was fired at by both the second Morschauserland Militia Infantry Unit ...


... and the Morschauserland Militia Artillery Unit ...


... with the result that the Cavalry Unit was destroyed.

Turn 3
Eager to exact some sort of revenge for their recent losses, the Eastland Artillery Unit fired at the Morschauserland Militia Anti-tank Gun Unit and inflicted serious casualties on it.


The two Eastland Tank Units opened fire on the foremost Morschauserland Militia Infantry Unit ...


... and despite the fact that it was undercover, the Morschauserland Militia Infantry Unit's strength was seriously depleted.


The Morschauserland Militia Infantry Unit fought back against one of its attackers, but was unable to inflict any casualties upon the Eastland Tank Unit.


The Morschauserland Militia Artillery Unit did manage to inflict a few casualties on the leading Eastland Tank Unit ...


... but not enough to seriously impair its fighting ability.

Turn 4
The Eastlanders began by deploying one of their Tank Units to attack and wipe out the foremost Morschauserland Militia Infantry Unit.


The Eastland Artillery Unit then destroyed the Morschauserland Militia Anti-tank Gun Unit ...


... and the other Eastland Tank Unit left the road and moved left.


As they were out of weapon range, the remaining Eastland Cavalry Unit moved forward tentatively.


The remaining Morschauserland Militia Infantry Unit responded to this by opening fire on the Eastland Cavalry Unit ...


... but their fire only caused a few casualties.

The Morschauserland Militia Artillery Unit also fired at the Eastland Cavalry Unit ...


... but also only inflicted a minimal number of casualties.

Turn 5
The Eastlanders pulled back their Cavalry Unit to protect their line of retreat ...


... whilst the rest of their force began to move towards their left, thus threatening the now-exposed Morschauserland right flank.


As they were now unable to see what the Eastlanders were doing, the Morschauserlanders stayed in their existing positions.


Turn 6
The Eastlanders continued their advance towards the unprotected Morschauserland right flank whilst the Morschauserland troops – who were expecting further attacks – maintained a high state of alert.


Turn 7
As the leading Eastland Tank Unit began to climb the hill on the Morschauserland right flank, they came into view of the Morschauserland Militia Artillery Unit.


The Morschauserland Militia Artillery Unit opened fire on the enemy Tank Unit, and managed to cause it minor casualties.


Turn 8
Now that the position of the Morschauserland Militia Artillery Unit was observable, the Eastland Artillery Unit opened fire on it ... with devastating results. The Morschauserland Militia Artillery Unit was instantly reduced to less than 50% of its original strength!


The situation was made worse by the attack made on the Morschauserland Militia Artillery Unit by the leading Eastland Tank Unit ...


... which wiped out the Morschauserland Militia Artillery Unit!


The fight was not – however – a one-way affair, and the Morschauserland Regular Infantry Unit in the town engaged the leading Eastland Tank Unit and inflicted some damage on it.


Turn 9
The battle now turned into a slogging match, with the Eastlanders using their Artillery Unit and Tank Units to bombard the Morschauserland Regular Infantry Unit in Essenburg.


Morschauserland Regular Infantry Unit fought back as best it could, but found it impossible to inflict further casualties on the leading Eastland Tank Unit.

Turn 10
The fight for Essenburg continued unabated with the result that both sides suffered increasing numbers of casualties.


In response to the losses suffered by the Morschauserland Regular Infantry Unit, the Morschauserland Militia Infantry Unit began to move from the wood it had occupied towards the centre of Essenburg.


Turn 11
The Eastland Cavalry Unit moved forward in the hope that this would deter the Morschauserland Militia Infantry Unit from moving into Essenburg.


At the same time, the attack by the Eastland Tank and Artillery Units finally destroyed the Morschauserland Regular Infantry Unit ...


... but did not prevent the Morschauserland Militia Infantry Unit from taking its place.


Turns 12 and 13
The bombardment of the town continued, and eventually the remaining defenders were eliminated.


Essenburg was in Eastland hands ... but for how long?

This play-test was a most enjoyable battle to fight. It did throw up one or two things that need to be changed (e.g. Cavalry need to have their weapon range increased to 2 hexes), but I feel that they work pretty well and do not require many changes to reach the point where I will be happy to use them for the foreseeable future.

Friday, 4 September 2015

Today, I'ave mostly been ... writing my own World War II variant of Neil Thomas's One Hour Wargames rules

Like most wargamers, I find it very difficult not to tinker with the wargame rules I use ... and the rules in Neil Thomas's ONE HOUR WARGAMES book are very tinkerable. (I don't know if 'tinkerable' is a proper word ... but if it isn't, it should be!)

What I wanted was a set of rules that allowed me to field Infantry, Cavalry, Anti-tank guns, Artillery, Armoured Cars, and Tanks on my 2 foot x 3 foot hexed mini-campaign wargame board. I read through the chapters of Neil Thomas's book that covered the American Civil War, the Machine Age, and the Second World War, and melded together elements of all three sets of rules to produce my own.

One thing that is significantly different in my rules is the reduction in movement and weapon ranges. Because the Hexon II hexes are 10cm/4 inches from face to face, I converted the original measurements using a ratio of 6 inches = 1 hex. Thus a tank that moves 12 inches in the original rules moves 2 hexes in my version, and artillery that has a maximum range of 48 inches in the original rules has an range of 8 hexes in my rules.

With a bit of luck, I hope to play-test this draft at some point over the weekend.

OHW World War II: Hexed version (Working Draft: 4th September 2015)

Unit Types
  • Infantry: Represents an infantry unit of between 500 and 1,000 men.
  • Cavalry: Represents a cavalry unit of between 350 and 700 men
  • Anti-tank Guns: Represents an anti-tank gun battalion/regiment.
  • Artillery: Represents an artillery battalion/regiment of artillery.
  • Armoured Cars: Represents an armoured car/reconnaissance unit with between 50 and 75 vehicles.
  • Tanks: Represents a tank unit with between 50 and 75 tanks.
Turn Sequence
  • When a unit is activated it follows the following sequence:
    • Movement;
    • Observation;
    • Combat (if it has not moved or if it has moved into a hex adjacent to an enemy unit);
    • Unit elimination (any unit that has been eliminated is removed immediately).
  • A unit may only be activated once per turn.
Movement
  • Movement rates:
    • Infantry: 1 hex
    • Cavalry: 2 hexes
    • Anti-tank Guns: 1 hex
    • Artillery: 1 hex
    • Armoured Cars: 2 hexes
    • Tanks: 1 hex
  • Changing direction: Units may change direction as many times as they wish during a move.
  • Terrain effects:
    • Woods: Only Infantry units may enter woods.
    • Towns: Only Infantry units may end their move in a town.
    • Marshes and Lakes: Marshes and Lakes are impassable to all units.
    • Rivers: Rivers may only be crossed via bridges or fords.
    • Roads: Units who make their entire move along a road increase their movement rate by 1 hex.
  • Moving and Shooting: Units that have moved may not fire during the same turn.
  • Moving and Assaulting: Units that have moved may assault an enemy unit that is an adjacent hex but if they do not immediately eliminate that enemy unit, the assaulting unit must immediately fall back 1 hex.
  • Unit Interpenetration: Units may move through friendly units without penalty.
Observation
  • Observation Range is 3 hexes.
  • With the exception of Artillery units, units may only fire at enemy units they can see.
  • Artillery units may fire at enemy units that can be seen by a friendly unit or whose position has already been identified.
  • Line-of-Sight: Line-of-sight is blocked by hills, towns, woods, and enemy units.
Combat
  • Units have a 360° arc-of-fire.
  • Weapon Ranges:
    • Infantry: 2 hexes
    • Cavalry: 1 hex
    • Anti-tank Guns: 2 hexes
    • Artillery: 8 hexes
    • Armoured Car Guns: 2 hexes
    • Tank guns: 2 hexes
  • Casualties: One D6 per unit firing.
  • Casualties are per the dice score as modified below:
    • Infantry vs. Infantry, Cavalry, Anti-tank Guns, & Artillery = D6; vs. Armoured Cars & Tanks = D6-2
    • Cavalry vs. Infantry, Cavalry, Anti-tank Guns, Armoured Cars, & Tanks = D6-2
    • Anti-tank Guns vs. Infantry, Cavalry, Anti-tank Guns, & Artillery = D6-2; vs. Armoured Cars & Tanks = D6+2
    • Artillery vs. Infantry & Cavalry = D6+2; vs. Anti-tank Guns & Artillery = D6; vs. Armoured Cars & Tanks = D6-2
    • Armoured Cars vs. Infantry, Cavalry, Anti-tank Guns, & Artillery = D6; vs. Armoured Cars & Tanks = D6+2
    • Tanks vs. Infantry, Cavalry, Anti-tank Guns, & Artillery = D6; vs. Armoured Cars & Tanks = D6+2
  • Cover: Units in cover or ‘hull down’ only suffer half casualties. (Fractions are rounded up.)
Unit Elimination
  • Units are eliminated once they have suffered 15 casualties.

I would like to thank the brilliant writers of the BBC TV series THE FAST SHOW for inspiring the title of this blog entry.

Friday, 28 August 2015

One Hour Wargames: Pushing the envelope

Having now tried out Martin Rapier's hexed-based variant of the World War II rules in Neil Thomas's ONE-HOUR WARGAMES book – and having thoroughly enjoyed the experience – I decided to add a few bits of 'chrome' so that I could set up a scenario that is not in the book!

I wanted to see if I could set up a landing on a defended beach using naval gunfire support ... so I did. The only significant additions that I made to the rules related to the use of a large warship (in this case a battleship) to provide gunfire support. The model in question occupies two hexes ... so I treated it as two units that move together but that may – or may not – fire at the same target each turn. The battleship was given a starting strength of 30 points (i.e. 2 x 15) and each gun turret fired as if it were heavy artillery but is not allowed to fire at targets that are in hexes next to friendly units. For assessing damaged caused to the battleship, the ship is treated as if it were a tank.

Scenario
In retaliation for the recent border incursion, the Eastlanders decided to seize control of a small, fortified island off the coast of Morschauserland. To achieve this they sent a force of Marines – carried in a number of small steamers and barges and accompanied by the battleship Republicka – to the island.

The Eastland Battleship Republicka.
The Marine force comprised:
  • 5 x Infantry Units
  • 1 x Artillery Unit
The defenders occupied a number of concrete blockhouses and trenches, and comprised:
  • 2 x Infantry Units
  • 1 x Artillery Unit

The Terrain


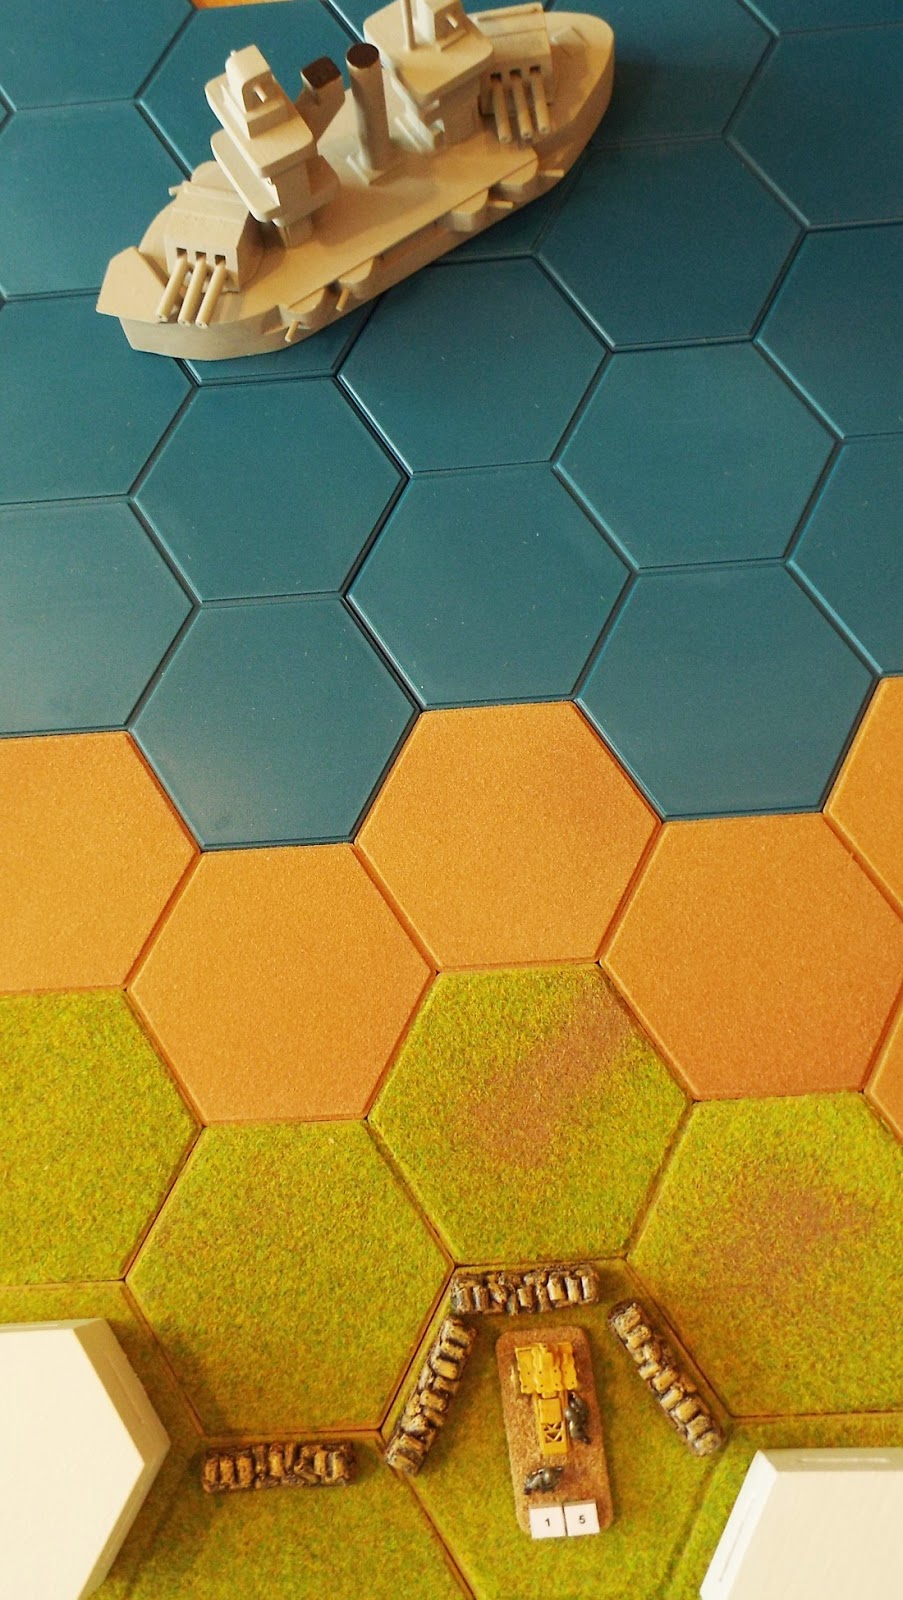
The Defenders
Each of the blockhouses was occupied by a Morschauserland Infantry Unit whilst the Artillery Unit was sited within the trench system.


Turns 1 to 3
The first three turns of the battle saw the Republicka concentrating the fire of her main armament on the two blockhouses.


The two Morschauserland Infantry Units in the blockhouses suffered casualties, but were by no means suppressed.


The Morschauserland Artillery Unit returned fire, and inflicted minor damage on the Republicka.


Turn 4
Now that the defences had been softened up, the vessels carrying the Eastland Marines began to move towards the beach.


The Republicka now switched her fire onto the Morschauserland Artillery Unit, which suffered a few casualties.


Morschauserland Artillery Unit fired back at the Republicka, and caused her some more minor damage.

Turn 5
The vessels carrying the Eastland Marines began arriving at the landing beach ...


... and the Republicka continued firing at the Morschauserland Artillery Unit.


For some reason the Morschauserland Artillery Unit fired at the Republicka again ... but her shells just bounced off the battleship's armour.

Turn 6
The first of the Eastland Marines stormed ashore ...


... supported by fire from the Republicka.

The first Marines onto the beach immediately came under fire from the Morschauserland defenders, and the Eastland Marine Infantry Units began to suffer casualties.


Turn 7
Whilst the Eastland Marines that had already landed laid down covering fire, the remainder of the Marines landed.


The Republicka continued to fire at the Morschauserland Artillery Unit, which was close to being destroyed.


The Morschauserland defenders continued to engage the Eastland Marines, and all along the beach the number of Marine casualties began to rise.


Turn 8
Whilst the Eastland Marines engaged in numerous firefights along the edge of the beach (as a result of which, the Morschauser Infantry Units in right-hand blockhouse was destroyed) ...


... the Republicka finally managed to destroy the Morschauserland Artillery Unit.


At this point the remaining Morschauserland troop surrendered ... and the island was firmly in Eastland hands!

This battle was a great pleasure to fight, and the Eastlanders did not have as easy a time of it as I had expected. The battleship rules worked well, and show that the basic rules have an almost infinite capacity to be developed to meet specific needs.