I built both my prototype Casemate Ironclads from basswood and some other wooden bits and pieces that I bought from the local branch Hobbycraft. I find that basswood is better than balsa. It is a bit harder and heavier and therefore seems easier to work, especially when you are cutting and sanding it. In addition, its finer grain takes paint better than balsa.
The following description explains how I built my third Casemate Ironclad.
Stage 1: The hull
The hull is 10cm long and was cut from a length of ¼-inch thick by 2-inch wide basswood.
This was then trimmed down to 4cm wide and the basic shape of the hull was marked out on the wood in pencil.
 The surplus wood was trimmed away with a razor saw and sharp modelling knife ...
 ... and then the hull was smoothed into shape using fine sandpaper.
 Stage 2: The Casemate
The bottom half of the casemate was made from four lengths of 1cm by 1cm basswood strip. The corners were cut at a ninety degree angle so that they fitted together. These were then carefully glued into place, and the glue allowed to dry.
 The upper part of the casemate was made from four lengths of ½cm by ½cm basswood strip. The two longer strips (each 4cm long) were glued in place to form the ends of the casemate, and the two short strips (each 1½cm long) were glued so that firing slits were formed in the side of the casemate.
 Once the glue was dry, the roof of the casemate (a 4cm by 4cm piece of ⅛-inch thick basswood) was glued into place.
 Stage 3: The Funnel/Smoke Stack
This was made from a 1cm by 1cm piece of ⅛-inch thick basswood (the base of the funnel/smoke stack), a short length of matchstick, and two wooden spools.
 The end of the match was gently pushed into a hole drilled into the basswood base …
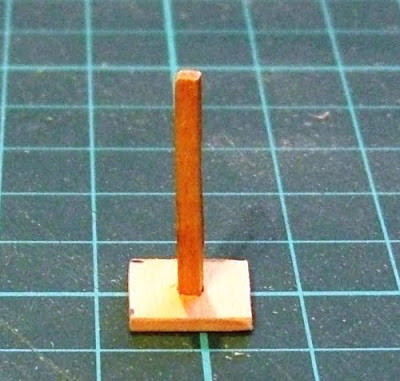 … and the first wooden spool was dropped down the matchstick and glued onto the base.
 The second spool was then glued onto the first, and the finished funnel was set aside to dry.
 Stage 4: Final Assembly
All that remained was to glue the funnel/smokestack in place on top of the casemate, and to add a pilothouse (made from a 2cm long piece of 1cm by 1cm basswood strip) onto the front of the casemate.
 Once the glue had thoroughly dried, a final check was made to remove any glue that had seeped out during the construction process and to sand down anything that was protruding where it should not … and the model was ready for painting.


Quit your shilly shallying Cordery and get up that river! Gordon isn't going to rescue himself.
ReplyDeleteQuit your shilly shallying Cordery and get up that river! Gordon isn't going to rescue himself.
ReplyDeleteConrad Kinch,
ReplyDeleteI need to build some more gunboats first, then ship some Canadians over to row my riverboats, and then ...
You are quite right, of course; they would make quite passable Nile Gunboats ... and probably will do at some time in the future!
All the best,
Bob
Bob
ReplyDeleteI was wondering if painting the gunports might allow you to create a lower profile than building up the model to accomodate the ports.
This would allow you to reduce the side profile and so make them look more in proportion.
Phil B,
ReplyDeleteI did consider the option of painting on the gunports, but in the end I decided to model them ... which added at least an extra stage to the building process.
As you say, the side view might have been more in proportion, but as most of my ship models look a bit 'cartoon' like, they would have looked out of place alongside them.
All the best,
Bob
I hope you don't mind, but I posted the link to this entry to the Wargaming on a Budget Yahoo form - http://games.groups.yahoo.com/group/wargaming_on_a_budget/ - as the guys there do a lot of this sort of stuff (only not limited to naval build-your-own).
ReplyDeleteDale,
ReplyDeleteNo problem at all!
All the best,
Bob
Very cool Bob. I ran into the group that Dale mentioned above too. Though I have not tried any of this with wood yet, I have dabbled with Styrofoam bits to make 1/2500 scale sail ships. Anyway, just wanted to praise the creativity and I hope to see some GMs running games with self made stuff at MAG-Con. www.mag-con.com
ReplyDeleteUncleGreasy,
ReplyDeleteThanks for your kind comments. When pressure of work begins to drop a bit - hopefully later this week - I intend to have a look at Group you and Dale mention; it sounds like I will find it very interesting.
Good luck with your own model ships,
All the best,
Bob
http://awargamingodyssey.blogspot.com/
ReplyDeleteBob, you should check this out!
Phil B,
ReplyDeleteI already have! It is a great piece of modelling!
David Crook is an old wargaming friend from way back in the 1980s, when we wargamed together in the basement of Eric Knowles’s s long-gone shop, ‘New Model Army’. We lost touch until a couple of years ago, but since we 'found' each other again, we have been communicating on a very regular basis ... and nicking ideas off each other!
He and I are currently working on our own variants of MOBAS, and the ideas flow backwards and forwards thick and fast!
All the best,
Bob