Introduction
When I needed a number of model warships for a naval war game I planned to put on at 2016 Annual Conference of Wargamers (COW2016), I decided to build what I needed from what I had to hand or could buy quickly and easily. The models had to meet the following criteria:

The model of the Titanic was made of pine, and its hull became the basis of my model generic pre-dreadnought battleship.
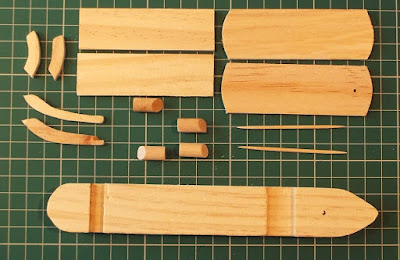
The rest of the bits and pieces used were made from basswood, bamboo skewers, cocktail sticks, and plywood.
Tools
The tools I used included:
Whan making any models using my methods, there are some basic rules that need to be followed:
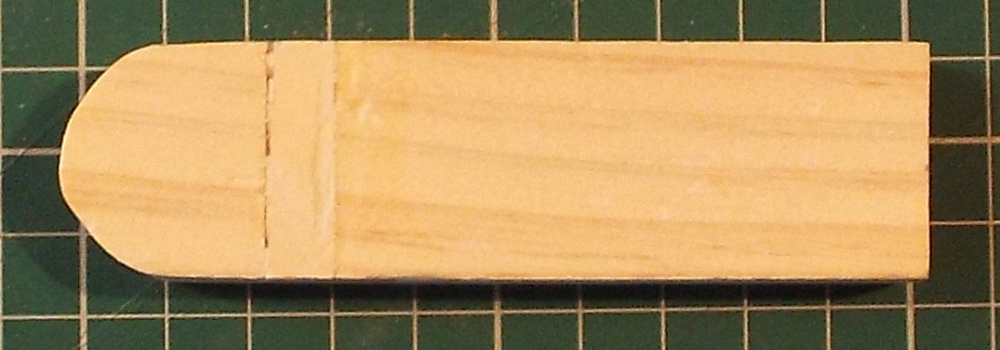
Straight from the pack, the hull looked like this:

The first thing that I did was to shorten it so that it was only 4-inches/10cm long.

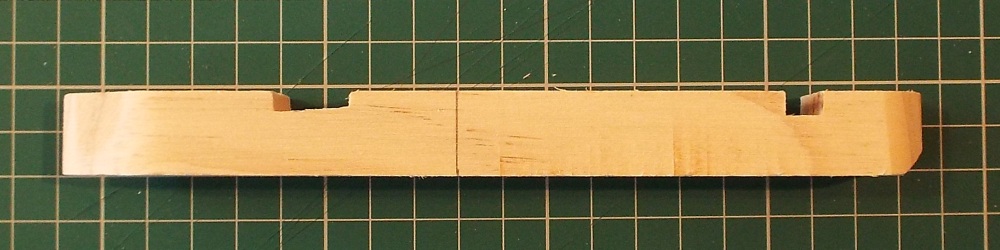
I then filled in the cut-out section of the hull using spare pieces of basswood.

This was then set aside for the glue to cure before the excess wood was carefully sawn off ...

... and the hull was sanded to smooth out any imperfections.
I then began shaping what would become the bows of the model by marking on the shape of the bows using a curve ...

... and then sawing off the corners ...

... before carefully using the craft knife/box opener to carve away the excess wood. The bows were then carefully sanded to smooth out any imperfections.

When I needed a number of model warships for a naval war game I planned to put on at 2016 Annual Conference of Wargamers (COW2016), I decided to build what I needed from what I had to hand or could buy quickly and easily. The models had to meet the following criteria:
- The finished models had to be no longer that 4-inches/10cm so that it would fit inside a Hexon II terrain hex
- The type of ship they represent should be reasonably obvious
- They should look somewhat akin to the old tin-plate toy warships built at the turn of the nineteenth and twentieth centuries
- They should be robust enough to suffer many years of wargaming (mis)use

The model of the Titanic was made of pine, and its hull became the basis of my model generic pre-dreadnought battleship.

The rest of the bits and pieces used were made from basswood, bamboo skewers, cocktail sticks, and plywood.
Tools
The tools I used included:
- PVA Wood Glue
- A razor saw
- A craft knife/box opener
- A steel ruler
- An aluminium mitre block
- A number of modelling clamps
- An emery board
- Sandpaper
- Two pin vices (each holding a different sized drill bit)
- A pencil
- A small modelling power drill and a sanding block
- A number of cheap cotton buds (very useful for gently removing excess wood glue)
Whan making any models using my methods, there are some basic rules that need to be followed:
- Remember to use any tools carefully so that you do not risk injuring yourself.
- Always let the glue 'cure' before you attempt to move on to the next stage in the production process. (The PVA Wood Glue that I use usually takes about an hour to 'cure' but does not reach its maximum strength for twenty four hours.)
- Always clamp and/or support any glued joints until the glue has 'cured'.
Straight from the pack, the hull looked like this:
The first thing that I did was to shorten it so that it was only 4-inches/10cm long.

I then filled in the cut-out section of the hull using spare pieces of basswood.

This was then set aside for the glue to cure before the excess wood was carefully sawn off ...
... and the hull was sanded to smooth out any imperfections.
I then began shaping what would become the bows of the model by marking on the shape of the bows using a curve ...

... and then sawing off the corners ...

... before carefully using the craft knife/box opener to carve away the excess wood. The bows were then carefully sanded to smooth out any imperfections.


Well thought out BOB- with limited Hand Tools you've certainly produced some very nice Toy-Like Battleships. Regards. KEV.
ReplyDeleteKev,
DeleteThanks very much for you kind comment. I try to make things easy for myself ... and anyone seeking to copy my methods.
All the best,
Bob