My third play-test was yet another battle between the Greeks and the Turks, but this time it was a somewhat larger fight as it pitted the largest ships in each fleets against each other. Because the number of ships that were going to be deployed was larger than in the previous play-tests, I increased the size of the battle area so that it was seventeen hexes long and seventeen hexes wide, giving a total of two hundred and eighty-four hexes.
The Greek flotilla included the Modern Pre-dreadnoughts Kilkis and Lemnos (accompanied by the Light Cruiser Helle) and the Turkish flotilla consisted of the Older Pre-dreadnoughts Heireddin Barbarossa, Torgud Reis and the Light Cruiser Medjidieh.


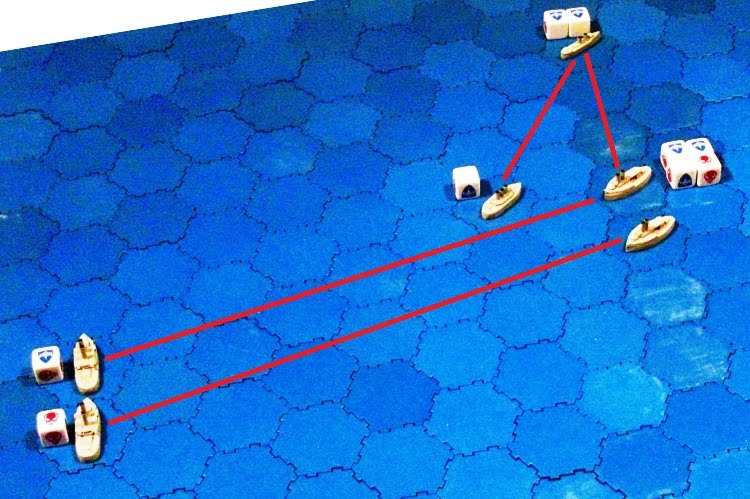
Both flotillas were deployed into line-ahead formation, led by their light cruisers.
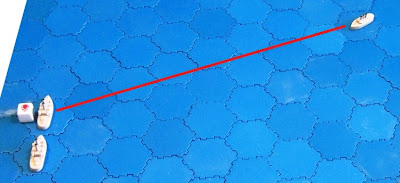
 Both sides threw a D6 die to determine which side would move first. The Greeks threw a 6 and the Turks a 3, so the Turks moved first.
The Turkish ships all moved forward at maximum speed and turned towards the Greeks as soon as they could. In response, the Greeks continued to sail on their existing course at the highest speed at which their ships could move.
 Turn 2
As all the ships were still well out of range of each other, both sides threw a D6 die to determine which side would move first. The Greeks threw a 3 and the Turks a 2, so the Turks moved first.
The Turks kept to their existing course, intent upon closing on the Greeks as quickly as possible. The Greeks responded by maintaining their existing course, with the Helle turning towards the approaching Turks at the last moment.
 Turn 3
This movement had brought Medjidieh within range of Kilkis’s guns and the latter fired at extreme range. At such a range a hit was unlikely, and this was the case.
 Both sides threw a D6 die to determine which side would move first. The Greeks threw a 1 and the Turks a 2, so the Greeks moved first.
The Greek Battleships continued to sail straight ahead whilst the Light Cruiser Helle closed upon the Turks. Chastened by the gunfire from Kilkis’s guns, Medjidieh turned to engage Helle. The Turkish Battleships maintained their existing course, which was likely to take then astern of the Greek battle line.
 Turn 4
The unfortunate Medjidieh was still in range of Kilkis’s guns and was now also in range of Lemnos’s. Both Battleships opened fire on the Light Cruiser, inflicting four points of damage upon her. In a single turn she had suffered sufficient damage for her to have reached her ‘Critical Point’, and she had to break off battle as soon as possible.
Matters were not, however, completely one-sided, and Helle had strayed too close to the enemy. Both Heireddin Barbarossa and Torgud Reis fired at her, inflicting one point of damage.
 Both sides then threw a D6 die to determine which side would move first. The Greeks threw a 3 and the Turks a 5, so the Greeks moved first.
All the Greek ships kept to their existing courses. Medjidieh moved forwards and once she was out of the path of the oncoming Heireddin Barbarossa and Torgud Reis, she turned away from the Greek Battleships and followed a course parallel to Helle’s but slightly astern of her. Heireddin Barbarossa and Torgud Reis continued to maintain their existing course and moved closer to the Greek battle line.
 Turn 5
Heireddin Barbarossa and Torgud Reis were now in range of the guns carried by Kilkis and Lemnos, and the two Greek Battleship opened fire on their opponents. Kilkis’s guns hit Torgud Reis, but only inflicted one point of damage; Lemnos’s guns missed their target, Heireddin Barbarossa.
The Turkish Battleships were unable to reply, but Torgud Reis did fire at Helle, as did Medjidieh. The Turkish shooting was outstanding, and the Helle suffered six points of damage, which caused her to sink. Before she did so, however, she fired at Torgud Reis and inflicted a further two points of damage on her.
 Both sides then threw a D6 die to determine which side would move first. The Greeks threw a 3 and the Turks a 5, so the Greeks moved first again.
The two Greek battleships turned toward their Turkish opposite numbers, and were now on a reciprocal course to them. The Turkish Battleships remain on their existing course, and their guns were now able to fire at Kilkis and Lemnos. In the meantime, Medjidieh continued to sail away from the main action, her work having been completed.
 Turn 6
Both pairs of Battleships engaged their opposite number. Kilkis fired at Torgud Reis and Lemnos engaged Heireddin Barbarossa. The first pair of ships failed to hit each other, but the Lemnos inflicted three points of damage on Heireddin Barbarossa whilst the latter caused one point of damage to the former.
 Both sides then threw a D6 die to determine which side would move first. The Greeks threw a 4 and the Turks a 1, so the Turks moved first.
The Turkish Battleships continued to follow their existing course, and seemed to be intent on shortening the range as quickly as possible. The Greeks also followed the same course of action, and as a result, the distance between the two pairs of ships rapidly decreased.
At the same time, Medjidieh continued to sail away from the action, and was soon be back in her home port where she was repaired as quickly as possible.
 Turn 7
Both pairs of Battleships engaged each other yet again. Kilkis inflicted no damage on Torgud Reis, but Torgud Reis caused four points of damage on Kilkis! Lemnos’s shooting was much better, and she caused four points of damage on Heireddin Barbarossa and suffered two points of damage in return.
 At this stage the four battleships had all suffered some damage:
Both sides then threw a D6 die to determine which side would move first. The Greeks threw a 2 and the Turks a 6, so the Greeks moved first.
Kilkis and Lemnos continued on their existing course, but the Turks turned away. This left Torgud Reis vulnerable to damage from the Lemnos’s guns, but the Heireddin Barbarossa was masked from hostile fire, and the Kilkis’s guns were unable to fire as the Lemnos was between them and any Turkish targets.
 Turn 8
Lemnos and Torgud Reis exchanged fire, and Lemnos inflicted four points of damage on Torgud Reis, and Torgud Reis caused two points of damage on Lemnos. Torgud Reis was now also close to her ‘Critical Point’, and this was an important factor for the commander of the Turkish flotilla to take into consideration.
 Both sides then threw a D6 die to determine which side would move first. The Greeks threw a 5 and the Turks a 6, so the Greeks moved first again.
The two Greek Battleships turned to starboard to try to close with the Turkish ships, but the Turks were already sailing away from the Greeks as fast as they could.
 Turn 9
Lemnos and Torgud Reis both fired at each other again, and Lemnos caused a further three points of damage to Torgud Reis, and the latter was now past her ‘Critical Point’
 Both sides then threw a D6 die to determine which side would move first. The Greeks threw a 3 and the Turks a 2, so the Greeks moved first again.
Both Greek Battleships turned to chase the Turks, but the Turks had a head start on them. Realising that they had little or no chance of catching the Turkish ships, and with night fast approaching, the Greeks broke off the chase and returned to their base with a victory under their belt.
The Turkish commander felt that his two Battleships were outclassed by the more modern Greek Kilkis and Lemnos, and that he had done well to have managed to keep both Heireddin Barbarossa and Torgud Reis from being sunk.
Comments
This was a very enjoyable battle to fight, and the outcome was unclear until quite late in the action. I felt that the rules are now at a stage where they work well as a generic set of naval wargames rules. They may require further development in the future, but for the time being I intend to leave them as they are.
The Greek flotilla included the Modern Pre-dreadnoughts Kilkis and Lemnos (accompanied by the Light Cruiser Helle) and the Turkish flotilla consisted of the Older Pre-dreadnoughts Heireddin Barbarossa, Torgud Reis and the Light Cruiser Medjidieh.

Kilkis

Lemnos

Helle

Heireddin Barbarossa

Torgud Reis

Turn 1Medjidieh
Both flotillas were deployed into line-ahead formation, led by their light cruisers.
 Both sides threw a D6 die to determine which side would move first. The Greeks threw a 6 and the Turks a 3, so the Turks moved first.
The Turkish ships all moved forward at maximum speed and turned towards the Greeks as soon as they could. In response, the Greeks continued to sail on their existing course at the highest speed at which their ships could move.
 Turn 2
As all the ships were still well out of range of each other, both sides threw a D6 die to determine which side would move first. The Greeks threw a 3 and the Turks a 2, so the Turks moved first.
The Turks kept to their existing course, intent upon closing on the Greeks as quickly as possible. The Greeks responded by maintaining their existing course, with the Helle turning towards the approaching Turks at the last moment.
 Turn 3
This movement had brought Medjidieh within range of Kilkis’s guns and the latter fired at extreme range. At such a range a hit was unlikely, and this was the case.
 Both sides threw a D6 die to determine which side would move first. The Greeks threw a 1 and the Turks a 2, so the Greeks moved first.
The Greek Battleships continued to sail straight ahead whilst the Light Cruiser Helle closed upon the Turks. Chastened by the gunfire from Kilkis’s guns, Medjidieh turned to engage Helle. The Turkish Battleships maintained their existing course, which was likely to take then astern of the Greek battle line.
 Turn 4
The unfortunate Medjidieh was still in range of Kilkis’s guns and was now also in range of Lemnos’s. Both Battleships opened fire on the Light Cruiser, inflicting four points of damage upon her. In a single turn she had suffered sufficient damage for her to have reached her ‘Critical Point’, and she had to break off battle as soon as possible.
Matters were not, however, completely one-sided, and Helle had strayed too close to the enemy. Both Heireddin Barbarossa and Torgud Reis fired at her, inflicting one point of damage.
 Both sides then threw a D6 die to determine which side would move first. The Greeks threw a 3 and the Turks a 5, so the Greeks moved first.
All the Greek ships kept to their existing courses. Medjidieh moved forwards and once she was out of the path of the oncoming Heireddin Barbarossa and Torgud Reis, she turned away from the Greek Battleships and followed a course parallel to Helle’s but slightly astern of her. Heireddin Barbarossa and Torgud Reis continued to maintain their existing course and moved closer to the Greek battle line.
 Turn 5
Heireddin Barbarossa and Torgud Reis were now in range of the guns carried by Kilkis and Lemnos, and the two Greek Battleship opened fire on their opponents. Kilkis’s guns hit Torgud Reis, but only inflicted one point of damage; Lemnos’s guns missed their target, Heireddin Barbarossa.
The Turkish Battleships were unable to reply, but Torgud Reis did fire at Helle, as did Medjidieh. The Turkish shooting was outstanding, and the Helle suffered six points of damage, which caused her to sink. Before she did so, however, she fired at Torgud Reis and inflicted a further two points of damage on her.
 Both sides then threw a D6 die to determine which side would move first. The Greeks threw a 3 and the Turks a 5, so the Greeks moved first again.
The two Greek battleships turned toward their Turkish opposite numbers, and were now on a reciprocal course to them. The Turkish Battleships remain on their existing course, and their guns were now able to fire at Kilkis and Lemnos. In the meantime, Medjidieh continued to sail away from the main action, her work having been completed.
 Turn 6
Both pairs of Battleships engaged their opposite number. Kilkis fired at Torgud Reis and Lemnos engaged Heireddin Barbarossa. The first pair of ships failed to hit each other, but the Lemnos inflicted three points of damage on Heireddin Barbarossa whilst the latter caused one point of damage to the former.
 Both sides then threw a D6 die to determine which side would move first. The Greeks threw a 4 and the Turks a 1, so the Turks moved first.
The Turkish Battleships continued to follow their existing course, and seemed to be intent on shortening the range as quickly as possible. The Greeks also followed the same course of action, and as a result, the distance between the two pairs of ships rapidly decreased.
At the same time, Medjidieh continued to sail away from the action, and was soon be back in her home port where she was repaired as quickly as possible.
 Turn 7
Both pairs of Battleships engaged each other yet again. Kilkis inflicted no damage on Torgud Reis, but Torgud Reis caused four points of damage on Kilkis! Lemnos’s shooting was much better, and she caused four points of damage on Heireddin Barbarossa and suffered two points of damage in return.
 At this stage the four battleships had all suffered some damage:
 - Kilkis: 4 points of damage
- Lemnos: 3 points of damage
- Heireddin Barbarossa: 7 points of damage
- Torgud Reis: 3 points of damage
Both sides then threw a D6 die to determine which side would move first. The Greeks threw a 2 and the Turks a 6, so the Greeks moved first.
Kilkis and Lemnos continued on their existing course, but the Turks turned away. This left Torgud Reis vulnerable to damage from the Lemnos’s guns, but the Heireddin Barbarossa was masked from hostile fire, and the Kilkis’s guns were unable to fire as the Lemnos was between them and any Turkish targets.
 Turn 8
Lemnos and Torgud Reis exchanged fire, and Lemnos inflicted four points of damage on Torgud Reis, and Torgud Reis caused two points of damage on Lemnos. Torgud Reis was now also close to her ‘Critical Point’, and this was an important factor for the commander of the Turkish flotilla to take into consideration.
 Both sides then threw a D6 die to determine which side would move first. The Greeks threw a 5 and the Turks a 6, so the Greeks moved first again.
The two Greek Battleships turned to starboard to try to close with the Turkish ships, but the Turks were already sailing away from the Greeks as fast as they could.
 Turn 9
Lemnos and Torgud Reis both fired at each other again, and Lemnos caused a further three points of damage to Torgud Reis, and the latter was now past her ‘Critical Point’
 Both sides then threw a D6 die to determine which side would move first. The Greeks threw a 3 and the Turks a 2, so the Greeks moved first again.
Both Greek Battleships turned to chase the Turks, but the Turks had a head start on them. Realising that they had little or no chance of catching the Turkish ships, and with night fast approaching, the Greeks broke off the chase and returned to their base with a victory under their belt.
The Turkish commander felt that his two Battleships were outclassed by the more modern Greek Kilkis and Lemnos, and that he had done well to have managed to keep both Heireddin Barbarossa and Torgud Reis from being sunk.
Comments
This was a very enjoyable battle to fight, and the outcome was unclear until quite late in the action. I felt that the rules are now at a stage where they work well as a generic set of naval wargames rules. They may require further development in the future, but for the time being I intend to leave them as they are.


Hi Bob,
ReplyDeleteGreat report and I am not surprised at the outcome! The Turks were certainly outgunned but made a good fight of it. Once again, the models are really nice - have you ever written up a 'how to' article on these?
All the best,
DC
David,
ReplyDeleteThe outcome was closer than I expected. It also showed that you should never let your cruisers stray between the two lines of battleships ... or within range of their guns!
I made the models so long ago I can barely remember how I made them, so a 'how to' blog entry might be a bit difficult. Still, the next batch of model ship I build might warrant one …
All the best,
Bob