Pages

Monday 31 January 2011

And here is one I missed earlier ...

After writing the blog entry about the amount of HOe-gauge locomotive and rolling stock that I own, I suddenly remembered that I also own a single OO-gauge locomotive.

It is an 0-4-0 Saddle Tank locomotive. The original locomotive was one of a series built between 1891 and 1910 by the Lancashire and Yorkshire Railway Company. They were designed by Sir J A F Aspinall, and because of their small size, they were nicknamed 'Pugs'.

This model was made by Dapol Model Railways Limited, and the bodywork was based on the Airfix model of the 'Pug' (which had been made originally by Kitmaster), the moulds for which Dapol bought some years ago. Because of its small size, it is ideally suited for use in a wargames setting.

Do I really own that many locomotives?

After my recent blog entry about railways and wargames, I decide to sort through my storage boxes to find out just how much railway stuff I had.

The result was rather shocking.

It turned out that I own five HOe-gauge locomotives, ...

... three eight-wheeled passenger carriages, ...

... five four-wheeled passenger carriages, ...

... a closed goods wagon, and four mineral trucks.

In addition, I also own several N-gauge items (including a locomotive) that can be used 'as is' or converted for use with my HOe-gauge locomotives and rolling stock.

This was a bit of a revelation for me ... as I only thought that I owned a few bits and pieces!

A bit of a non-event ...

Just before Christmas I noticed that a small lump under my right eye had got slightly bigger. Over the Christmas holiday it continued to grow, and as I had no idea what it was, I went to see my doctor. He thought that it was a form of wart that was under the outer skin layer, and although it was probably not serious, he decided that it should be removed.

The appointment to remove the wart was set for this evening, and I turned up at the local health centre in plenty of time for the minor surgical procedure that was required. The doctor was running late, and it was not until 5.30pm that I was finally called in. The area under my eye was anaesthetised, and the procedure began ... and almost immediately stopped.

It appears that the wart has a far deeper root than the doctor had first thought, and that its removal will need to be performed by an eye surgeon rather than someone qualified just to do general surgery. I have, therefore, been referred to a local hospital that has a department with the necessary specialist surgical expertise. Unfortunately, I will probably have to wait for at least two months before the operation will take place, and it the meantime all I can do is hope that the wart does not get much bigger.

PS. The local anaesthetic has had one rather disconcerting side-effect; my right eye keeps weeping. The doctor warned me that this would happen, and that the effect should wear off in five to six hours. In the meantime, I am sitting here almost constantly dabbing my right eye with a handkerchief in order to stop tears running down my face. I must look rather strange ... and I certainly feel rather odd.

Sunday 30 January 2011

Railways and Wargames: Some images from my old Colonial Wargaming website

My Colonial Wargaming website has been running – in various incarnations – for over nine years, and was last given a major overhaul in 2005. At that time I renovated quite a few of the existing pages and deleted others, including those dedicated to wargaming and railways. I did not, however, delete the photographs that I had used ... and here are some of them.

The first is from my very first battle report – The Battle of Arora Junction – and although the photograph is not of a particularly good quality, the Liliput™ HOe-gauge locomotive and passenger carriage can be seen in the centre.

The next four photographs show a variety of different HOe-gauge locomotives and rolling stock.

The first is a Liliput™ 0-6-2 tank locomotive and 4-wheel passenger carriage, ...

... the second a Liliput™ 0-6-2 tank locomotive and 4-wheel goods van, ...

... the third is a ROCO™ 0-6-0 tank locomotive and 4-wheel passenger carriage, ...

... and the fourth is a ROCO™ 0-6-0 tank locomotive and mixed goods wagons.

The 15mm-scale figures give some indication of the size of the locomotives and rolling stock.

The advantage of HOe-gauge model railway equipment is that it runs on N-gauge model railway track. As the photographs show, although the locomotives and rolling stock are 1:87-scale, they fit in well with 20mm and 15mm-scale wargames figures. The N gauge track is 9 mm wide, and is equivalent to 90 cm (3 foot) gauge track in 1:100-scale.

The portable wargame: A second tryout

Having re-written the rules slightly in the hope of improving them (the constant obsession of all wargames rule writers!), I decided to give them a further tryout this afternoon.

Rather than give a blow-by-blow account of each turn, I will summarise the main events of the battle and I hope that the photographs I have taken (using my iPhone rather than my normal digital camera) will enable my blog readers to follow the action.

Initial positions
The British force consisted of:
  • A Command Unit
  • Two Units of British Infantry
  • Two Units of Sudanese Infantry
  • An Artillery Unit
Opposing them was a Mahdist force of:
  • A Command Unit
  • Four Units of Nile Arab Infantry
  • Four Units of Hadendowa Infantry
As can be seen from the following photograph, the British formed up with their Artillery Unit in the centre of their formation whilst the Mahdist concentrated their troops into two ‘blocks’ in two of the corners of the battlefield.

Both sides were allocated three ‘Risk Express’ dice at the beginning of the battle.

Turn 1
Because no Mahdist Units were in range of the British Artillery Unit, it was unable to fire. Both sides threw a D6 die to see who would move and fight first, and the Mahdists won. As can be seen from the following photograph, the Mahdists were able to move their Command Unit and three Infantry Units, and chose to advance of their left flank. The British response was rather restricted by some poor dice throws, and all they did was to move their Command Unit towards their right flank, thus responding to the Mahdist advance.

Turn 2
The British Artillery unit opened fire on the closest Hadendowa Infantry Unit, but they missed their intended target and hit the Hadendowa next to it and destroyed it.

Both sides threw a D6 die to determine who moved first this turn, and this time the British won. They moved the rightmost British Infantry Unit forward and it opened fire on the Hadendowa Infantry Unit directly in front of it, and destroyed it. The Command Unit moved up behind the advancing British Infantry Unit to give its support.

The Mahdist response was move the two remaining Hadendowa Infantry Units forward, accompanied and supported by their Command Unit.

Turn 3
The British Artillery Unit fired at the nearest Mahdist Unit – the Command Unit – which it hit … and destroyed! This immediately reduced the number of ‘Risk Express’ dice the Mahdists could throw this turn to two.

Both sides threw a D6 die to determine who moved first this turn, and on this occasion the Mahdists won, and were able to move one of their Infantry Units. The foremost Hadendowa Infantry Unit moved into an orthogonally adjacent grid square to the rightmost British Infantry Unit, which it engaged in Close Combat. Both sides threw a D6 die each. Amazingly neither side won the Close Combat, and the attacking Hadendowa Infantry Unit was forced to withdraw.

It was then the British turn to move and fight. They were able to move most of their troops forward, and the two British Infantry Units opened fire on the foremost Hadendowa Infantry Unit … which was destroyed.

The Mahdist force was now only five Infantry units strong, and this reduced the number of ‘Risk Express’ dice it could throw next turn to one.

Turn 4
The British Artillery Unit was unable to fire at the nearest Mahdist Unit, which was masked by one of the British Infantry Units, and all other possible targets were out of range. Both sides threw a D6 die to determine who moved first this turn and the British won. Unfortunately, they were unable to move many of their Units forward, and only one of the British Infantry Units was in range of a Hadendowa Infantry Unit. They fired at the Mahdists … and missed!

The Mahdists were slightly luckier with their ‘Risk Express’ dice throws, and were able to withdraw the remaining Hadendowa Infantry Unit, thus ending the battle.

Comments
The revised rules worked quite well, and I was particularly happy with the way in which the numbers of ‘Risk Express’ dice that could be thrown by either side was affected by events. I was also pleased with the way the attacker who failed to win a Close Combat had to withdraw.

The photographs taken with the iPhone were not quite as good in terms of quality as those I usually take with my digital camera, but they are certainly of a reasonable and usable standard … and it will teach me to make sure that I have charged the battery on my digital camera before my next play-test!

A little light retail therapy

This morning was taken up with doing the weekly shopping. Now some men do not like any form of shopping, but my wife and I reached an agreement many years ago that if we went out shopping together, we would both allow the other some time to do some 'retail therapy' of their own. Today was no exception to that rule.

I managed to visit the local branch of Waterstones, where I finally got around to buying a copy of Christian Wolmer's ENGINES OF WAR (Published by Atlantic Books Ltd [2010] ISBN 978 1 84887 172 4)

This book tells the history of how the railways transformed warfare, and is a must for anyone like me whose interests include military history from 1830 onwards ... and railways (particularly steam railways).

I also bought the February issue of WARGAMES ILLUSTRATED, which caught my eye as I was passing through the retail centre's branch of WHSmith.

Over recent months I have not bought either of the two main UK wargames magazines. The reason why has little to do with cost, but more to do with what interests me. I have just not seen any articles in either that I wanted to read ... but this issue of WARGAMES ILLUSTRATED bucked that trend, so I bought it.

The articles that were of particular interest to me were all about the war in the Sudan:
  • "Give them volleys!": Wargaming the Mahdist Revolt
  • Circling the Square: The campaign to save Gordon and the Battle of Abu Klea
  • A good dusting: David Bickley's designer eye-view of writing rules for re-fighting the battles of the Sudan War
  • Unfinished business: Avenging Gordon and the Battle of Tofrek
This issue also included an article about building armies for A VERY BRITISH CIVIL WAR, which looks very interesting.

These were not the only wargames/military history-related purchases I made today. I had to pay a visit to the local branch of John Lewis Partnership, and whilst I was making my way through the Toy Department, I happened to see an very nice folding wooden chessboard on sale. After thinking about it ... for at least ten seconds ... I bought it. It is larger than the chessboard I am currently using for my portable wargame, and this means that the individual squares are bigger. This will allow me to field some of the 15mm-scale troops that I have already have and that are on bases that are currently too large for my existing chessboard. This will also mean that my battles will no longer be confined to Colonial ones, as they currently are.

Not a bad day's 'retail therapy', eh?

Saturday 29 January 2011

The portable wargame: Preparing for the next tryout

My wife and I spent quite a lot of time today with my father-in-law in Herne Bay, Kent. We were trying to help him sort out the aftermath of his recent car accident, including sending the relevant forms to the DVLA in Swansea in order to get a refund of what remained of his unexpired Vehicle Excise Duty and to transfer ownership of the remains of his car to his insurance company.

This has left me little time today to tryout the latest version of the rules I have developed to use with my portable wargame. However, I did have time to place the Units on the board, and to set down some ideas as to how decide how many 'Risk Express' dice each side should have. (I use the 'Risk Express' dice in my solo battles to decide how many of each type of unit each side may move each turn.)

I took my inspiration from a comment I read about the latest in Richard Borg's COMMANDS & COLORS series of games, COMMANDS & COLOURS: NAPOLEONICS. I understand that in the rules for this new game, the British throw more dice than the French when they are firing and the French throw more dice than the British when in close combat. I decided that in my solo games the number of 'Risk Express' dice each side is allocated would be decided by the following formulae:
  • European troops: one 'Risk Express' dice for every three non-Command Units (with any remainders being rounded up) plus one 'Risk Express' dice for the Command Unit
  • Native troops: one 'Risk Express' dice for every three non-Command Units (with any remainders being rounded down) plus one 'Risk Express' dice for the Command Unit
For example, if a European force of eight Units (including a Command Unit) were facing a Native force of eight Units (including a Command Unit), the Europeans would be allocated four 'Risk Express' dice (7/3 = 2.66 [which when rounded up = 3] plus 1 = 4) and the Natives would be allocated three 'Risk Express' dice (7/3 = 2.66 [which when rounded down = 2] plus 1 = 3). This would supposedly reflect the superior discipline of the European troops as well as preventing the Native force from having far more 'Risk Express' dice than the European force.

In addition, the number of 'Risk Express' dice allocated to each side should diminish as Units are destroyed, and the loss of a Command Unit would therefore have serious consequences.

I intend to try this system out during the next play-test of my rules/tryout of my portable wargame, and to see if it improves the game to the extent that I hope it will.

Friday 28 January 2011

Frontier/Musket Wargames Rules: Minor changes made

I was stuck in a traffic jam on the Queen Elizabeth II Bridge over the River Thames at Dartford this evening on the way back from seeing my father in his residential care home, and I started to think about the finished draft of my heavily Morschauser-influenced Frontier/Musket wargames rules ... and realised that I had missed something out that I had intended to include.

In the original Close Combat system there are four alternative results:
  • The Attacker wins and the Defender is destroyed
  • The Defender wins and the Attacker is destroyed
  • Both the Attacker and the Defender are destroyed
  • Both the Attacker and the Defender survive
I did not feel that the latter rather neutral result was quite what I wanted, especially in my solo wargames, and so I have now changed it so that if the Close Combat is a draw, the Attacker must withdraw.

I will see how this change to the Close Combat system works in my next play-test of the rules ... if I ever manage to get a long enough time-slot in my busy schedule to organise one!

Battle Cry! 150th Anniversary Edition: The board

The board that BATTLE CRY! is fought over has also been redesigned. It is slightly less yellow and rather greener than the one in the original game, and although the terrain tiles are similar to the old ones, they have also been re-drawn.
The BATTLE CRY! board and some examples of the terrain tiles. The latter include fieldworks, entrenchments, fences, homesteads, fields, rocky outcrops (rough terrain), orchards, and woods.
As before, all the terrain tiles are double sided, and there seem to be enough of each type so as to enable additional scenarios to be created ... should players so desire it!

Thursday 27 January 2011

Battle Cry! 150th Anniversary Edition: The figures

After another busy day at work, I only managed to have enough time when I got home to take a look at the new figures that are the playing pieces supplied with the latest edition of BATTLE CRY!

For reasons of clarity, I have only photographed the Confederate figures; the Union figures are exactly the same except that they are moulded in blue and not grey.

They are somewhat more detailed that the figures supplied with the original game, but they do appear to be compatible with the older figures.

As this photograph shows, the only major change to the units is confined to the Artillery. In the old edition, Artillery was represented by two cannon, each with a single crewman. In the new edition there is only one cannon per artillery unit, but it comes with three crewmen.

The following photographs show each of the types in unit in slightly more details. Firstly, an Infantry unit ...

... secondly, a Cavalry unit ...

... thirdly, an Artillery unit ...

... and finally, a General.

I still need to fix the flags to the various flagpoles, but once that is done, the figures will be ready to use.

Wednesday 26 January 2011

Battle Cry! 150th Anniversary Edition: Rules book

Although I could just about resist taking everything out of the box containing the newly arrived edition of Richard Borg's BATTLE CRY!, I could not stop myself from looking at the rules booklet.

The booklet is printed on gloss paper, and has the sort of production levels that one has now come to expect from commercial games. The rules appear to be generally similar to those in the original edition of the game, although there have been some changes that are a result of the extensive development the basic game system has undergone over the years. The rules seem to me to be better laid out in the new edition, and I found the explanations and diagrams were definitely better.

The main change is the increase in the number of scenarios that are included in the booklet. They are:
  • Falling Waters (West Virginia, 2nd July, 1861)*
  • First Bull Run (Virginia, 21st July, 1861)#
  • Wilson's Creek (Missouri, 10th August, 1861)*
  • Greenbrier River (West Virginia, 3rd October, 1861)*
  • Belmont (Missouri, 7th November, 1861)*
  • Dranesville (Virginia, 20th December, 1861)*
  • Fort Donelson [Confederate Breakout] (Tennessee, 15th February, 1862)*
  • Little Sugar Creek (Arkansas, 17th February, 1862)*
  • Pea Ridge (Arkansas, 7th March, 1862)#
  • Kernstown (Virginia, 23rd March, 1862)#
  • Shiloh [First Day] (Tennessee, 6th to 7th April, 1862)#
  • Williamsburg (5th May, 1862)*
  • McDowell (Virginia, 8th May, 1862)~
  • Winchester (Virginia, 25th May, 1862)~
  • Oak Grove (Virginia, 25th June, 1862)*
  • Gaines Mill (Virginia, 27th June, 1862)#
  • Cedar Mountain (Virginia, 9th August, 1862)~
  • Second Bull Run (Virginia, 28th August, 1862)#
  • Richmond (Kentucky, 30th August, 1862)*
  • Ox Hill (Virginia, 1st September, 1862)*
  • Antietam (Maryland, 17th September, 1862)#
  • Perryville (Kentucky, 8th October, 1862)*
  • Prairie Grove (Arkansas, 7th December, 1862)*
  • Frederickburg (Virginia, 13th December, 1862)#
  • Murfreesboro [First Day] (31st December, 1862 to 2nd January, 1863)#
  • Gettysburg [Devil's Den & Wheat Field, Second Day] (Pennsylvania, 1st to 3rd July, 1863)#
  • Gettysburg [Pickett's Charge, Third Day] (Pennsylvania, 1st to 3rd July, 1863)#
  • Chickamanga [Second Day] (Georgia, 19th to 20th September, 1863)#
  • New Market (Virginia, 15th May, 1864)#
  • New Hope Church (Georgia, 25th May, 1864)#
All the scenarios marked with a hash (#) were included in the original rules booklet, those marked with a star (*) are in the new edition of the rules, as are those marked with a tilde (~), which are in the 'Jackson Campaign Supplement'.

Tuesday 25 January 2011

Burns Night: The wait was worth it!

I finally got home at about 8.30pm ... only thirteen hours after I left for work this morning. Was my evening wasted? Well, I did manage to see seven potential students in two hours, but most of them were only 'just looking'. Mind you, if we manage to recruit a couple of them, it makes the future of the course I teach a bit more secure.

My wife and I finally ate our Burns Night Supper at 9.00pm ... and as custom demands, it was accompanied by a wee dram. The haggis was good, the 'neeps were sweet, the 'tatties were mashed to a creamy consistency ... and the 'water of life' was a reasonable blend.

All-in-all, it was a good end to a long day.

Burns Night

Tonight is Burns Night, and if things were at all fair, I would be sat at home now waiting for my haggis, 'neeps and 'tatties ... and a small tot of the 'water of life'.

But I am not. I am presently sat in my office, waiting for the 'Open Evening' to start at 6.00pm. This is when prospective students have the opportunity to pay us a visit, look around, ask questions ... and then go elsewhere to study.

The management have provided food and drink for us ... but unfortunately I do not like cold, spicy Caribbean food. I did manage to drink a plastic cupful of apple juice (supplies ran out before I managed to get a second one), but I will have to wait until I get home before I can eat my Burns Night Supper.

Address to a Haggis
By Robert Burns


Fair fa' your honest, sonsie face,
Great chieftain o the puddin'-race!
Aboon them a' ye tak your place,
Painch, tripe, or thairm:
Weel are ye wordy of a grace
As lang's my arm.

The groaning trencher there ye fill,
Your hurdies like a distant hill,
Your pin wad help to mend a mill
In time o need,
While thro your pores the dews distil
Like amber bead.

His knife see rustic Labour dight,
An cut you up wi ready slight,
Trenching your gushing entrails bright,
Like onie ditch;
And then, O what a glorious sight,
Warm-reekin, rich!

Then, horn for horn, they stretch an strive:
Deil tak the hindmost, on they drive,
Till a' their weel-swall'd kytes belyve
Are bent like drums;
The auld Guidman, maist like to rive,
'Bethankit' hums.

Is there that owre his French ragout,
Or olio that wad staw a sow,
Or fricassee wad mak her spew
Wi perfect sconner,
Looks down wi sneering, scornfu view
On sic a dinner?

Poor devil! see him owre his trash,
As feckless as a wither'd rash,
His spindle shank a guid whip-lash,
His nieve a nit:
Thro bloody flood or field to dash,
O how unfit!

But mark the Rustic, haggis-fed,
The trembling earth resounds his tread,
Clap in his walie nieve a blade,
He'll make it whissle;
An legs an arms, an heads will sned,
Like taps o thrissle.

Ye Pow'rs, wha mak mankind your care,
And dish them out their bill o fare,
Auld Scotland wants nae skinking ware
That jaups in luggies:
But, if ye wish her gratefu prayer,
Gie her a Haggis!

Monday 24 January 2011

New acquisitions

I managed to get to the collection point of the local Post Office sorting office before the morning rush, and was pleased to find that I had been right about the parcels I had to collect.

The largest contained a copy of the latest version of Richard Borg's BATTLE CRY ...

and the others contained two 'new' cannon for my LITTLE WARS project.

Other than open the parcels, have a quick look at them, and then photograph them for this blog entry, I have not had much time to examine my new acquisitions in great detail ... but on first look, they look even better than I had hoped.

Another quiet day ...

Today is going to be a busy day. I have an appointment to see my doctor at 10.30am, and before that I have to visit the Post Office to collect some parcels (hopefully a couple of new cannons for my LITTLE WARS project and a copy of the latest version of Richard Borg's BATTLE CRY!) and the Bank to pay in some cheques.

After the visit to my doctor, I hope to make time to visit my father in his residential home on my way to Walthamstow, where I will be picking up one of my guests for tonight's lecture. It is then on to Royston, where I will deliver my lecture ... and then it will be back to Walthamstow and home. I will probably not get home until after 10.30pm, and will have driven over one hundred and fifty miles during the day.

Another nice, quiet day!

Sunday 23 January 2011

Another 'interesting' day

I had several things planned for today ... but as yet none of them has happened!

Firstly, I was going to read through my lecture notes on Sir Charles Warren, as I am delivering it tomorrow in Royston, Hertfordshire, and I wanted to make sure that knew what I was going to say! I wrote my notes back in 2009, and have not delivered my lecture since then ... so hopefully prior preparation would have prevented a poor performance.

Sir Charles Warren GCMG, KCB, FRS
Soldier, Archaeologist, Historian, Policeman, Politician, and Social Reformer.
Secondly, I was going to play-test the latest draft of my Frontier/Musket wargames rules and write up my battle report as a blog entry.

Thirdly, I was going to look for some painted 15mm-scale Colonial figures that I have stored somewhere in my wargames room ... and was not able to find when I was looking for them last week!

Because we had not planned to do much today, my wife and I had a leisurely breakfast, followed by a shopping trip a local retail park to buy food and to undertake some 'retail therapy'. When we got home, we had a very pleasant lunch, after which we both intended to spend time doing things that we wanted to do.

Unfortunately, it was at this point that our plans began to go awry.

I had just begun reading though and correcting my lecture notes when we got a telephone call from my father's residential home. It appeared that he had developed a urinary infection that had made his dementia worse and that they needed me to help calm him down and to collect the medication the doctor had prescribed.

My wife and I hurriedly got ready, and were on our way there when the Duty Manager telephoned us again to say that my father was now a lot calmer, and that the doctor had managed to obtain the necessary drugs without us needing to collect them from the pharmacy. They also told us that they thought that my father might become agitated again if we arrived to visit him so late in the day.

By the time we got back home, both of us felt emotionally drained, and I had lost all enthusiasm to do any of the things that I had planned to do. I eventually managed to complete reading through my lecture notes, but I have yet to start the play-test or look for my ‘missing’ figures. Doing those two things will now have to wait for another day … or possible another weekend.

Saturday 22 January 2011

Frontier/Musket Wargames Rules are finished!

Despite having spent a large part of the day visiting my father-in-law in Herne Bay (and – more importantly – making sure that the ‘new’ mobility scooter he has bought to replace his damaged car actually works), I actually managed to finish the draft of my Frontier/Musket Wargames Rules.

The rules are heavily influenced by Joseph Morschauser 'Frontier' and 'Musket' wargames rules (as featured in John Curry's reprint of Joseph Morschauser's HOW TO PLAY WAR GAMES IN MINIATURE) with just a few touches of my own.

The rules are too long to include in a blog entry, but once they have been play-tested and any of the anomalies have been ironed out, I will try to make them available to anyone who would like a copy.

Little Wars: Recent additions

My LITTLE WARS project is still developing slowly but surely, and the latest additions are some old Britain's British Infantry figures that have been repainted to represent members of one of the Rifle Regiments. I bought these figures via eBay, and they have just been delivered by the Royal Mail.

I hope to use these figures as the templates from which to create my own figures ... but this is not something that I am going to do in the very near future. In the meantime, they can serve as the basis of my first LITTLE WARS Infantry Unit.

The portable wargame: Some slight rule changes

The rules I have been using with my portable wargame are heavily based on Joseph Morschauser's 'Frontier' wargames rules (as featured in John Curry's reprint of Joseph Morschauser's HOW TO PLAY WAR GAMES IN MINIATURE). These rules work quite well, but do not allow Units other than those armed with Artillery to have any ability to engage the enemy at a distance. In other words, Units armed with firearms have no 'reach', and fight in the same way as those armed with close combat weapons (e.g. swords and spears).

This has no real effect on the game if both sides are armed with similar weapons, but if one side is exclusively armed with firearms and the other with close combat weapons (as happened in my recent tryout of the game), it can look and feel unbalanced. I have therefore decided to amend my existing rules so that they give Units armed with firearms the ability for engage enemy Units at a distance, and I am going to use the firing mechanism from Morschauser's 'Musket' rules as the basis for this change. Once this is done, I hope to play-test the amended rules in the very near future.

Friday 21 January 2011

Peter Laing Figures

I recently had a request for some close-up photographs of the Peter Laing 15mm figures that I recently featured on a blog entry.

Peter Laing was the first manufacturer to produce a range of 15mm-scale figures, and I had loads of them. They were very simple figures, and most of the detail had to be painted on. This had both advantages and disadvantages. The main advantage was that the lack of detail modelled onto the figures made the bulk of them quite 'generic', which in turn mean that 'paint conversions' were very easy. The downside of this was that the figures never appealed to wargamers who wanted super-detailed wargames figures, and over time Peter Laing's figures were overtaken and supplanted by figures produced by other manufacturers. Wargamers were usually lovers or haters of Peter Laing's figures.

The following images are of some of my collection of Peter Laing's Austro-Prussian figures. The first three are Prussian Artillery, ...

... Line Infantry, ...

... Jägers, and a General.

The second set of images are Austrian Artillery, ...

... Line Infantry, ...

... Jägers, and a General.

I bought these figures via eBay. They were already painted, and were part of a much larger collection that was sold off in batches. I regret not being able to buy more of them at the time, and hope that one day another batch or two will become available.

A whole load of war games that use a chessboard ...

I am indebted to another member of Wargame Developments – Stefan Wolf-Beyrich – for bringing Lloyd Krassner´s Warp Spawn website to my attention.

Amongst other things, Lloyd Krassner has developed forty-nine(!) different sets of wargames rules that are fought out on an 8 x 8 chessboard.

They make my portable wargame project look a bit 'minor league' by comparison, but I am not jealous … well not very much!

Thursday 20 January 2011

The Visiting Fireman

This evening Tim Gow – a fellow member of Wargame Developments who co-organises the Conference of Wargamers [COW] with me every year – paid my wife and I a visit. As happened last year, he was in London for a conference and made time to come over for a chat, something to eat, and a wargame!

We spent a very pleasant evening together, and managed to play a short card-based wargame about D-Day. We also spent time doing what wargamers everywhere seem to enjoy doing almost as much as they do wargaming ... and that is talking about wargaming! Lots of ideas were discussed, as were several possible projects that we might undertake.

My wife and I always enjoy seeing Tim, and hopefully it will not be quite as long before we both see him again.

Wednesday 19 January 2011

The portable wargame: Terrain ideas?

Arthur Harman recently contacted me, and reminded me that Donald Featherstone had described and illustrated a map-making method in his book, ADVANCED WAR GAMES, that used a similar-looking board to the chessboard I am using for my portable wargame.

Arthur suggested that similar terrain squares could easily be created for my portable wargame ... and having looked at the diagram in Donald Featherstone's book, I can see the possibilities of Arthur's suggestion.

More food for thought!

The portable wargame: The Austro-Prussian War?

My time for wargaming and wargaming-related activities was rather limited this evening, and I decided to see what some of my 15mm Peter Laing Austro-Prussian figures would look like on the portable wargame board.

As you can see, as presently based, the figures do not quite fit into a grid square, but with a little re-basing, it would be quite easy for me to field an Austrian and a Prussian army for my portable wargame. This would make a change from the current Colonial armies that I have available to be used on the portable wargame board, and it started me thinking about the possibilities of other armies that I could 'create'.

The rules I am using – a slightly modified version of Joseph Morschauser's 'Frontier' wargames rules – could easily be adapted for fighting battles set during the mid to late nineteenth century, and the armies would be small enough to make it reasonably cheap to create several.

Methinks that there are possibilities here ...

Tuesday 18 January 2011

Combining elements of Morschauser's 'Frontier' and 'Modern' wargames rules

For the last few weeks I have been working on and off – mainly off! – to combine elements of Joseph Morschauser's 'Frontier' and 'Modern' wargames rules into a 'new' set of wargames rules for fighting battles set during the early and mid-twentieth century.

Now this course of action may seem a little odd to my regular blog readers, who will remember that just before I went on my cruise I had been working on a set of wargames rules for that period. These rules combined
  • The basic structure of Joseph Morschauser's 'Modern' period wargames rules (modified for use on 10cm Hexon II hexed terrain)
  • The turn sequence from Joseph Morschauser's 'Frontier' wargames rules
  • The basic combat system from Richard Borg's MEMOIR '44 wargame
  • The use of MEGABLITZ-like Unit strength markers
The working title for the rules was MEMOIR OF MODERN BATTLE, and I did quite a lot of development work on them whilst I was on my cruise.

The problem was that when I got home, I had to put the rules aside for a few days to do other things ... and when I re-read the draft I was working on, they seemed rather 'clunky' and over-complex. I then re-read the heavily Morschauser-inspired 'Modern Period Wargames Rules' that I wrote for inclusion in John Curry's reprint of Joseph Morschauser's HOW TO PLAY WAR GAMES IN MINIATURE and realised that they were a much better set of rules than MEMOIR OF MODERN BATTLE were ... and that by simply combining them with the turn sequence from Joseph Morschauser's 'Frontier' wargames rules, they could be made even better.

That is exactly what I have been doing – when I have had the time – and the 'new' wargames rules are now almost complete, although they still need proof reading to check for any obvious mistakes. I hope to play-test them very soon ... work, family, and Ofsted permitting!

Monday 17 January 2011

Victorian War Game sells for £4,800!

It is very rare that wargames and wargaming get a mention in the UK media, but today was an exception. During this morning's edition of the BBC's TODAY programme, there was an almost four-minute long discussion about the sale, by auction at Bonhams this afternoon, of a British boxed war game dating from the late 1880s/early 1890s.

Luke Honey (Bonhams chess and games consultant) and Major-General Patrick Cordingley (who commanded the 7th Armoured Brigade during the First Gulf War) were questioned about the game by Evan Davis.

It subsequently sold for £4,800!

The game is housed in a lockable mahogany box, and contains:
  • Six hundred Red and Blue playing pieces that represent Infantry, Cavalry, Mounted Infantry, Horse Artillery, Sappers, and Machine Gun Units
  • Two ivory rulers
  • Two pairs of compasses
  • Two ivory dice
  • Two pairs of callipers
  • A red leather-covered dice shaker
  • Some coloured pegs
  • A wooden ruler
No maps or original rules are included with the box, but a facsimile copy of the RULES FOR THE CONDUCT OF THE WAR-GAME, 1884 (reprinted 1889) was provided by the seller. (Perhaps they could have invested in a copy of VERDY'S FREE KRIEGSPIEL (1876) AND THE VICTORIAN ARMY'S 1896 KRIEGSPIEL WARGAME RULES from John Curry! They only cost £12.50!)

It makes my portable wargame look very cheap by comparison … but at least mine contains everything that you need to fight a battle!

PS. If you get a chance, try to listen to the interview. It contains some wonderful quotes such as 'The Prussians were very good at this strategy sort of thing ...’ Priceless!

Sunday 16 January 2011

Can you use 15mm-scale vehicles with 20mm-scale figures?

I had a few minutes spare before we went shopping this morning, and whilst looking for something in my wargames/’toy’ room, I found a selection of AXIS AND ALLIES MINIATURES that I bought some time ago. This was very serendipitous as I wanted to look at the idea of combining 1:100th-scale vehicles with 20mm-scale figures, as used in the new ZVEZDA wargame about ‘Operation Barbarossa’. I was unaware that this wargame was now available in the UK until I read David Crook’s A WARGAMING ODYESSY blog this morning, but now that I am aware of its availability, I am in somewhat of a quandary. Do I buy a copy or should I try to produce something similar with the resources I already have? After all, until I know how similar or dissimilar it is to games like MEMOIR ’44, I won’t be able to decide what to do.

But before I looked at the compatibility of 1:100th-scale vehicles and 20mm-scale figures, I wanted to see how the AXIS AND ALLIES MINIATURES figures would look on my portable wargame board. The result was – to say the least – interesting.

I don’t know if I will develop a 20th century version of Joseph Morschauser’s ‘Frontier’ wargames rules to use on my portable wargame board … but the above photograph shows that this idea has possibilities.

Now on to the 1:100th-scale vehicle/20mm-scale figure comparisons. I have several different 1:100th-scale vehicles and 20mm-scale figures, and the following image shows a selection of them:

The vehicles in the background are a PETER PIG and AXIS AND ALLIES MINIATURES Sherman and the figures in the foreground are – from left to right – manufactured by RAVENTHORPE, SKYTREX, BRITANNIA, DIXON, IRREGULAR, and an original AIRFIX.

It is immediately apparent that the AXIS AND ALLIES MINIATURES Sherman does not look 'right' with any of the 20mm-scale figures ... but then they are all such different sizes that the large figures on the left do not look 'right' with those on the right side of the photograph. By eliminating the extremely small 1:100th-scale Sherman and the very large 20mm-scale figures, you end up with the following:

It is very obvious from this image that whereas the BRITANNIA, DIXON, and IRREGULAR figures do not look too bad when put alongside the smaller scale model tank, the original 20mm-scale AIRFIX figure ‘fits’ very well with the PETER PIG 1:100th-scale Sherman, and this is further borne out by a comparison with a PETER PIG 1:100th-scale Pzkpfw IV.

This comparison exercise does not provide a definitive answer to the question 'Can you use 15mm-scale vehicles with 20mm-scale figures?' ... but it at least indicates that the idea does deserve further investigation.

A day of 'rest'?

When we awoke this morning my wife announced that – emergencies excepted – today is going to be a day devoted to doing things at home. We may have to go out later to undertake some necessary 'retail therapy' or to go to the local golf club for a relaxing drink with friends, but other than that we shall be 'stay-at-homes' today.

Although this does not mean that I will be able to spend all day wargaming (perish the thought!), it does mean that I might be able to undertake some 'light' wargaming-related activity ... so watch this space!

An ‘interesting’ day

The ancient Chinese curse that you ‘may live in interesting times’ seems to have been visited upon me quite a lot of late.

Yesterday morning my wife and I paid a visit to my father. He seemed more settled, and actually laughed a couple of times, which is something he has not done for some time. We left him at lunchtime, and after eating lunch nearby, we went home.

We had been trying to speak to my father-in-law for the past couple of days to check up on how he was coping with life in general, and to find out if he needed us to do any shopping for him, but we had been unable to contact him by telephone. It was about 3.00pm when we got home after lunch, and after settling down for a quiet afternoon (and in my case, some wargaming-related activity!), we finally managed to make contact with my father-in-law … only to discover that he had been in hospital overnight after having had a car accident.

My wife and I immediately set off to see him in Herne Bay to find out if there was anything that we could do to help him. Once we got there he told us what had happened. On Friday morning he had set off in his car to do some shopping, and had somehow got lost during the drive home. The police had come to his aid, and given him directions so that he could get home, but on the drive back he managed to hit a brick that had fallen into the road. This punctured his car's two off-side tyres and had caused damage to the underneath of the car which resulted in his clutch and gearbox failing. Some different police officers then arrived on the scene, and because he appeared confused and a little dazed by what had happened, they insisted that he go to hospital for a complete check-up. He was also very strongly advised to stop driving. The hospital kept him in overnight, and brought him home by ambulance only a couple of minutes before we had telephoned him on Saturday afternoon.

As his car is probably a write-off, it is now quite a strong possibility that he will finally stop driving (he is, after all, 95 years old!) … but it now means that my wife and I will have to drive from London to Herne Bay at least once a week to take him shopping. As we are also committed to going to Hornchurch to see my father at least once a week for the foreseeable future, it looks doubtful if I am going to have much free time for some time to come.

With the Ofsted inspection still looming on the horizon, I certainly feel as if I am ‘living in interesting times’!

Friday 14 January 2011

The portable wargame: Another short tryout

Despite bewailing the fact in a recent blog entry that I had not had enough time to do any wargaming recently, circumstances provided me with an opportunity to do some far quicker that I had thought possible. I had expected to have to drive over to Herne Bay to see my father-in-law this evening, but he had already gone out and so the evening was relatively free (no pun intended!).

I therefore took the opportunity to give my portable wargame another short tryout, and what follows is a battle report that describes what happened.

Starting Positions

Turn 1
As only the British had an Artillery Unit, it fired before any movement took place. They aimed at the Mahdist Infantry Unit that was directly in front of them, threw a 4 on a D6 die, and hit the grid square in front of the target grid square.

Both sides then threw a D6 die to see who would move and fight first this turn. The British threw a 1 and the Mahdists threw a 2; the Mahdists were therefore able to move and fire first. The Mahdists then threw three ‘Risk Express’ dice to see how many Units they could move.

The results were pretty useless as the Mahdists had no Cavalry or Artillery, and the Mahdist Command Unit moved forward one square.

The British then threw their three ‘Risk Express’ dice and their results were hardly much better as they were only able to move their Artillery and Command Units and one of their Infantry Units.

Turn 2
The British Artillery Unit fired at the same target for a second time. This time they threw a 3 on a D6 die, which meant that their fire had landed in the grid square to the right of the target grid square. A second D6 die score of 4 meant that the Mahdist Infantry unit in that grid square was destroyed.

Both sides then threw a D6 die to see who would move and fight first this turn. The British threw a 2 and the Mahdists threw a 3; the Mahdists were therefore able to move and fire first. The Mahdists then threw three ‘Risk Express’ dice to see how many Units they could move. The results were much better this time ...

... and five Mahdist Infantry Units surged forward towards the British.

The British then threw their three ‘Risk Express’ dice and their results were hardly much better as they were only able to move their Cavalry and Command Units and one of their Infantry Units.

Turn 3
The British Artillery Unit fired at the Mahdist Infantry Unit that was directly in front of it. They threw a 5 on a D6 die, which meant that their fire had landed in the target grid square, and a second D6 die score of 2 meant that the Mahdist Infantry unit in that grid square was destroyed.

Both sides then threw a D6 die to see who would move and fight first this turn. The British threw a 5 and the Mahdists threw a 1; the British were therefore able to move and fire first. The British then threw three ‘Risk Express’ dice to see how many Units they could move. The results were much better this time ...

... as they allowed the British to withdraw their Artillery Unit slightly (thus removing it from the front rank of the British force) whilst enabling them to move three of their Infantry Units forward and the Cavalry Unit out towards the right flank.

The Mahdists threw their three 'Risk Express' dice to see how many Units they would be able to move.

As they had no Cavalry, the results generated by one of the dice was ignored, but the other two allowed the Mahdists to move four of their Infantry Units into contact with the British.

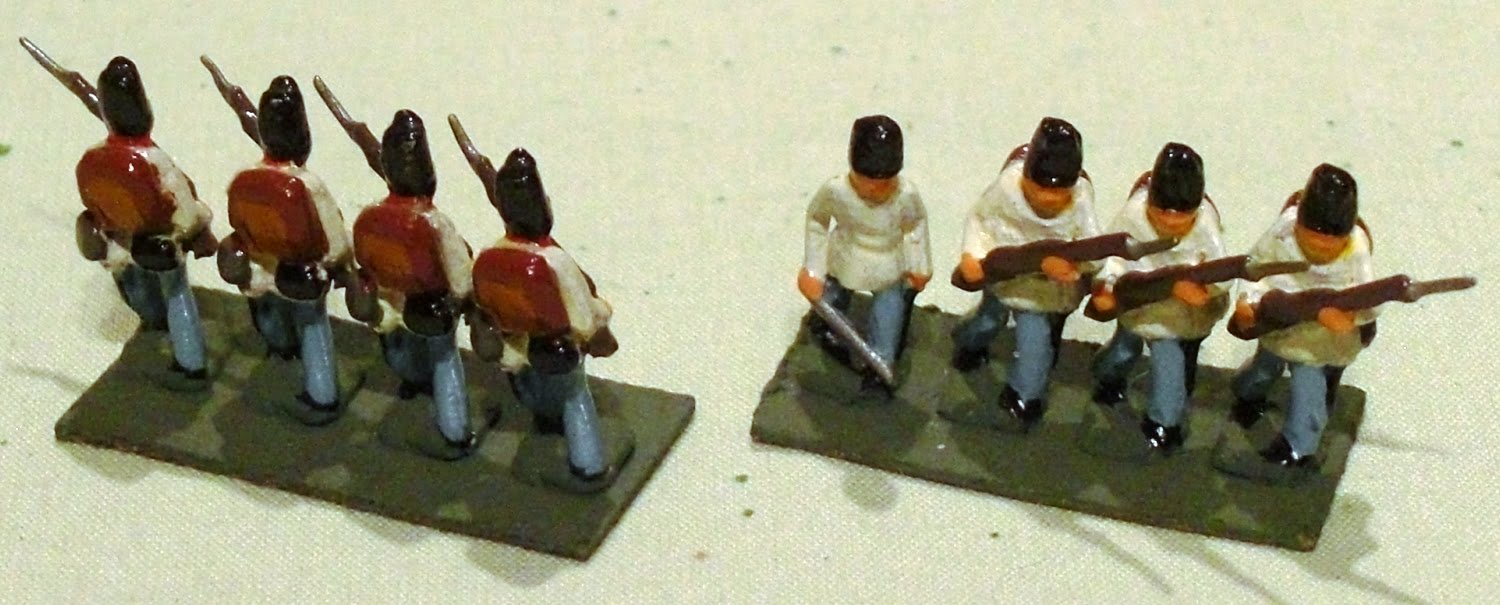
The resulting fighting was bloody.

From left to right:
  • The British Infantry Unit survived the Mahdist attack, and the Mahdist Infantry Unit was destroyed;
  • The Mahdist Infantry Unit pressed home its attack,and the British Infantry Unit was destroyed;
  • The British Command Unit survived the Mahdist attack (just!), and the Mahdist Infantry Unit was destroyed;
  • The Mahdist Infantry Unit's attack on the British Cavalry Unit failed, and the Mahdists were destroyed.
Turn 4
The British Artillery Unit fired at the closest Mahdist Infantry Unit. They threw a 6 on a D6 die, which meant that their fire had landed in the target grid square, and a second D6 die score of 4 meant that the Mahdist Infantry unit in that grid square was destroyed.

At this point the Mahdist force had been reduced to less than 50% of its original strength, and the British were adjudged to have won the battle.

Comments
The use of the 'Risk Express' dice made the battle much less predictable that it would have been without their use, and it also made playing the game solo much more satisfying.

The rules work well, and I can foresee using this portable wargame to fight some of the minor but important skirmishes that occur during a campaign. As such, it works both as a simple and quick stand-alone game as well as an adjunct to larger battles.
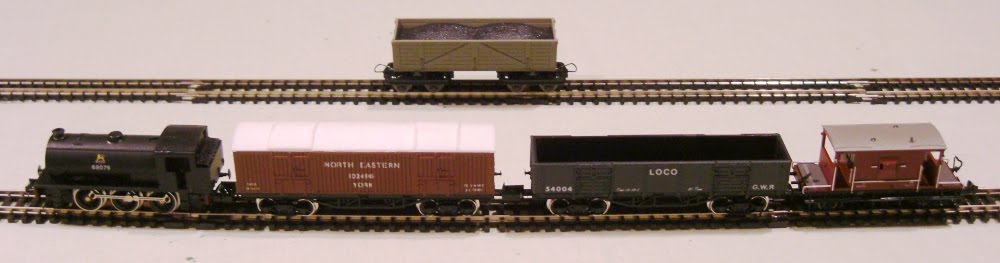