Pages

Saturday 30 November 2013

A quiet day before a busy week

After doing quite a bit of wargaming (and other things) this week, today should be relatively quiet. With luck I will be able make a few minor but neccessay changes to my ITCHY AND SCRATCHY rules before my wife and I go to visit some old friends who own a small holding in Kent. We are going out to dinner with them and, having looked at the restaurant's website, it looks as if we have a great meal to look forward to.

Tomorrow looks like starting with an early morning visit to Bluewater (a large shopping centre near the southern end of the Dartford Crossing) followed by some food shopping. If recent visits to Bluewater are anything to go by, my wife and I will return from the experience feeling tired and rather anti-social, having 'maxed-out' on crowded places during the brief time we will be there.

Monday will see me getting ready for and then attending a meeting of my Masonic Mother Lodge in Cheshunt, Hertfordshire, where we will be initiating a new Brother into 'The Craft'. My part in the ceremony is only a minor one, but it will be followed by a formal dinner where I am giving the toast to the visitors.

After the meeting I will be bringing home one of the other members of the Lodge, and he will be staying with my wife and I overnight. Both of us hope to go to Firepower: The Royal Artillery Museum on Tuesday morning after my wife has made us one of her memorable cooked breakfasts. After our museum visit I will take my friend to the local underground railway station so that he can get across London to catch his train home to Bristol.

On Wednesday my wife and I have to go to collect the new camera she is buying for me for Christmas. (It is an entry-level bridge camera made by Fujifilm, which we chose because it was reasonably priced even though it has a viewfinder and CMOS sensor.) We ordered the camera online using the 'click and collect' option rather than postal delivery one because we don't want to risk losing it in the mountain of mail that the Post Office has to deal with at this time of year.

I am not sure what will happen on Thursday ... but no doubt something will crop up that needs to be done. If I manage to do any wargaming over the next few days, it will be a miracle ... but miracles do sometimes happen!

Friday 29 November 2013

A further incident from the Rusland Civil War: The bridge over the River Malyava (or yet another Itchy and Scratchy play-test)

For the next play-test of my ITCHY AND SCRATCHY rules I decided to re-visit the Rusland Civil War.

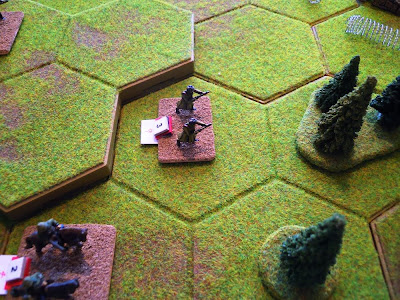
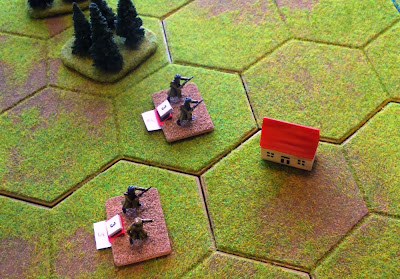
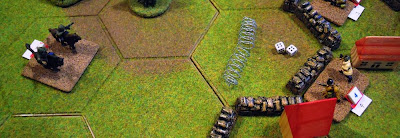
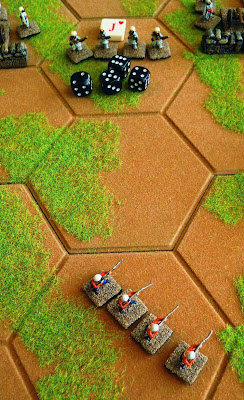
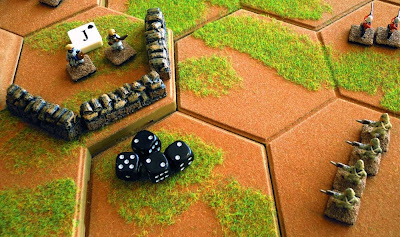
This play-test was set up so that I could try out a couple of ideas that had been occupying my mind over the previous days, namely the use of the rules with multi-figure based units and a playing card-driven unit activation system where each unit was allocated a specific playing card (as outlined in my blog entry).

Scenario
Major General Lentilov had a problem. He had been set the task of removing a large stockpile of weapons and ammunition from the town of Sittangrad on the River Malyava before revolutionary forces under the command of ColCom (Column Commander) Kornilov captured the town. In order to do this Lentilov had to hold the town – and its bridge – until the end of the day (i.e. for six turns).

Although he had only arrived in Sittangrad a few days before he received the order to abandon the town after its valuable contents had been removed, he had managed to order the construction of a series of defences (including trenches and barbed wire) behind which his troops could fight.


He did not have very many troops, but what he had were good:
  • Major General Lentilov: SP = 1 (Black 1)
  • 100th Artillery Battery: SP = 2 (Black 2)
  • 101st Machine Gun Battalion: SP = 2 (Black 3)
  • 102nd Rifle Battalion: SP = 4 (Black 4)
  • 103rd Rifle Battalion: SP = 4 (Black 5)
  • 104th Rifle Battalion: SP = 4 (Black 6)
  • Exhaustion Point: The loss of 9 SP
ColCom Kornilov commanded a much larger force … but its quality was somewhat variable. The infantry and cavalry were raw militia, but he had been given some artillery recruited from the Red Banner Fleet:
  • ColCom Kornilov: SP = 1 (Red 1)
  • Red Banner Artillery Battery: SP = 2 (Red 2)
  • 201st Cavalry Regiment: SP = 2 (Red 3)
  • 202nd Cavalry Regiment: SP = 2 (Red 4)
  • 203rd Rifle Battalion: SP = 3 (Red 5)
  • 204th Rifle Battalion: SP = 3 (Red 6)
  • 205th Rifle Battalion: SP = 3 (Red 7)
  • 206th Rifle Battalion: SP = 3 (Red 8)
  • 207th Rifle Battalion: SP = 3 (Red 9)
  • Exhaustion Point: The loss of 11 SP
Kornilov’s orders were to capture Sittangrad at all costs before the arms and ammunition that was know to be there were conveyed across the River Malyava.

Turn 1
Col Com Kornilov moved his forces towards Sittangrad. Major General Lentilov chose not to open fire on the advancing troops as he intended to hold his fire until they were much closer.


Turn 2
At the behest of ColCom Kornilov, the Red Banner Artillery Battery opened fire on the 101st Machine Gun Battalion, but the range was too great to achieve any serious results.


The 207th Rifle Battalion moved forward ...


... and in response Major General Lentilov changed his position so that he could support and command the 101st Machine Gun Battalion.


The 100th Artillery Battery then engaged the Red Banner Artillery Battery but the target was too far away for it to suffer any casualties.


202nd Cavalry Regiment advanced on the right wing ...


... whilst the Red Banner Artillery Battery fired for a second time at the 101st Machine Gun Battalion ... with the same negative result.


In the centre the 205th Rifle Battalion moved forward ...


... supported by the 206th Rifle Battalion.


On the left the 204th Rifle Battalion moved closer to the enemy trenches ...


... but it was then overtaken by the 203rd Rifle Battalion.


On the right the 201st Cavalry Regiment moved up behind the 202nd Cavalry Regiment.


Turn 3
The 205th Rifle Regiment charged forward into the barbed wire. (I decided that any unit stopped by barbed wire would not be allowed to engage in any form of combat until the barbed wire was removed.)


This gave Major General Kornilov the opportunity to order the 101st Machine Gun Battalion to fire at 205th Rifle Regiment ... with devastating results!


The 204th Rifle Regiment advanced towards the enemy defences and fired at the 104th Rifle Battalion, but was unable to cause them any casualties.


The 202nd Cavalry Regiment charged into the barbed wire on the left flank of the defences around Sittangrad ...


... and the Red Banner Artillery Battery fired at the 101st Machine Gun Battalion. The artillery was on target but yet again it was ineffectual.


The 103rd Rifle Battalion opened fire on the 202nd Cavalry Regiment ... and emptied half of the Regiment's saddles!


The 102nd Rifle Battalion fired at the remnants of the 205th Rifle Battalion ... and wiped them out!


The 101st Machine Gun Battalion shot at the 203rd Rifle Battalion and inflicted a casualty.


The 100th Artillery Battery fired over open sights at the oncoming 204th Rifle Battalion and caused it its first casualty.


On the other flank the 207th Rifle Battalion sought cover in the nearby wood ... and will no doubt incur the wrath of its political masters in the very near future for not showing a sufficiently aggressive attitude.


The 104th Rifle Battalion joined in the general firefight that had developed along the line of Sittangrad's defences, but was unable to inflict any casualties on the 203rd Rifle Battalion.


In the centre the 206th Rifle Battalion moved into the barbed wire protecting one face of the position occupied by the 101st Machine Gun Battalion.


At this point ColCom Kornilov ordered the Red Banner Artillery Battery to fire at the troublesome 101st Machine Gun Battalion. Their fire missed the 101st Machine Gun Battalion ... but hit and killed Major General Lentilov!


Whilst this was happening, the 203rd Rifle Battalion moved into the field of barbed wire in front of the 104th Rifle Battalion ...


... and on the right flank the 201st Cavalry Regiment joined the depleted 202nd Cavalry Regiment.


(At this point in the battle the ColCom Kornilov's troops had lost 6SP and their opponents had lost only 1 ... but it was their General, Major General Lentilov.)

Turn 4
Despite the loss of their commander, the 101st Machine Gun Battalion was undaunted and inflicted serious casualties upon the 206th Rifle Battalion.


The 204th Rifle Battalion fired over the marshy area at the 100th Artillery Battery, but caused no casualties.


The 202nd Cavalry Regiment managed to remove the barbed wire and engaged the 103rd Rifle Battalion in close combat. The 202nd Cavalry Regiment won the close combat, and the 103rd Rifle Battalion was reduced to half strength. (The 103rd Rifle Battalion could have given ground, but preferred to accept an additional casualty in order not to be forced to retreat.)


The Red Banner Artillery Battery tried to repeat its earlier success but was unable to hit the 101st Machine Gun Battalion.


The 103rd Rifle Battalion counter-attacked the 202nd Cavalry Regiment ... and completely destroyed it!


The 207th Rifle Battalion emerged from the wood and advanced towards the enemy positions.


The 104th Rifle Battalion fired at the 203rd Rifle Battalion, but were unable to inflict any casualties upon them.


The 203rd Rifle Battalion then removed the barbed wire that had earlier halted their advance and charged forward to engage the 104th Rifle Battalion. Despite the intensity of the fighting, neither side suffered any casualties.


The 100th Artillery Battery fired at the 204th Rifle Battalion and caused them a further casualty.


The 201st Cavalry Regiment finally fought their way through the barbed wire in front to the enemy's defences and attacked to 103rd Rifle Regiment. Neither side suffered any casualties ...


... but the 201st Cavalry Regiment was forced to withdraw.


In the centre the 206th Rifle Battalion attacked the 101st Machine Gun Battalion, but immolated itself in the process.


(At this point the attackers had reached their Exhaustion Point.)

The 102nd Rifle Battalion opened fire on the 201st Cavalry Regiment, but the range was too great and the fire too inaccurate for them cause any casualties.


ColCom Kornilov encouraged the Red Banner Artillery Battery to make more attempt to destroy the 101st Machine Gun Battalion ... but although they were on target the trenches prevented the 101st Machine Gun Battalion from suffering any casualties.


Realising the he was not going to be able to capture the bridge over the River Malyava by nightfall, ColCom Kornilov recalled his troops ... and effectively signed his own death warrant for failing to achieve his objective.


Although their casualties had been relatively light, the death of Major General Lentilov was a blow from which his army would take time to recover. They had achieved all that they had been asked to do ... but the loss of such a great general had been a high price to pay.

Conclusions
  • The simplest version of the playing card-driven unit activation that I outlined in my earlier blog entry worked very well indeed, and produced some interesting results.
  • The tabletop was unencumbered with playing card tiles, which – from my point of view – improved the whole look of the battle.
  • One unforeseen by-product of the playing card-driven unit activation was the aid the cards gave me when I was writing the turn-by-turn battle report. I had kept the cards in the order that they were turned over and this helped me to keep an accurate record of which units were activated in what order.
  • Using multi-figure unit bases and magnetic strength markers ensured that units did not 'dwindle away' but remained intact until they were destroyed. This was aesthetically much more pleasing on the eye ... and has given me something to think about as I had previously be of a mind to only use single-figure bases in future.

Thursday 28 November 2013

A different method of playing card activation

In one of his comments regarding the recent play-test of my ITCHY AND SCRATCHY rules, Arthur1815 made the following suggestion:
'I would suggest having counters labelled or linked to the units, and draw one at a time to determine which unit acts next, so that one does not know in advance the order in which one's own/enemy units will be activated. A bit more preparatory work, perhaps, and slightly slower in play, but surely more realistic?
This set me thinking, and I have come up with an idea that I want to play-test as soon as I can.

In an ideal world I would produce a special playing card (or unit card) for each unit. Together these would form a pack which could be shuffled and laid face down next to the playing surface. The top playing/unit card would then be turned over and that unit would then be activated. This is basically what Arthur1815 suggested ... but I have an idea that might take the whole thing one stage further.

My idea would be to allocate a suit colour and particular card number to each unit (i.e. the Frontier Guides are Red 1). The relevant cards would then be extracted from a normal pack of playing cards and used to make up a pack of unit cards for that battle. The pack would be shuffled and placed face down somewhere convenient. The top card would then be turned over, and the relevant unit would be activated. This would continue until all the cards – and units – had been activated. The pack would then be shuffled again … and the process repeated.

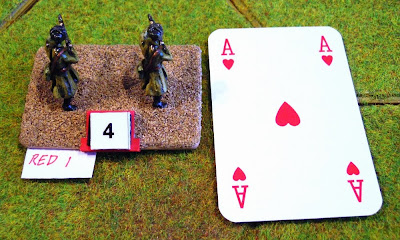
An example of a unit – in this case Red 1 – and the playing card that will activate it. This unit has a multi-figure base and a magnetic marker that represents its current strength. This magnetic marker would be changed as the unit begins to suffer casualties.
This simple system could easily be made more complex … and more unpredictable. If all the cards in a normal pack of playing cards – with the exception of the Jokers – were used rather than just the relevant ones, each unit would have two potential activations (i.e. Red 1 would be activated when the Ace or Hearts and Ace of Diamonds was turned over). This would mean that a unit might be activated for a second time immediately after it had been activated for the first time.

If the Jokers were included things could be made even more unpredictable by reshuffling the pack when a Joker was turned over. Using this method you could get rid of conventional ‘turns’ and have a continual series of unit activations. Not only that, but a unit might be activated more than once before a Joker is turned over … and some units may never be activated at all! This might seem a bit extreme, but it would certainly ensure an element of uncertainty in a game.

It seems to me to be a concept that is worth trying out once just to see whether or not it works, although my predisposition to making small evolutionary changes mean that I would probably want to start with the ‘one unit has one unit card’ option first.

Wednesday 27 November 2013

My fourth Wargaming in History book

Having read WARGAMING IN HISTORY VOLUME 3: GETTYSBURG 1863 – BRANDY STATION, BARLOW’S KNOLL, SICKLES’S FOLLY AND PICKETT’S CHARGE by John Drewienkiewicz and Adam Poole, and having a great interest in nineteenth century military history, it naturally followed that at some point I would have to buy WARGAMING IN HISTORY VOLUME 8: THE AUSTO-PRUSSIAN WAR OF 1866: THE OPENING BATTLES by John Drewienkiewicz and Andrew Brentnall. This has only recently been published by Ken Trotman Books (ISBN 978 1 907417 43 6) and I have been awaiting its arrival by post for some time.


The book has eleven chapters, five appendices, and has numerous colour photographs and maps:
  • Foreword
  • Place names then and now
  • Contents
  • Abbreviations
  • Introduction
  • Chapter 1: Opening Engagements of the Bohemian campaign
  • Chapter 2: Prussian Army of 1866
  • Chapter 3: Austrian and Saxon Armies of 1866
  • Chapter 4: Setting up the battles
  • Chapter 5: Gitschin 29 June: The Austrians obey
  • Chapter 6: Trautenau 28 June: Gablenz show the way
  • Chapter 7: Nachod 27 June: Ramming not up to speed
  • Chapter 8: Skalitz 28 June: Steinmetz surges forward
  • Chapter 9: An alternative Skalitz: Festetics to the rescue
  • Chapter 10: Conclusions
  • Chapter 11: The Battlefield Today
  • Appendix A: Chronology of the Austro-Prussian War
  • Appendix B: Further reading
  • Appendix C: Outline orders of battle
  • Appendix D: The rules for 1866
  • Appendix E: Information for wargamers
I bought two small ready-painted 15mm-scale Austrian and Prussian armies some years ago, and now that I have this book I might actually manage to use some of them on the tabletop other than in the guise of one of my imagi-nations.

Tuesday 26 November 2013

Lots to think about

Yesterday's blog entry generated a lot of very useful comments, and I have already begun to think about possible improvements that I can make to my existing ITCHY AND SCRATCHY rules.

I have also been thinking about the mid-twentieth century version of the rules that I want to develop. I already have a title – TOMMY AND JERRY – and I have my PORTABLE WARGAME: MODERN and MEMOIR OF MODERN BATTLE rules from which I can borrow ideas.

I do, however, have a couple of problems. One is aesthetic and revolves around whether I should develop the rules for individually-based figures or multi-figure bases. The other is more complex and revolves around my desire to re-fight the Eastern Front/Great Patriotic War ... but without the political aspects of the war between Nazism and Communism intruding into my campaign. In other words I do not want to field SS and NKVD units in my games ... but without them would I be re-fighting the Eastern Front/Great Patriotic War?

I do have a possible solution ... and that is to use imagi-nation versions of the two sides. I have already done this for my wars/battles set in 1891, and it would not be impossible to do the same for 1941. Germany would become Teutonia and Russia would be SPUR (the Soviet Peoples' United Republic). Teutonic allies could include Magyarvia, Remania, and any number of other smaller states.


The latter is just an idea at the moment ... but it would enable me to equip my model armies with generic rather than specific weaponry, which in turn would allow me to 'mix and match' all sorts of stuff that I already have available to use.

Monday 25 November 2013

On the borders of Gaziristan: An Itchy and Scratchy play-test

I set up this small battle in order to play-test the latest draft of my Itchy and Scratchy rules. Because it was played solo I used an alternative move sequence that relied upon playing card tiles to activate each side's units.

The turn sequence was as follows:
  1. At the start of each turn a small playing card or playing card tile is deal or picked out of the bag and placed FACE DOWN next to each unit and General on the tabletop.
  2. Once each unit and General has been allocated a small playing card or playing card tile, the small playing cards or playing card tiles are turned over and units and Generals are activated in turn. The order of activation is in ascending numerical/face value and suit order precedence (i.e. Ace, 2, 3, 4, 5, 6, 7, 8, 9, 10, Jack, Queen, and King being the numerical/face values, and Hearts, Clubs, Diamonds, and Spades the suit order precedence).
  3. Once both sides have moved and/or conducted combats with each of their units and Generals in turn – subject to any restrictions laid down in the rules – the turn is complete.
  4. Once both sides have moved and/or conducted combats with each of their units and Generals in turn they must check to see if they have reached their Exhaustion Point. Once that has been done, the turn is complete and the next turn can commence.
This play-test also gave me the opportunity to experiment with an idea that I had, and that was:
  • To allow a General to activate a unit they were co-located with when it was the General's turn to be activated and
  • To allow the unit the General was co-located with the be activated when it was the unit's turn to be activated.
By doing this it was possible for a unit to be activated twice during a game turn and gave a command role (rather than just a supporting role) to the General.

Background
Gaziri tribes, led by Mohamed Bashir Khan, have been raiding into Chindia again. The local army commander – Sir Hector Boleyn-Green – was given the task of preventing further raids, and as an old frontier hand he knew that the only way to do that was to mount a punitive expedition into Gaziristan. He could then disperse Mohamed Bashir Khan's supporters and destroy his base.

Mohamed Bashir Khan had based himself just inside the Gaziristan border. He had taken over and rebuilt an ancient stone tower in a valley which he thought he could defend with ease. His supporters had built a number of sangars atop the hills at the entrance to the valley and further sangars on the valley floor. Mohamed Bashir Khan knew that these defences would be difficult to break through and that any attackers should suffer serious casualties.


The forces he had available to deploy in the valley's defences were not insignificant, and include six warbands of tribesmen and two batteries of smooth-bore cannon


Sir Hector Boleyn-Green had been given a small Infantry Brigade (part of the Gaziri Frontier Field Force) with which to mount his punitive expedition. The brigade included:
  • 1st Battalion, MacBean Highlanders
  • 2nd Battalion, Royal Surrey Regiment
  • 3rd Battalion, Frontier Guides
  • Gatling Gun Detachment, Yorkshire Fusiliers
  • X Battery, Royal Artillery

Turn 1
The playing card tiles were picked out of their bag, placed face down next to each unit and General, and then turned over.


The units and Generals were then activated in turn.

One of the Gaziri Red Turban warbands opened fire on the MacBean Highlanders at maximum range ... and hit them!


This was followed by one of the Gaziri artillery batteries firing at the Frontier Guides ... to no avail.


The next unit to be activated (a Gaziri Cream Turban warband) remained where it was and did not fire.

The other Gaziri artillery battery then fired at the MacBean Highlanders, but their fire was inaccurate.


It was now the turn of the Frontier Guides, who moved forward and fired at the Gaziri Cream Turban warband in the nearby sangar. Their fire was on target but caused no casualties.


The next unit to be activated (a Gaziri White Turban warband) remained where it was and did not fire.

In the centre the Royal Surreys advanced but did not fire.


On the right flank the MacBean Highlanders advanced and fired at the Gaziri Red Turban warband in the nearby sangar ... and inflicted a casualty!


The next unit to be activated (a Gaziri Red Turban warband) remained where it was and did not fire.

X Battery, Royal Artillery moved out towards the left flank of the advance so that it could fire on the nearby sangar next turn.


The Gaziri Cream Turban warband in the sangar fired at the oncoming Frontier Guides, but inflicted no casualties.


At this point Sir Hector Boleyn-Green moved forward ...


... followed by the Gatling Gun Detachment, Yorkshire Fusiliers.


Mohamed Bashir Khan also moved forward to join one of the Gaziri artillery batteries.


The final unit to be activated (a Gaziri White Turban warband) remained where it was and did not fire.

Turn 2
The playing card tiles were picked out of their bag, placed face down next to each unit and General, and then turned over.


X Battery, Royal Artillery engaged the nearest sangar, and thanks to some superb shooting they inflicted a casualty on the Gaziri Cream Turban warband in the sangar.


The next unit to be activated (a Gaziri Red Turban warband) remained where it was and did not fire.

The Royal Surreys then opened fire on the Gaziri Red Turban warband, but their rifle fire was ineffective.


The next unit to be activated (a Gaziri Cream Turban warband) remained where it was and did not fire.

The Gatling Gun Detachment, Yorkshire Fusiliers then fired at the same Gaziri Red Turban warband. Their machine gun fire was much more effective than the Royal Surrey's rifle fire and caused a casualty.


Sir Hector Boleyn-Green, who was co-located with the Gatling Gun Detachment, Yorkshire Fusiliers, encouraged them to fire again ... which they did, inflicting a further casualty on the Gaziri Red Turban warband.


Not to be outdone by his opponent Mohamed Bashir Khan exhorted the Gaziri artillery battery with which he was co-located to open fire on the MacBean Highlanders ... but their fire was inaccurate and they missed their target.


It was now the turn of the Frontier Guides to engage the Gaziri Cream Turban warband in the nearby sangar ... and despite being under cover the Gaziris suffered a casualty.


At this point the MacBean Highlanders moved forward and engaged the remnants of the Gaziri Red Turban warband that was occupying the sangar. The Gaziris fought back, but the Highlanders prevailed and destroyed the Gaziri warband.


One of Gaziri artillery batteries opened fire on the Frontier Guides ... and missed.


One of the Gaziri White Turban warbands moved out of its defensive position and fired at the Royal Surreys ... but their rifle fire was ineffective and caused no casualties.


At that point the Gaziri Cream Turban warband in the sangar fired at the Frontier Guides without effect.


The next unit to be activated (a Gaziri White Turban warband) remained where it was and did not fire.

The Gaziri artillery battery that was co-located with Mohamed Bashir Khan fired at the MacBean Highlanders in the hope that they could inflict further casualties on them ... but despite the short range the artillery fire was inaccurate.


Turn 3
The playing card tiles were picked out of their bag, placed face down next to each unit and General, and then turned over.


One of the Gaziri White Turban warbands charged forward and engaged the Royal Surreys in close combat, causing one casualty and forcing them to withdraw.


The Royal Surreys replied with a volley of rifle fire which caused a casualty on the Gaziri White Turban warband.


The Gaziri artillery battery that was co-located with Mohamed Bashir Khan fired yet again at the MacBean Highlanders ... and caused them a single casualty.


X Battery, Royal Artillery fire at the nearby sangar that was occupied by a Gaziri Cream Turban warband but was unable to hit their target.


The remaining Gaziri Red Turban warband rushed forward to reoccupy the sangar and this brought them into close combat with the MacBean Highlanders. Both sides inflicted casualties on the other, but the MacBean Highlanders were forced to fall back.


The second Gaziri artillery battery fired at the Frontier Guides and inflicted a casualty upon them.


Despite this set-back the Frontier Guides were still able to fire at the Gaziri White Turban warband that had earlier engaged the Royal Surreys, but their rifle fire was ineffective.


As it appeared that the battle was beginning to go their way, the Gaziri White Turban warband that had been positioned behind Mohamed Bashir Khan moved forward and onto the lower, passable slopes of the mountain.


The Gaziri Cream Turban warband in the sangar fired at the Frontier Guides ... and reduced their numbers even further.


The remaining MacBean Highlander fired at the nearby Gaziri White Turban warband, and caused them to suffer a casualty.


The Gatling Gun Detachment, Yorkshire Fusiliers that was co-located with Sir Hector Boleyn-Green fired at the Gaziri Red Turban warband in the sangar ... and inflicted a casualty upon them.


The Gaziri artillery battery with which Mohamed Bashir Khan was co-located fired for a third time at the MacBean Highlanders ... and wiped them out!


With the urging of Sir Hector Boleyn-Green, the Gatling Gun detachment, Yorkshire Fusilier fired yet again at the Gaziri Red Turban warband in the sangar ... and inflicted yet another casualty.


Seeing an opportunity to deal the Frontier Guides a mortal blow, the Gaziri Cream Turban warband that had been on the lower slopes of the mountain charged forward ... and wiped out the Frontier Guides!


At this point Sir Hector Boleyn-Green realised that his troops were exhausted and stood no chance of winning the battle despite the fact that they had inflicted far more casualties than they had suffered. He therefore decided to withdraw in order to regroup and bring up reinforcements.


Mohamed Bashir Khan realised how close he had come to defeat, but the sight of his enemy retreating gave him and his surviving troops good reason to rejoice. A feast would be held to celebrate this victory over the accursed infidels ... but after that Mohamed Bashir Khan knew that he would have to prepare for further battles against his sworn enemy. He may have won today, but only Allah knew who would win tomorrow.

Conclusions
I fought this battle on and off over the space of three days, and the playing card tiles made it very easy to see which units had been activated and which had not.

The playing card tiles also made it easier to fight the battle solo as each activation was – in effect – a separate sub-turn. I looked at the tactical situation as a unit was activated and decided what its best course of action was at that particular moment.

The rule that allowed Generals to activate a unit that they were co-located with when it was the General's turn to be activated worked well, and I intend to incorporate it in the next draft of the rules.