Pages

Showing posts with label Donald Featherstone. Show all posts

Thursday, 11 September 2025

What wargame rules have influenced my World War II wargaming?

Whilst I was waiting for my wargaming mojo to return, I spent some time looking at the World War II wargame books on my shelves and thinking about how much they have influenced my World War II wargaming.

The first was Donald Featherstone's WAR GAMES ... and it was both his basic rules and Lionel Tarr's rules that I started using first.

My much battered copy of Donald Featherstone's WAR GAME. I do have a copy in much better condition and a copy of John Curry's reprint, but this volume has very fond memories for me.

In particular, the images of Lionel Tarr's Eastern Front/Great Patriotic War battle around Stalingrad ingrained themselves in my wargaming psyche and I still hanker to fight similar battles in my dotage!

The next was Charles Grant's BATTLE: PRACTICAL WARGAMING.

Once again, the battered cover of this book shows just how much usage it got in the years after I bought it.

The main text of this book had originally appeared as a series of articles in the long-defunct MECCANO MAGAZINE, and its influence on me was mainly the way in which Charles Grant organised his troops into units and sub-units and in his use of ROCO Minitanks. It is thanks to him that I have loads of T-34/85s and sWs half-tracks in my collection although most of them remain unpainted!

When it comes to showing how it was possible to model a whole variety of different military vehicles from the limited resources available at the time, John Sandar's AN INTRODUCTION TO WARGAMING stands head and shoulders above his contemporaries ... and his rules were bl**dy good as well!

Thanks to his influence, I have - over the years - converted all sorts of ROCO and Airfix military vehicles into something that I could not buy off-the-shelf ... as the recent photographs of my Eastern Front/Great Patriotic War collections show.

Some examples of John Sandar's vehicles, as featured in a book edited by Peter Young and entitled THE WAR GAME. The book was illustrated with photographs taken by Philip O Stearns.

I know that my old friend Chris Kemp (the designer of NQM or NOT QUITE MECHANISED) was also inspired by John Sandar's book, and his rules had a profound influence on my World War II wargaming. The original draft of the rules (which were originally titled PANZERBLITZ OR NOT QUITE MECHANISED) were quite literally drawn many years ago and I have followed their evolution and development ever since.

The cover of the very first edition of NQM. My copy was the first of only twenty!
The cover of the recently published edition of NQM.

NQM led indirectly to the development of Tim Gow's MEGABLITZ!, a set of rules that I had a small part in helping to develop.

I took part in many wargames using these excellent rules, and putting together armies for them led directly to the creation of my Eastern Front/Great Patriotic War collection.

A Megablitz battle that I staged at a wargame club in Norwich.

Finally, Frank Chadwick's COMMAND DECISION ...

... (and particularly his bathtub campaign book BARBAROSSA 25) ...

...made me realise that I could stage a large-scale Eastern Front/Great Patriotic War campaign if I felt so inclined.


Other books that deserve an honourable mentions include LIONEL TARR'S MODERN WARGAMING RULES 1939-1945 (as recently published by John Curry as part of his 'History of Wargaming' Project ...

... and Gavin Lyall's OPERATION WARBOARD.


WAR GAMES was written by Donald Featherstone and published in 1962 by Stanley Paul (ISBN 0 09 064901 X). It was republished in a revised edition in 2014 by the History of Wargaming Project (ISBN 978 1 2918 5142 7).

BATTLE: PRACTICAL WARGAMING was written by Charles Grant and published in 1970 by Model & Allied Publications Ltd/Argus Press Ltd.

AN INTRODUCTION TO WARGAMING was written by John Sandars and published in 1975 by Pelham Books Ltd. (ISBN 0 7207 0681 3).

NOT QUITE MECHANISED was written by Chris Kemp and published in 2024 by Lulu Inc. (ISBN 978 1 4452 7312 9).

MEGABLITZ! was written by Tim Gow and published in 2002 by Stratagem Publications.

COMMAND DECISION and BARBAROSSA 25 were written by Frank Chadwick and published in 1986 and 1988 respectively by Game Designers Workshop.

LIONEL TARR'S MODERN WARGAMING RULES 1939-1945 was compiled by John Curry and published in 2017 by The History of Wargaming Project (ISBN 978 1 3269 1498 1).

OPERATION WARBOARD was written by Gavin Lyall and published in 1976 by A&C Black (ISBN 0 7138 1646 6). It was republished in 2013 by the History of Wargaming Project (ISBN 978 1 2913 2352 8)

Tuesday, 20 May 2025

My first ever wargame article

I happened to be looking through my file of clippings when I came across a copy of the first ever wargame article that I wrote. It was published in issue No. 175 of the WARGAMER'S NEWSLETTER in October 1976, and was entitled BATTLE REPORT: THE BATTLE OF TAIPING ... and was a battle report about solo wargame set during the Sino-Japanese War.

I have reproduced this article below.


BATTLE REPORT

The Battle of Taiping

Preamble: This battle came about as a result of reading several books about the Sino-Japanese War. I possess a small Japanese Army based upon the Fujmi Japanese Infantry set and a First World War British Army suitable for use as Chinese Army units, and therefore set up the following battle. It was fought solo using my own rules which are based upon ideas by Featherstone, Sandars, Wise, and Grant. I also tried out a new idea of my own regarding major tactical decisions to remove bias in my decisions. When a major tactical decision had to be made, I wrote down 6 alternatives courses of action. I then threw a die and the number on the die was the course of action chosen.

Scenario: Several small Japanese units have been fired upon, and the local Japanese commander has decided to take punitive action against Chinese units in and around the village of Hanlow. In order to do this he has sent the following forces to Taiping, just north of Hanlow -

  • 1st, 2nd, 3rd, Infantry Coys.
  • A Mortar section.
  • A Machine gun section.
  • 3 Infantry guns.

The Chinese forces in and around Hanlow are as follows -

  • A, B, C, D, E and F Infantry Coys camped in the village.
  • An artillery battery (3 18pdrs) by the line of trees to the east of the village.
  • Sentries are at the railway bridge over the river and at the railway crossing.

Terrain: The terrain is a flat plain split be a railway embankment, which has paddy-fields to the north and south of it. A river (the River Tai) runs from north-east to south-west across the north-west corner of the plain.

The Battle: During the night, the 1st Japanese Company advance along the east bank of the river, whilst the 2nd and 3rd Companies, with the M.G. and Mortar sections moved towards the railway embankment along the Hanlow-Taiping road. The Chinese sentries were more alert than expected and were able to give a warning before being killed. The Japanese forces at the railway embankment now spead out along it, with the M.G. and Mortar sections sited to cover the road from Hanlow. The 1st Company continued its advance along the river bank after leaving a small force to cover the railway bridge.

The Chinese commander, on hearing the sentries' warnings, immediately alerted his men and dispatched A and B Companies towards the railway embankment, along the road. The Japanese held their fire until the Chinese were almost upon them, and then opened fire with all available weapons (rifles, light and heavy machine guns, 'knee' mortars, and 81mm mortars). The Chinese, who were becoming more and more visible in the growing light of dawn, now retreated to the paddy-fields after suffering heavy casualties.

In the meantime the 1st Company advanced further along the river bank and began to move into the southernmost paddy-fields. The Chinese C, D, E and F Companies now deployed towards those same paddy-fields, although unaware of the Japanese presence there. The Chinese battery opened fire on the embankment from their gun line near the trees, but only caused a few casualties on the well spread out Japanese forces there. They did, however, alert the Japanese commander to their presence, and he moved his infantry guns forward and formed a gun line to the rear of the embankment.

Using the paddy-fields as cover, A and B Companies had begun firing upon the embankment to cover the other companies as they advanced on the bridge. However, these four companies blundered into the Japanese 1st Company as it was deploying in the next field. The Japanese company commander did not hesitate in his actions and charged the Chinese, who, although superior in numbers, were shocked by the sudden appearance of the enemy on their flank. In the ensuing melee both sides suffered casualties but the ferocity of the Japanese attack had its desired effect, and the Chinese retreated towards Hanlow. The Japanese company commander, realising that the Chinese were only temporarily demoralised, and that he was considerably outnumbered, withdrew towards the river in order to make good an escape back to his own lines.

The Japanese infantry guns had, by now, moved into position and begun firing upon the Chinese gun line, who were still trying (in vain) to dislodge the Japanese on the embankment. The Japanese guns were, however, very effective, and within short time, had caused several casualties amongst the Chinese gunners. The Chinese now switched their attention to counter-battery fire, but without any observation their fire remained ineffective and wide of the target.

The Chinese commander now reviewed his situation. His artillery was not being very successful (especially in view of mounting casualties to the gunners) and although A and B Companies were in contact with the enemy, C, D, E and F Companies wee shaken after the skirmish in the paddy-fields He was also aware of a Japanese force on his flank (although unaware that this force was, in fact, retreating). He therefore decided that withdrawal was the best course he could take, and issued orders to the artillery to cease fire and move southwards with C, D, E and F Companies. He also ordered A and B Companies to slowly withdraw southward to cover the retreat. The Japanese 2nd and 3rd Companies , seeing this retreat, began to advance down the Hanlow-Taiping road, but were checked by A and B Companies long enough for the main Chinese force to withdraw, although the infantry guns were able to inflict some casualties upon the retreating force. When the Chinese finally withdrew off the battlefield the Japanese advanced and occupied Hanlow.

Conclusions and observations: The Japanese attack was not as successful as it should have been. The main advance down the Hanlow-Taiping road stalled as soon as the sentries alerted the main Chinese force. The flank attack also failed in its main purpose because of the size of the attacking force.

The Chinese counter-attack failed for two main reasons. Firstly the artillery support was bad as lack of observation made it impossible to adjust ranges, etc. Secondly the lack of reconnaissance by C, D, E and F Companies when advancing towards the railway bridge across the paddy-fields.

The battle was very enjoyable, and the new idea I tried out with regard to major tactical decisions worked quite well. An example of how well it did work is in the reaction of the main Japanese force when the Chinese sentries managed to give the alarm. I gave the commander the following 6 alternatives and then threw the die -

  1. Withdraw to Taiping.
  2. Leave a company to guard the crossing and send the rest of the troops towards the river.
  3. Leave a company to guard the crossing and advance wit the remainder.
  4. Stay put and defend the embankment.
  5. Continue the advance.
  6. Using the embankment as cover move the entire force toward the river.

The die score was 4 and this was the course of action which was followed.

By using such a system it is possible to have forces reacting to situations without bias on the part of the solo player, as long as he keeps the alternative options reasonable. I am going to use this system again in solo games as I found that it made this one more enjoyable than my usual games have been. If you are a solo player you might like to try it. Please do - you might find that it works as well for you as it did for me!


This was the first of several articles that I submitted to the WARGAMER'S NEWSLETTER and when the latter ceased publication, it directly led to an invitation from the late Dr Paddy Griffith to attend the famous Moor Park 'New Directions in Wargaming' Conference (the first ever Conference of Wargamers or COW). By the end of that conference I had suggested the name of the new organisation we created (WARGAME DEVELOPMENTS) and become the Treasurer and Memberships Secretary ... a role that I still perform some forty-five years later!

Thursday, 10 October 2024

The Empire of Scandinavia vs. The Empire of the Baltic: An ironclad naval battle

Donald Featherstone’s NAVAL WAR GAMES: FIGHTING SEA BATTLES WITH MODEL SHIPS was published in 1965 and I bought my copy in the late 1960s.

One battle that stood out at the time was the one described in the chapter devoted to fighting naval wargames set during the later nineteenth century. It was fought using rules written by Walter Gurney Green and saw the fictional Empire of Scandinavia take on the Empire of the Baltic … and win (just!) after a flurry of ships ramming each other.

The ships involved were as follows:

The Empire of Scandinavia

  • Battleship Denmark: 4 x 12.5-inch Rifled Muzzle-loading guns; 20-inch armour; 12 knots
  • Battleship Sweden: 4 x 12.5-inch Rifled Muzzle-loading guns; 20-inch armour; 12 knots
  • Battleship Hotspur: 1 x 10-inch Rifled Muzzle-loading gun; 3 x 64-pounder Rifled Muzzle-loading guns; 10-inch armour; 12 knots*
  • Battleship Huascar: 2 x 10-inch Rifled Muzzle-loading guns; 3 x 64-pounder Rifled Muzzle-loading guns; 10-inch armour; 12 knots*

The Empire of the Baltic

  • Battleship Latvia: 2 x 12.5-inch Rifled Muzzle-loading guns; 2 x 64-pounder Rifled Muzzle-loading guns; 18-inch armour; 10 knots
  • Battleship Lithuania: 2 x 12.5-inch Rifled Muzzle-loading guns; 2 x 64-pounder Rifled Muzzle-loading guns; 18-inch armour; 10 knots
  • Battleship Devastation: 4 x 10-inch Rifled Muzzle-loading guns; 14-inch armour; 14 knots*
  • Battleship Dreadnought: 4 x 10-inch Rifled Muzzle-loading guns; 14-inch armour; 14 knots*
  • Screw-sloop Crown Prince: 28 x 11-inch Smoothbore Muzzle-loading guns; No armour; 10 knots

Some of the ships were based on real warships (indicated above by *) and the others were imaginary designs. I’ve long hankered after recreating this battle … and it might be a nice little project for me to undertake in the near future.


The ‘real’ ships that took part

  • HMS Hotspur

  • Huascar

  • HMS Devastation

  • HMS Dreadnought


The fleets in action

The Empire of Scandinavia's fleet (the light grey ships) under attack by ships of the Empire of the Baltic's fleet (the dark grey ships).
Both sides engage each other at short range.  The Hotspur was heavily damaged but managed to torpedo and sink the Latvia and Lithuania. She was then sunk by a torpedo fired by the Crown Prince.

Wednesday, 19 July 2023

Looking back in order to go forward

COW2023 gave me the opportunity to take part in two World War 2 wargames: Tim Gow's LITTLE WORLD WARS and Chris Kemp's NQM: NOT QUITE MECHANISED. As a result, I've been thinking about the rules I want to use for my much-planned Eastern Front/Great Patriotic War project.

Coincidentally, during the conference I spoken to a wargamer who had play-tested the earlier version RED FLAGS & IRON CROSSES ... and that set me thinking about the World War 2 rules that I wrote before I began work on what became the PORTABLE WARGAME, RED FLAGS & IRON CROSSES: TARRED AND FEATHERSTONED. These were published as an appendix to John Curry's 2009 reprint of Donald Featherstone's WARGAMING AIRBORNE OPERATIONS. I still have the MS Word file containing the rules somewhere on my computer, and I hope to print off a copy in due course to see if there is some way that I can meld elements of it with elements of the PORTABLE WARGAME.

The following are some photographs of one of the play-test battles I fought using RED FLAGS & IRON CROSSES: TARRED AND FEATHERSTONED back in 2008.

Sunday, 5 December 2021

Fletcher Pratt Naval War Game

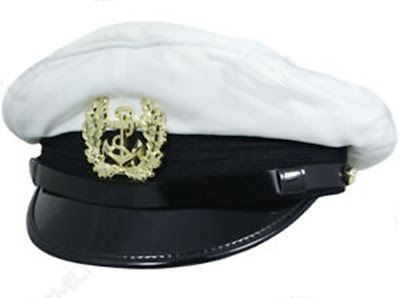
This morning I am off to central London to take part in a naval battle that is being put on by members of the Jockey's Fields Irregulars. The rules that are going to be used are a version of Fletcher Pratt's Naval Wargame rules, and my role will be to act as the admiral commanding one of the opposing fleets. I have even bought a suitable hat for the occasion!

When I was younger and fitter, I used to enjoy being one of the active participants in a Fletcher Pratt's Naval Wargame, but age and infirmity (mainly arthritis) mean that although I can get down without any problems, getting back up is somewhat difficult ... and I cannot spend the entire day crawling about on the floor!

I was first read about Fletcher Pratt's Naval Wargame in Donald Featherstone's book NAVAL WAR GAMES but never used the rules until I took part in Eric Knowles's Madasahatta Campaign. During one of the battles we fought during that campaign, I commanded the Imperial Japanese battleship Fuso ... with deadly results for the combined German/Turkish squadron opposing me!

Saturday, 12 June 2021

Paddy Griffith's Wargaming Operation Sealion

Back in 1974, Paddy Griffith was a fairly new member of the staff of the Royal Military College, Sandhurst, when he conceived the idea to run a serious historical wargame that examined what might have happened had the Germans attempted to carry out Operation Sealion. It was one of the first wargame of its sort and is credited by Peter Perla as showing that a wargame could be a serious academic tool when use was made of proper historical analysis, statistical modelling, and applied human experience.

The DAILY TELEGRAPH sponsored the event, and it was staged at the Army Staff College. The list of participants is very interesting, and included:

  • General Adolf Galland: Holder of the Kight's Cross of the Iron Cross, with Oak Leaves, Swords, and Diamonds, he was a fighter ace who had flown in combat from the Spanish Civil War until the end of the Second World War.
  • Major Rudolf Rothenfelder: An ex-Luftwaffe pilot who became President of the German Fighter Pilots Association.
  • Admiral Freidrich Ruge: Holder of the Knight's Cross of the Iron Cross, he commanded naval forces in the North Sea, Italy, and the Channel during the Second World War. He became the first commander of the Federal German Navy.
  • Admiral Prof Dr Jurgen Rohwer: German naval historian who served aboard several destroyers and minesweepers during the Second World War.
  • Admiral Dr Schunemann: German naval attaché in 1974,
  • General Heinz Trettner: Holder of the Knight's Cross of the Iron Cross, he served as Chief of Operations of 7th Flieger Division in 1940, before taking part in the invasion of Crete. He later commanded 4th Fallschirmjager Division, and after the war he became commander of the Federal German Army.
  • Air Chief Marshal Sir Christopher Foxley-Norris GCB, DSO, OBE, FRSA: He served as a fighter pilot during the Battle of Britain. After the Second World War he served as Assustant Chief of the Defence Staff, commander of RAF Germany, and the 2nd Tactical Air Force.
  • Rear Admiral Edward Findlay "Teddy" Geuritz CB, OBE, DSC & Bar: He was the third most senior member of the beachmaster party on Sword Beach on D-Day. After the war he served as Deputy Director of the Royal Naval Staff College before a stint on the Naval Staff at the Admiralty. He then moved to become Captain of the Fleet for the Far East Fleet, then Director of Defence Plans (Navy), Director of the Joint Warfare Staff, and President of the Royal Naval College, Greenwich. His last appointment was as Commandant of the Joint Warfare Establishment.
  • Major General Glyn Charles Anglim Gilbert CB MC: He came ashore at Normandy in command of a company of 2nd Lincolns, and he fought with them throughout the subsequent campaign to liberate France. He took part in the Rhine crossing, and was still leading his company when they captured Bremen in 1945. After the war he transferred to the Parachute Regiment, and commanded of the Territorial Army's 44th Parachute Brigade before becoming the Commandant of the School of Infantry, Warminster. His final posting was as General Officer Commanding 3rd Division.
  • John Davis: One of the wargaming pioneers, his figures were used in the episode of CALLAN that featured a wargame,
  • Andy Callan: One of the founding fathers of Wargame Developments and still one of the most innovative wargame designers around.
  • Brigadier Page: He was the Assistant Commandant of the RMA Sandhurst at the time of the wargame.
  • Dr Antony Brett-James: After service with the Royal Corps of Signals during the Second World War, he served for a time as Head of the War Studies Department at Sandhurst.
  • Professor Michael Orr: He lectured in War Studies at the Royal Military Academy, Sandhurst, from 1969 to 1984. He later worked at  the Conflict Studies Research Centre, and amongst other things he is currently a Honorary Research Fellow in War Studies at the University of Birmingham, editor of the Records of the Douglas Haig Fellowship, and Secretary General of the British Commission for Military History.
  • Nigel de Lee: He taught war studies at Sandhurst, before moving on to teach history at the US Naval Academy, Annapolis, and Operations and Tactics at the Krigsskolen in Oslo.
  • Dr David Chandler: After serving as a Captain in the British Army, he lectured at Sandhurst and held held three visiting professorships at Ohio State University, the Virginia Military Institute, and the Marine Corps University. He specialised in the study of the Napoleonic Wars, and was an acknowledged expert on Napoleon's military career.
  • 'Lieutenant' Featherstone: THE Donald Featherstone, who was 'temporarily' (and unofficially) promoted from his wartime rank of sergeant and allocated to the team from 44th Parachute Brigade who assisted in the running of the wargame.

A report on the wargame was featured in the DAILY TELEGRAPH, and Richard Cox used it as the 'plot' for his 'what if' novel about Operation Sealion.

A very poor-quality photograph of those taking part in the 1974 Operation Sealion wargame at the British Army Staff College. The map over which the battle was fought can be seen in the centre of the photograph.

This book contains a wealth of information and was put together by John Curry from Paddy Griffith's notes and records. It not only includes the background information and player briefings, but also the rules used and the data required to run the wargame.

In addition, there is a scale-down version of the wargame that was devised by John Curry for use by a smaller group or wargame club. This was used at the Wargame Developments Conference of Wargamers in 2008, and I contributed my research into the naval forces that would have been involved had Operation Sealion taken place.

I think that this will be one of those books that serious wargamers will want to have on their shelves. IT shows that wargaming is not only a fun hobby but can also be a very useful historical research tool if used correctly. I leave the final words to Peter Perla:

'Finally, to me, one of the more interesting and cogent contributions contained herein is the short section on Griffith's Reflections on wargaming in general and Sealion in particular. Those alone are worth the price of admission.'


PADDY GRIFFITH'S WARGAMING OPERATION SEALION: THE GAME THAT LAUNCHED ACADEMIC WARGAMING was edited by John Curry from the writings of the late Dr Paddy Griffith. It was published in 2021 by The 'History of Wargaming' Project (ISBN 979 8 5106 7146 9).

Friday, 3 January 2020

The Miles Rounders

Further to some of the comments made to yesterday's blog entry, I've looked at my copy of Donald Featherstone's ADVANCED WAR GAMES and the following are images of the devices devised by Ron Miles that were known as 'Miles Rounders'.

Miles Rounder for discovering the results of gunfire (World War II)


This was devised specifically to work with Lionel Tarr's modern wargame rules (as published in WAR GAMES).

Miles Rounder for ascertaining the morale state of a formation after a melee or after taking fire


Miles Rounder for the effects of fire by muskets and artillery on infantry and cavalry (Horse and Musket era)


I have reproduced the above as best I can, but better copies are available in ADVANCED WAR GAMES.

ADVANCED WAR GAMES was written by Donald Featherstone and originally published in 1969 by Stanley Paul. It is now available from the 'History of Wargaming' Project (ISBN 978 1 409 26138 4).

WAR GAMES was written by Donald Featherstone and originally published in 1962 by Stanley Paul. It is now available from the 'History of Wargaming' Project (ISBN 978 1 291 85142 7).

Lionel Tarr's modern wargame rules are available from the 'History of Wargaming' Project (ISBN 978 1 326 91498 1).

Saturday, 6 April 2019

Spring cleaning ... and Salute 2019

Every so often the feeling that I really ought to have a bit of a tidy up comes upon me. With the change to British Summer Time, the general improvement in the weather, and with Easter just a few weeks away, I decided that I needed to do a bit of Spring cleaning.

Tidying up my toy/wargame room didn't take very long, so I moved on to my computer. Over the years I have stored all sorts of stuff in files, and I decided to sort and rationalise the file structure ... after I'd backed up the existing files onto a removable hard drive!

As one can easily imagine, there were quite a few files of photographs I'd taken during our cruises and a lot of files relating to wargames and wargaming ... including drafts of several sets of rules. Going through them was time-consuming, especially as I found one or two forgotten gems.

Some of photographs will be featured as blog entries over the next few weeks. As to the drafts of wargame rules ... well most of them have been published over the years, but one set that has not been made public, stood out. It was the original version of RED FLAGS AND IRON CROSSES.


A developed version of the rules – RED FLAGS AND IRON CROSSES – TARRED AND FEATHERSTONED – were featured in some of my earliest blog entries and published in DONALD FEATHERSTONE'S WARGAMING AIRBORNE OPERATIONS (edited by John Curry and published by the 'History of Wargaming' Project [ISBN 978 1 4092 8647 9]).


The latter combined:
  • A card activation system
  • Move distances (converted into hexes) from Lionel Tarr’s rules
  • A combat system that drew on that used in Donald Featherstone’s published rules
The original RED FLAGS AND IRON CROSSES were somewhat different, with far more reliance on the use of playing cards to generate randomness. For example, if a unit in cover was hit, a playing card was turned over. If the card was black, the cover prevented the hit from being effective whereas if the card was red, the cover was ineffective, and the unit was hit.

Looking at them afresh over ten years later, the rules do have much to commend them, and some of the concepts and mechanisms I used when creating them might well be the basis of a set of rules that, when combined with elements of my PORTABLE WARGAME rules, I could use for my much-planned solo Eastern Front/Great Patriotic War project.

Its certainly something worth thinking about.

As regular blog readers will have noticed, today is the day that SALUTE 2019 is taking place at ExCel in Docklands. ExCel is almost directly north of where I live in south-east London, and I can actually see the building from the top of my driveway.

Getting there by public transport would not have been very difficult. I could have taken a bus to Woolwich Arsenal, followed by a journey on the Docklands Light Railway to Customs House or Prince Regent stations via Canning Town. The journey time would have been between forty-five to sixty minutes, depending upon the time I had to wait at various places to catch a connection.

I could have gone ... but I have chosen not to because – due to other commitments – I would only have had just about enough time to get there, queue to get in, spend about an hour looking around, and then have had to come home again. I'm of an age when that sort of rushing about is best avoided, as it is far too stressful, and would have reduced the enjoyment I would have had from going.

Friday, 6 October 2017

The War Game ... edited by Peter Young

A recent comment that the terrain created by the late Peter Gilder for the film CALLAN was also photographed and used in the book edited by Peter Young and entitled THE WAR GAME made me look out my copy of the book ... and reminded me how much it had inspired me when I first saw a copy.


The book was divided into ten chapters (each of which covered a major battle and was written by a different author) and two appendices:
  • THERMOPYLAE BC480 by Charles Grant
  • AGINCOURT 1415 by Philip Warner
  • EDGEHILL 1642 by Peter Young
  • BLENHEIM 1704 by David Chandler
  • LOBOSITZ 1756 by Charles Grant
  • SARATOGA 1777 by Aram Bakshian Jr
  • AUSTERLITZ 1805 by David Chandler
  • WATERLOO 1815 by James Lawford
  • GETTYSBURG 1863 by Clifford C Johnson

  • EL ALAMEIN 1942 by Donald Featherstone

  • Appendix 1: The Principles of War Gaming
  • Appendix 2: Model Soldier Suppliers

THE WAR GAME was edited by Brigadier Peter Young and illustrated with photographs taken by Philip O Stearns. It was published by Cassell & Company Ltd in 1972 (ISBN 0 304 29074 2).

In the acknowledgements at the back of the book it states that the figures came from the collections of David Chandler, Peter Gilder, Charles Grant, Lieutenant Commander John Sandars, Ed Smith, John Tunstill, and Brigadier Peter Young, and that the terrain was specially made for the book by Hinchliffe Models of Huddersfield.

Tuesday, 24 November 2015

Colonial inspiration!

I have been fumbling about for some inspiration for my first tabletop battle in some time ... and then I came across some pictures that I had used in a blog entry that I wrote quite some time ago.


The pictures are of one of Joseph Morschauser's wargames, and they were featured in his book HOW TO PLAY WAR GAMES IN MINIATURE. From the description in an article about his wargame that Joseph Morschauser sent to Donald Featherstone, and which the latter published in WARGAMER'S NEWSLETTER: No.66 (September 1967), they appear to show an attack by British troops on the Great Wall of Morobad, which surrounded the city of that name.

These photographs have given me an idea for a scenario, and I hope to use it for my forthcoming wargame.

Tuesday, 27 October 2015

Red Flags and Iron Crosses

Yesterday I happened to be looking back at the first few blog entries that I wrote. They were about the set of World War II rules that I was then developing ... RED FLAGS AND IRON CROSSES: TARRED AND FEATHERSTONED.

Re-reading about my various play-tests, I realised that they were a better set of rules than I remembered them being. Perhaps I ought to give them another try sometime soon? In the meantime, here are some of the photographs I used to illustrate those early blog entries.


For those of you who like to know a bit more about the models etc. that I used, they were:
  • Terrain: Hexon II
  • Trees: Cheap model railways trees that I based after adding additional flock to the foliage
  • Buildings: N-gauge Hornby model railway buildings
  • Walls/Entrenchments: Hovels
  • Aircraft: Pre-painted models issued with a magazine part-work
  • Tanks: Corgi pre-painted models
  • Vehicle: Matchbox plastic kit
  • Artillery: Skytrex
  • Figures: Various manufacturers including Raventhorpe, Tumbling Dice, Skytrex, and Britannia