Pages

Showing posts with label Budget Model Railways Challenge. Show all posts

Friday, 3 July 2026

Model railways, mini-campaigns ... and the ghost of an idea

Looking at the map of the Fiddletown & Copperopolis Railway ...

... I was struck by the similarity to the sort of maps found in Donald Featherstone's book, WAR GAME CAMPAIGNS. This set me thinking ... and I remembered the 'Long Live The Revolution!' mini-campaign that I included in my book, DEVELOPING THE PORTABLE WARGAME.

The campaign was a linear one and players moved backwards and forwards from one map to another, thus:

Regional Capital

Provincial Capital

Railway Station

Capital City

Now, the last two maps had railways of them, and it would not be that difficult to add some railway track to the others. I could easily build four small, self-contained baseboards (in the style of those featured in the Budget Model Railway Challenge) that I could then use to fight a mini-campaign on, based on the 'Long Live The Revolution!' one ... and I could also connect all four together to create a small model railway.

I don't know if anything will come of this idea ... but it is certainly an interesting mini-campaign to think about!

Thursday, 14 August 2025

I'll tell you a story ...

... about losing my wargaming and railway modelling mojo.

I think that periodically most wargamers and railway modellers lose their enthusiasm for their hobbies. Sometimes it lasts a few day, sometimes a few weeks ... and sometimes even longer. In my case, this lack of enthusiasm has been coming on for some time and for several reasons.

Firstly, since I broke my leg on 10th April last year, getting to my toy/wargame room – where I do most of my wargaming and railway modelling – has been difficult. After a spell in hospital, I was confined to bed until the end of last August and could not walk – even aided – until the middle of September. I finally made it up to my toy/wargame room in mid-October, once we had a stairlift installed. However, accessing the room still remains problematic, and carrying figures, terrain, etc., up or down from the room is very difficult. This means that my wargaming and railway modelling are pretty well restricted to a single room on the top floor of our house ... and that rooms gets very hot during the summer months.

Secondly, most of my wargaming figures and terrain are in a storage unit some miles away and not easily accessible. We did this in preparation for our planned house move last year ... the house move that never took place because I broke my leg! I do have my Belle Époque collection and some of my Eastern Front/Great Patriotic War collection in my toy/wargame room as well as a small selection of Hexon II hexes ... but I really need more of the latter to hand to be able to fight a wargame. That said, most of my model railway stuff is in my toy/wargame room and easily accessible.

Thirdly, I seem to feel mentally and physically tired almost all the time. There is a well-known joke about old people falling asleep almost as soon as they sit in an armchair, but I can confirm that like most jokes, it contains an element of truth! I regularly wake up in the morning feeling as if I haven't slept well and doze off for up to an hour most afternoons. This is not conducive to working on one's hobbies as the tiredness saps one's ability to concentrate and then one begins to make mistakes, which are – in turn – very demoralising.

Fourthly, my recent floating shelf model railway project has – to use an appropriate metaphor – hit the buffers. As I mentioned in a past blog post, I had problems with the paint I was using not sticking to the plastic that covered the MDF floating shelf. I did find a solution (peel off the Fablon-like plastic to expose the MDF) but after that I ran into another problem, this time with the layout's wiring. Now this is not something that I expected to happen as I am using KATO Unitrack, which is well-known for its ease of use and outstanding reliability. I finally traced the problem to one of the points, whose mechanism was jamming and replaced it ... only to find that almost all of my locomotives had stopped working! Even after servicing each of the locomotives (i.e. cleaning the contacts and oiling the bearings), the reliability of all but one of them remains marginal if not downright poor.

Now, experience has shown me that when things are going wrong, it makes no sense to continue pushing forward. Doing that merely reinforces failure ... and can lead to a feeling of greater ennui and even depression. I am – therefore – planning to stop working on any serious wargaming or model railway projects for the next few weeks. I hope that by taking a break, my enthusiasm and energy will return sometime soon. I will, however, continue to blog as often as I can.


The title of this blog post comes from the opening line of the following poem.

I'll tell you a story
About Jack a Nory,
And now my story's begun;
I'll tell you another
Of Jack and his brother,
And now my story is done.

This short poem, which dates from the middle the eighteenth century, gave its name to JACKANORY, ...

... the famous BBC children's TV programme that was broadcast between 13th December 1965 and 24th March 1996. It featured an actor (often a famous one, including Tom Baker, Bernard Cribbins, Edward Fox, Sir Michael Horden, Sir Ian McKellen, Spike Milligan, Sir Tony Robinson, Sir Patrick Stewart, and Kenneth Williams) reading children's books or folk tales, usually whilst they were seated in an armchair.

Friday, 25 July 2025

The Budget Model Railways Challenge floating shelf layout: A problem has made me rethink my layout

My attempts to make progress on my Budget Model Railways Challenge floating shelf layout have been thwarted by a recurring problem ... nothing seemed to stick to my shelf!

I had painted the top surface of the shelf with two coats of yellow ochre acrylic craft paint before fixing the track in place and had also painted the edges with three coats of black acrylic craft paint and three coats of gloss polyurethane varnish. I then tried to use some masking tape on the top of the shelf so that I could paint a road on the shelf ... but when I removed the tape, it took off the paint underneath it!

For some reason the paint had not adhered to the surface of the shelf. I therefore put a length of masking tape on one edge of the shelf and removed it ... and the paint came off there as well!

I took a look at one of the other floating shelves I had bought, and realised that the surface was actually a thin layer of Fablon-like material and that was why the paint was not adhering to the surface of the shelf. I therefore used the tip of a sharp craft knife to lift the edge of the surface covering which – with a bit of effort on my part – peeled off, leaving me with an MDF surface that the paint will adhere to.

I am therefore going to restart my layout from the beginning ... and I am going to take my inspiration from P D Hancock's CRAIG & MERTONFORD RAILWAY. This layout featured Craig Harbour, and I may well include a small harbour on my layout.

A map of the final version of P D Hancock's Craig & Mertonford layout. The harbour is located on the left-hand side of the layout. (© P D Hancock)

Saturday, 19 July 2025

Whatever happened to the Budget Model Railway Challenge floating shelf layout?

The simple answer is ... not a lot recently.

The reasons are simple to explain, namely a two-week cruise from 22nd June until 6th July (and all the subsequent post-cruise sorting out), followed by an important Masonic meeting on 9th July in St Albans, and COW2025 from 11th to 13th July. As a result, I don't seem to have had much time to do anything to the layout.

I did get the layout onto my work table on earlier this week ... only to discover that during our cruise our cat had 'investigated' it, and whilst doing so, it had damaged to painted surface. I have now repaired the damage and hope to begin work on the layout in the near future.


I still intend to add my border fortress to the layout, but not until I have repainted it a lighter colour. When I came back from our cruise, I realised that it was far too dark and looked very gloomy.

Wednesday, 25 June 2025

An eBay bargain

I recently won an auction on eBay and bought six ready-painted 15mm resin buildings. They cost me just under £25.00, including postage and packing.

I bought them with the intention of using them on my floating shelf model railway layout ... and I think that they will fit in rather nicely on it.

Tuesday, 24 June 2025

The Budget Model Railways Challenge ... now has a backscene!

I managed to cut a piece of 3mm plywood to the size I wanted for my floating shelf model railway's backscene (60mm x 20mm). I then cut down part of the backscene I had recently purchased from THE MODEL SHOP in Faversham to the same size as the piece of plywood.

Once that was task was completed, I affixed the self-adhesive backscene to the plywood, which I then propped up behind my layout to see what it might look like when it is finished. I also placed a few of the trees I had also bought from THE MODEL SHOP and my border fortress on the layout, and the result looked like this:

I am having second thoughts about whether or not to use the border fortress on the layout. It looks a bit bigger on the layout than I expected and I do have some other buildings that might be more suitable.

Wednesday, 18 June 2025

The Budget Model Railways Challenge: My border fortress is finished

Before painting my border fortress I gave it two coats of PVA to seal the wood. Once that was done (and the PVA had dried), I undercoated the model using two thin coats of matt Black acrylic craft paint (made by Crelando).

I then dry-brushed the planked area with matt Burnt Sienna acrylic craft paint (made by Crawford & Black).

Once the brown paint had dried, I gave the rest of the model two thin coats of matt Medium Grey acrylic craft paint (made by Reeves).


I tend use cheap acrylic craft paint from a variety of different suppliers, including THE WORKS and LIDL for projects like this. I see no point in using expensive acrylic paints unless there is a particular colour that I want to use that isn’t easily reproduced by mixing my cheaper paints.

Monday, 16 June 2025

The Budget Model Railway Challenge: Some trees and a backscene

On Saturday, Sue and I went to Faversham in Kent, and whilst I was there, I visited THE MODEL SHOP in Preston Steer, Faversham.

I was able to buy two items that I need for my floating shelf model railway, a bag of Busch pine trees …

… and a rural back scene.

The former will get some additional foliage, and the latter will be fitted to a 3mm plywood board.


I have since bought two more bags of Hornby trees via Amazon and now have more than enough trees for my current floating shelf model railway project … and several more!

Friday, 13 June 2025

The Budget Model Railways Challenge: My border fortress

I have managed to convert my toy wooden castle into a border fortress for my floating shelf model railway layout ... and it looks like this:

The as-yet-unpainted border fortress with a garrison of 15mm Essex Miniatures Colonial figures from my Belle Époque collection.

I still have quite a few bits of the original wooden castle left ...

... and I intend to use them as the basis of other buildings for my layout.

Friday, 6 June 2025

The Budget Model Railways Challenge: Inspiration for my choice of layout

As regular blog readers will know, I've always hankered after having some sort of indoor equivalent of John Ruddle's garden wargames setup.

John's setup included a garden railway, and it was looking at several of the photographs that included railway track that inspired me to think about modelling a border fortress that is served by a spur from a major railway line.

The only problem was that I didn't have a model fortress to use on my layout ... and then I remembered that back in 2023 I bought a plywood model castle from the English heritage shop at Deal Castle. Luckily, I had not put it into storage and after a quick search of my toy/wargame room, I found it.

The pieces just push together, and when fully assembled, it looks like this:

I assembled mine ... and realised that it was far too large for the layout BUT that its parts could be adapted so that I could build a small fortress and have plenty of parts over that I could use to build other buildings. For example, the two towers could be used as the basis of a church or cathedral.

My next task is to build my small border fortress ... and I hope to do that over the next week.

Monday, 2 June 2025

The Budget Model Railways Challenge: A progress report

The first thing that I did was to paint the top of the floating shelf with three coats of Ochre Yellow acrylic paint.

I then placed my railway track onto the floating shelf to ensure that it fitted.

I then marked the places on the floating shelf where I would need to drill holes for the power supply and points wires …

… and then fixed the track to the floating shelf using a combination of white glue and track pins, ensuring that the wires passed through the holes I had drilled.

I then tested that the layout … and discovered that the points wouldn’t work! Despite checking everything I could, it proved impossible to track down the fault and I had to carefully remove the track.

I soon discovered the problem; the spring inside the points had come loose, and despite taking the points apart, it proved impossible for me to repair. As I didn’t have a like-for-like replacement, I had to re-think my layout plan.

In the end, I used a set of smaller radius manual points and adjusted the track accordingly. Once this was pinned and glued to the floating shelf, I tested it …

… and although it worked, I discovered that my 0-6-0 locomotives coped with the points and tighter curve better that my small 0-4-0 and large 0-6-2 locomotives.

I then painted the front edge and both ends of the floating shelf with matt black acrylic paint as I think that this frames the layout.

The next stage in this project is to decide on the theme for the layout.

Sunday, 25 May 2025

The Budget Model Railway Challenge: The layout suggested by ChatGPT ... doesn't fit of the floating shelf!

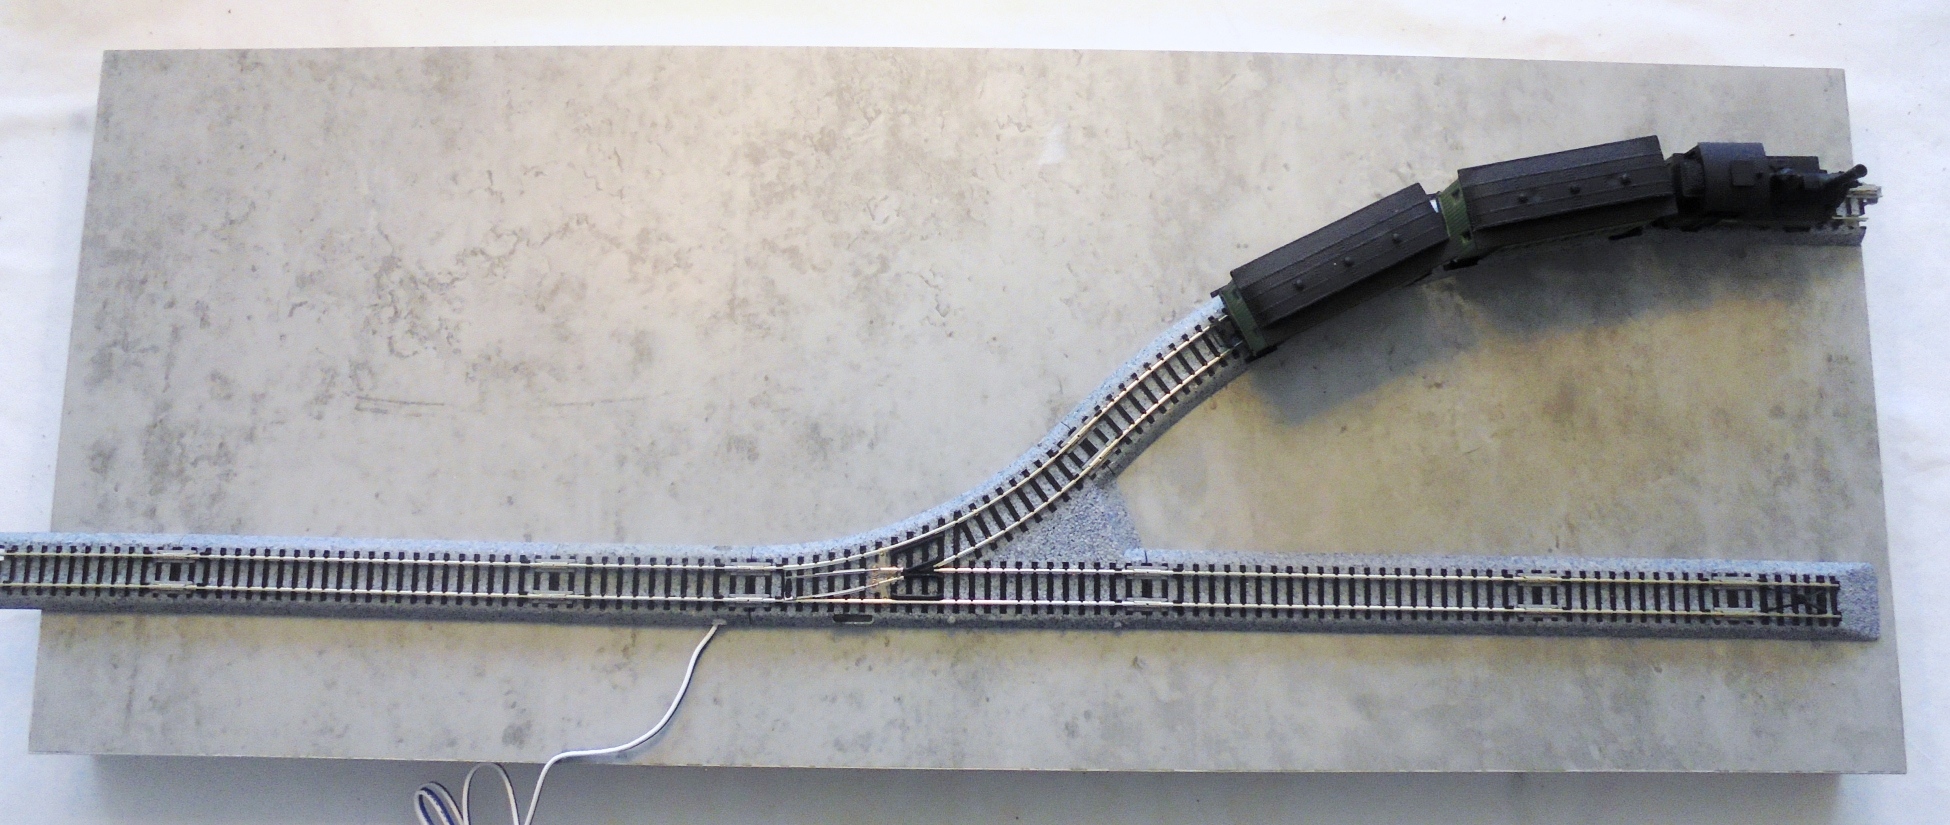
Having asked ChatGPT to design a layout that meets the Budget Model Railways Challenge, I assembled the various pieces of track it recommended and put them together ... and it didn't fit onto the floating shelf as it was too long!

In the end, I decided to design my own layout ... and this is what it looked like:

I tested that it was possible to do some shunting, and made a short video that I have uploaded to my YouTube channel. It can be seen here.

The next step is to paint the floating shelf and then fix the track to it.

Wednesday, 21 May 2025

The Budget Model Railway Challenge: A suggested layout … from ChatGPT

Whilst playing around with ChatGPT, I decided to ask it to design me a layout to meet this challenge. I phrased my request as follows:

Please design me a model railway end-to-end layout that will fit on a 60cm x 23.5cm board and that uses Kato Unitrack. It should have at least one set of points and at least one siding. Please list the Kato track pieces I will need to make the layout.

In reply, it gave me the following answer:

Here is a compact end-to-end model railway layout designed specifically to fit on a 60cm x 23.5cm board using Kato Unitrack (N Scale). It features a main line, one turnout (point), and a siding, ideal for shunting small trains or scenic dioramas.

Layout Overview

  • Type: End-to-end
  • Dimensions: 60cm x 23.5cm (board)
  • Scale: N Scale 
  • System: Kato Unitrack
  • Features:
    • One main line
    • One siding (via a turnout)
    • Space for scenic elements or small structures

Required Kato Unitrack pieces

  • 2 x 20-000 Straight track 248mm
  • 1 x 20-020 Straight track 124mm
  • 1 x 20-045 Turnout #4 left (or right) ~124 branch
  • 1 x 20-040 or 20-041 Curve R481-15° or R282-45° (optional, if curving siding)
  • 1 x 20-010 Straight track 62mm (for siding)
  • 1 x 24-850 Bumper track (buffer stop)

ChatGPT's suggested track plan.

Total Length Calculation

  • Main line:
    • 2 x 248mm = 496mm 
    • 1 x 124mm (with turnout) = 124mm
    • Total: ~620mm (layout allows small overhang for board edge buffer)
  • Siding:
    • Branch from turnout: 62mm (or longer, depending on available space)
    • Buffer at end (62mm)
    • Curve optional depending on shape/orientation

Notes

  • If you want to save a few cm, replace one of the 248mm straights with a 186mm (20-090).
  • You can mirror the turnout (use #4 right instead of left) depending on siding direction.
  • Power routing can be done via Kato 24-818 feeder track (substitute one straight if needed).
  • A small engine and 1-2 wagons would suit this micro-layout.

This is very helpful, and although I will probably use the list of track as a starting point, I expect that my final layout will be somewaht different.

Sunday, 18 May 2025

The Budget Model Railways Challenge: Acquiring a floating shelf

On Saturday afternoon, Sue and I went to the branch of B&M (Bargains and More) in Dartford, Kent … and I managed to buy two 60cm x 23.5cm floating shelves.

They cost me £5.00 each (they were priced at £10.00 each but were being sold at half price) , and I chose a pair that had a concrete finish. (I could have had high gloss white or black shelves, but the concrete looked more neutral in colour).

The next stage is to get some track out and play around with some possible layouts. After that, who knows where this challenge will take me!

Friday, 16 May 2025

The Budget Model Railways Challenge

One of the YouTube channels I follow is BUDGET MODEL RAILWAYS (who also have a website). They currently have issued a challenge … to build a small model railway layout on a 60cm x 23.5cm floating shelf.

The wording of the challenge is as follows:

To produce a layout of any scale/gauge on a 60cm x 23.5cm floating shelf.

Thickness of the shelf does not matter but must not exceed the 60cm x 23.5cm dimensions. It must have at least one point/switch and have as much operating potential as possible! i.e. not a single track diorama.

Any type of track including pre-ballasted is acceptable. Ovals are acceptable if they can be fitted in, as long as there is at least one point/switch.

It must have two buildings/structures as a minimum, but this can include sheds, signal boxes etc.

Back scene can be any height.

This is Mike Potter's N gauge freelance 60cm x 23.5cm layout. It is designed so that the Kato freelance pocket line range locomotives and rolling stock can run on it. In his description of the layout he states that he 'wanted to give a sense of open space with the railway part of the landscape and not the main feature'.

I am giving serious thought to taking part in this challenge … and if I do, I will certainly blog about it.


Please note that the photographs featured above are © Michael Potter.