Pages

Showing posts with label Memoir '44. Show all posts

Saturday, 25 April 2026

A potential solution quite literally hit me!

I recently visited our storage unit to look for several wargaming items I needed. Thanks to the light in the unit not working and my torch battery giving up the ghost after a couple of minutes, I didn't find everything that I wanted.

However, one of the things that I did bring home was a small box containing some plastic bits and pieces I think that I may be able to use for my current Belle Époque project. When I got the box up to my toy/wargame room, I went to put it on top of one of the bookcases, and in doing so, I dislodged a copy of MEMOIR '44 ... which fell off and hit me on the head!

Once I had got over the initial shock and began to pick up all the bits that had fallen out of the box, I realised that I had in my hand the game's playing board ... which is a foldable hexed board that has a grid of 9 x 13 hexes that measure approximately 5.25cm from face to face! My immediate thought was this size of hex should certainly work with my Belle Époque armies and has the big advantage of being eminently portable!

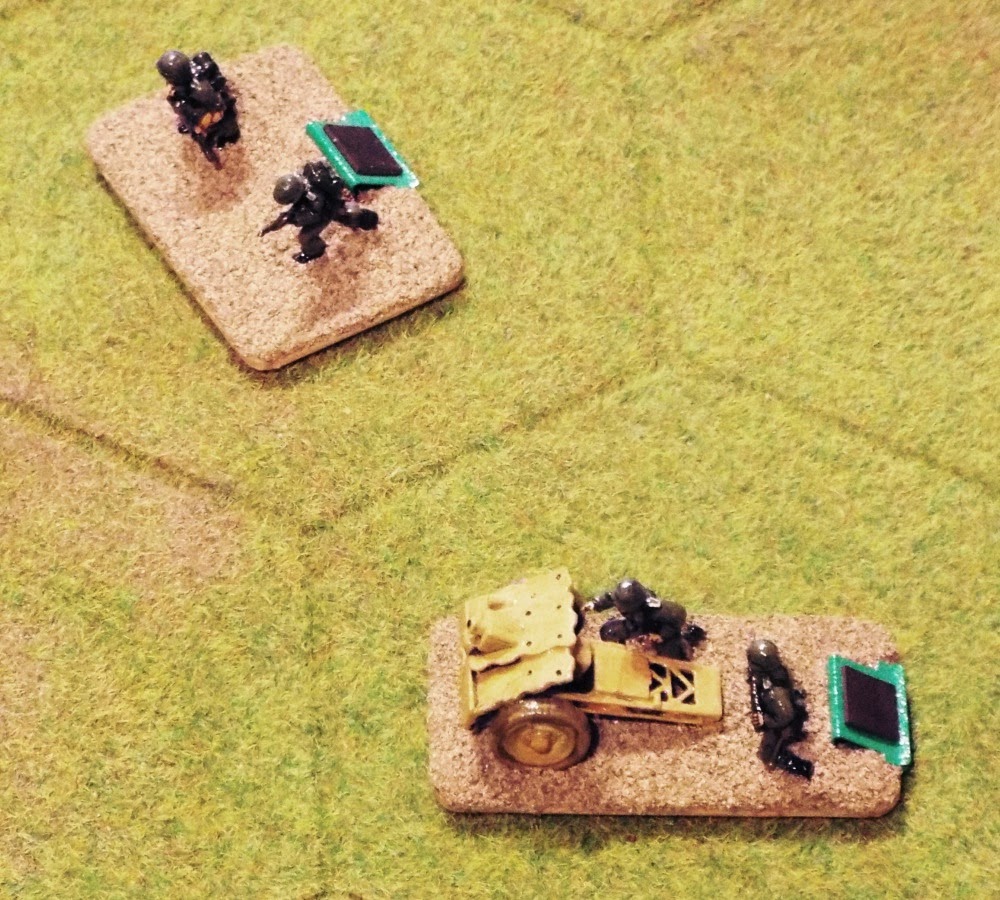
The next thing to do was to see what examples of my based figures looked like on the board, and the results are shown below:

The army of the Baggari of Sahel fighting troops of the Zubian Army.
Another view of the army of the Baggari of Sahel fighting troops of the Zubian Army.

This simple experiment shows that this is certainly a workable solution, especially as I already own several different versions of this board.

Just when I thought that I had made a decision, this 'accident' has made me think again.

Friday, 24 October 2025

Memoir ‘44 … twenty years on

MEMOIR '44 was created by Richard Borg and published in 2004 by Days of Wonder and has proven to be a very popular hybrid miniatures/board game. I own the basic set as well as most of the supplements and one of the scenario books, and over the years I have enjoyed playing the game. In fact, it was playing MEMOIR ‘44 that sparked off my development of MEMOIR OF BATTTLE (MOB), MEMOIR OF MODERN BATTLE (MOBAT) and eventually THE PORTABLE WARGAME.

A new, revised version of the game has (MEMOIR ‘44 REFRESH) been released to mark the twentieth anniversary of the game’s release … and I just could not resist buying a copy. I ordered it via Amazon, and it arrived on Wednesday.

The box contains:

  • 1 x A double-sided board
  • 144 x Axis and Allied miniatures
  • 36 x Obstacles
  • 44 x Double-sided terrain tiles
  • 60 x Command cards
  • 22 x Summary cards
  • 8 x Attack dice
  • 6 x Activation tokens
  • 2 x Cardholders
  • 1 x Rulebook
  • 1 x Scenario book

If one compares the two editions, the new version includes the following changes:

  • New elevation rules: Units on a higher elevation can now shoot over their own adjacent troops.
  • More scenarios: The new edition includes a total of 22 rather than the original's 16.
    1. Pegasus Bridge
    2. Sainte-Mère-Église
    3. Sword Beach
    4. Pointe Du Hoc
    5. Omaha Beach (First Wave)
    6. Mont Mouchet
    7. Battlegroup Heintz at Hauts-Vents
    8. Belle-Lande
    9. Panzer Lehr at Hauts-Vents
    10. Counterattack of Panzer Lehr
    11. Hauts-Vents is taken
    12. Vassieux, Vercors
    13. Operation Cobra
    14. Counterattack on Mortain
    15. Toulon
    16. Liberation of Paris
    17. Montélimar
    18. Arnhem Bridge
    19. Arracourt
    20. Saint Vith, Ardennes
    21. Saverne Gap, Vosges
    22. Omaha Beach - Overlord (this requires two game boards)
  • New miniatures: The new edition has re-modelled miniatures that are made of a harder, more detailed plastic.
  • Activation tokens: The new edition includes activation tokens to track which units have moved and fired.
  • Card holders: The game now includes two curved card holders fore players to place their cards in.
  • New dice: New, plastic dice, have replaced the original wooden ones.
  • Terrain pieces: The sandbags and barbed wire are now produced in a neutral grey colour, unlike those in the original game where they were coloured for either the Axis or Allied side.
  • Terrain pieces: Some new, double-sides terrain tiles(e.g. sea walls) have been added.
  • Rulebook: The rulebook has updated and reorganised
  • Box: The new edition’s box is larger and thicker, with a better designed insert for storing the components.
  • Box art: The new edition uses a slightly different colour palette and the box art has been updated.

All-in-all, the new edition is a worthy celebration of the original game and - in my opinion - was well worth buying. All I’ve got to do now is to persuade someone at my local club to play it!

Sunday, 24 January 2021

'The history of a wargame design ...'

'... is not unlike the history of a ball. Some designers may recollect all the little events of which the great result is the rules that are written, but no individual can recollect the order in which, or the exact moment at which, they occurred, which makes all the difference as to their value or importance.'

I do hope that the Duke of Wellington will excuse me mangling his quote* about the Battle of Waterloo, but it is rather appropriate at the moment.

This quote came to mind when I began work on the PowerPoint presentation that I am preparing for the forthcoming VCOW2021. I wanted to start with a short explanation about how the whole PORTABLE WARGAME concept came about ... and then realised that it was not as straightforward as I had thought that its was.

Looking back through my past blog posts, I began to realise that the rules evolved as a result of the coming together of several separate strands. The first of these was my desire to emulate the gridded wargames illustrated in both Donald Featherstone's and Joseph Morschauser's books.

In the latter's case, he was strongly influenced by Professor Gerard de Gre, who ran the wargame club at the college that Joseph attended as a student.

The second was Ian Drury's RETURN TO NEW STANHALL game at COW1998(!). This led directly to the development of SCWaRes (Simple Colonial Wargame Rules), which in turn was developed into WHEN EMPIRES CLASH!

At about the same time, I 'rediscovered' Joseph Morschauser's book and bought a copy of Richard Borg's MEMOIR '44 ...

... which eventually led me to buy both the first ...

... and second edition version of his American Civil War game, BATTLE CRY.

I did develop my own take on MEMOIR '44, which I entitled MEMOIR OF BATTLE, which in turn led to MEMOIR OF BATTLE AT SEA and MEMOIR OF MODERN BATTLE.

All the strands were now in place, and all it needed was a catalyst to start the process that led to the final development of the PORTABLE WARGAME.

The catalyst was an old, boxed chess set that was then stored in our conservatory. The heat and sun in the conservatory had not treated it kindly, and the wooden chessmen were warped and cracked. The edge of the board had become detached as the glue had dried out, and my wife gave me an ultimatum to either find a use for the chessboard or to throw it away.

I was loath to throw it away, and decided that it might make the basis of a simple, portable wargame. I began experimenting with ideas that I had garnered from my previous wargame designs ... and this eventually led to the creation of the PORTABLE WARGAME.


* The original quote is:

'The history of a battle, is not unlike the history of a ball. Some individuals may recollect all the little events of which the great result is the battle won or lost, but no individual can recollect the order in which, or the exact moment at which, they occurred, which makes all the difference as to their value or importance.'

It was written by the Duke of Wellington in a letter to John Croker, dated 8th August 1815. Croker was an Irish Member of Parliament and a longtime friend of the Duke.

Tuesday, 13 August 2019

Memoir '44 New Flight Plan expansion set

I like Richard Borg's wargames, and own quite a few of them, including both the early and later versions of BATTLE CRY and COMMANDS & COLORS: NAPOLEONICS. My largest collection of his games consists of MEMOIR '44 and most of the expansion sets ... and I have just added the latest of the latter to my collection.


The MEMOIR '44 NEW FLIGHT PLAN expansion set is a more streamlined and simplified version of the earlier AIRPACK (which I have used but never owned) and includes
  • 16 unpainted aircraft models that look approximately 1:300th-scale
    • US North American P-51 Mustang fighter
    • US Chance Vought F4U Corsair fighter
    • US Republic P-47 Thunderbolt fighter-bomber
    • US Boeing B-17 Flying Fortress heavy bomber
    • UK Submarine Spitfire fighter
    • UK Hawker Typhoon fighter-bomber
    • UK Avro Lancaster heavy bomber
    • German Messerschmidt Bf 109 fight
    • German Junkers Ju 87 Stuka dive bomber
    • Heinkel He 111 medium bomber
    • Japanese Mitsubishi A6M Zero fighter
    • Japanese Aichi D3A Val dive bomber
    • Japanese Mitsubishi G4M Betty medium bomber
    • Soviet Yakovlev Yak-9 fighter
    • Soviet Ilyushin IL-2 Sturmovik ground attack aircraft
    • Soviet Ilyushin DB-3/IL-4 medium bomber
  • 3 aircraft stands for the models to use when 'flying' over the terrain boards from the original MEMOIR '44 games
  • 30 Air Combat Cards
  • 8 Summary Cards
  • 15 Nation Markers
  • 18 Machine Gun and 12 Bomb Markers
  • A Rules Booklet
  • A Scenario Booklet with scenarios for 21 new battles most of which that can be used with or without the MEMOIR '44 NEW FLIGHT PLAN expansion set
    • Western Front
      • Isneauville Junction
      • Battle of Pico
      • Battle of La Heunière
      • Groesbeek Heights
      • North of Oosterbeek
      • Reinforce Arnhem
      • Elst
      • Koevering Corridor Raid
    • Mediterranean Theatre
      • Kalamata Waterfront
      • Fort Capuzzo
      • Attack of the Sabratha Division
      • Gambut
    • Eastern Front
      • Luftwaffe Air Attack
      • Soviet KV-2 tanks at Lutsk
      • The Grain Elevator
      • Battle of Maciejow
      • Cherkasskoye
    • Pacific Theatre
      • Battle of Wau
      • Main line of resistance
      • Hill 107
      • Capture of Meiktila

Although I have yet to use the rules, I have read through them, and they are not unlike my own air combat rules as featured in DEVELOPING THE PORTABLE WARGAME ... which isn't all that surprising considering they both use individual aircraft models on a hexed board!

For more information about this expansion set (including links to downloads of the rules in four languages and ten of the scenarios), go to the relevant page on the DAYS OF WONDER website.

Please note that the photographs featured above are © DAYS OF WONDER.

Sunday, 17 May 2015

Working towards a set of 'universal' wargames rules

Whilst I was on my recent cruise I had time to give quite a lot of thought to the rules I have been using in the Zubia-based mini-campaigns I have fought since Christmas ... and have come to the conclusion that I am on the verge of putting together a set of simple, fast-play wargames rules that will be adaptable to a variety of different historical periods.

The 'universal' wargames rules that are evolving are based upon the work I had previously done when I wrote the following:
  • THE PORTABLE WARGAME
  • MEMOIR OF BATTLE (MOB)
  • MEMOIR OF MODERN BATTLE (MOBAT)
  • ITCHY & SCRATCHY
They also draw heavily upon the work of Joseph Morschauser and Richard Borg.

In a nutshell the rules can be summarised as follows:
  • Units have initial strength values of 4 (infantry), 3 (cavalry), and 2 (artillery);
  • Units retain an undiminished ability to fight (i.e. they throw the same number of combat dice) until they are destroyed (i.e. their strength value is reduced to 0);
  • When one side's remaining strength value is reduced to 50% of the combined strength value they began the battle with, they cannot continue to advance from their existing positions, although they may withdraw and continue to defend themselves; when both sides are reduced to 50% of the combined strength value they began the battle with, the battle ends;
  • A card-driven unit activation system is used;
  • Unit movement is restricted by the terrain the unit is moving through and whether or not it is engaging in combat during its current activation;
  • One combat resolution system for both fire and close combat;
  • The combat resolution system uses standard D6 dice, with the number of dice thrown depending upon the range at which the combat is taking place;
  • The combat resolution system uses pairs of dice to determine 'hits' on enemy units (i.e. 1 + 1 = 'hit' on an enemy artillery unit; 2 + 2 or 3 + 3 = 'hit' on an enemy cavalry unit; 4 + 4 or 5 + 5 or 6 + 6 = 'hit' on an enemy infantry unit; enemy units in cover require these scores plus an additional pair to be 'hit')
I had initially decided to use special D6 dice similar to those used in Richard Borg's BATTLE CRY and MEMOIR '44 rules, but I found that my attempts to do so were flawed (i.e. the dice seemed to end up unbalanced) so I reverted to a simpler system based on the one used in my ITCHY & SCRATCHY rules. (The original idea for this combat resolution system came from Archduke Piccolo [see my blog entry of 14th September 2013 and his blog entry of 13th September 2013].)

These rules have now been set down on paper, but require some more play-testing before I make them more widely available. In the meantime I want to complete varnishing and basing my collection of Del Prado pre-painted 25/28mm-scale Napoleonic figures before the bicentenary of the Battle of Waterloo in June.

Friday, 20 February 2015

Barbarossa Mini-campaign: Battle No.3: Triple line

Having beaten off the determined Russian counter-attack, the somewhat weakened Germans continued their advance into Soviet territory. By this stage Russian resistance was weak, and the Germans knew that if they were to reach Moscow before the snows of Winter arrived, they had to push on and destroy all remaining Russian forces.

This was the third battle of my Barbarossa Mini-campaign.

Triple Line
This battle used Scenario 26 from Neil Thomas's ONE-HOUR WARGAMES. The Germans had six units and the Russians had four units.

The Germans had:
  • Three Infantry Units (= 12 Strength Points)
  • One Machine Gun Unit (= 4 Strength Points)
  • One Artillery Unit (= 2 Strength Points)
  • One Tank Unit (= 3 Strength Points)
Note: The German will become exhausted when they have lost 11 Strength Points.

The Russians had:
  • Two Infantry Units (= 8 Strength Points)
  • One Machine Gun Unit (= 4 Strength Points)
  • One Artillery Unit (= 2 Strength Points)
Note: The Russians will become exhausted when they have lost 7 Strength Points but as they are defending and will obey Stalin's 'Not one step back!' order, this will not seriously effect them.

The terrain looked like this:


Note: In the original scenario the defenders do not have any fieldworks, trenches etc. For this battle I decided that the second line of defenders would have had time to dig in, and I have therefore allowed them a line of trenches.

The battle began when the leading German units entered the battlefield.


The Russians were already in their defences ... waiting.


They did not have to wait long. The German Tank Unit moved forward and engaged the Russian Infantry Unit that was guarding the bridge, forcing it to retire.


The Germans then moved their Artillery Unit onto the battlefield.


Having clearer away the bridge's defenders, the German Tank Unit advanced across it and fired for a second time at the same Russian Infantry Unit, inflicting 25% casualties upon it and forcing it to fall back yet again.


The right-hand German Infantry Unit moved towards the bridge to support the advancing Tank Unit ...


... as did the German Machine Gun Unit.


The Russian Artillery Unit opened fire on the German Tank Unit ... and hit it.


Whilst this was happening the foremost Russian Infantry Unit advanced into the woods near the river as this enable them to threaten any German units moving forward over the bridge.


The German Tank Unit moved across the front of the Russian trenches and engaged the right-hand Russian Infantry Unit. Despite being in trenches, the Russian Infantry Unit lost 25% of its initial strength.


The leading German Infantry Unit advanced across the bridge, but was unable to fire at any of the Russian defenders.


The Russian Machine Gun Unit fired at the leading German Infantry Unit and hit it.


The German Infantry Unit was then fired upon by the Russian Infantry Unit that was in the woods, and although no casualties were inflicted, the German Infantry Unit was forced to retreat onto the bridge.


The Russian Artillery Unit fired for a second time at the German Tank Unit ... and destroyed it!


Despite the loss of the Tank Unit, the Germans pushed forward in the hope of achieving a quick and decisive victory.

First the German Infantry Unit on the bridge moved forward and into the woods on its right.


Secondly the German Machine Gun Unit moved forward on to the bridge, ...


... and the remaining German Infantry Unit entered the battlefield.


The Russians failed to respond to this movement, and the German continued to press forward.

Fighting broke out in the woods near the bridge, and resulted in further losses for the Russian Infantry Unit therein.


The German Machine Gun Unit advanced and opened fire on its opposite number in the Russian trenches ... and inflicted casualties on them.


One of the other German Infantry Units reached the bridge and began to cross it ...


... followed by the German Artillery Unit.


The fighting in the woods continued, although this resulted in losses for the Germans rather than the Russians.


These losses were offset when the Russian Machine Gun Unit lost further casualties at the hands of its German counterpart.


The combat in the woods was finally resolved when the Russian Infantry Unit was forced to retire, but the cost was heavy and the German Infantry Unit was destroyed.


The retreating Russian Infantry Unit was engaged by the German Machine Gun Unit, and forced to fall back even further.


Unfortunately for the Germans, the fact that the German Machine Gun Unit had not moved resulted in a traffic jam by the bridge, with units lining up to cross.


In order to clear the way for other units to cross the bridge, the German Machine Gun Unit moved to its left and fired at the Russian Infantry Unit that was in the trenches. This resulted in further losses for the Russian Infantry Unit.


The leading German Infantry Unit moved across the bridge and engaged the Russian Machine Gun Unit ... but with no effect.


The situation then suddenly swung in favour of the Russians. The Russian Artillery Unit fired at the leading German Infantry Unit and inflicted 50% losses upon it.


The German Infantry Unit was then fired at by the Russian Machine Gun Unit ... and wiped out!


At this point the Germans had almost become exhausted, and it was obvious that they would be unable to prise the Russians out of their defences without further reinforcements. The German Machine Gun Unit therefore withdrew to the other side of the bridge, where the Germans began to form a defence line.


This was the final battle of my mini-campaign. The Germans had won the first two battles, but the final one was drawn, leaving the Russians bruised but unbeaten and the Germans seriously in need of further troops. As happened in the real Operation Barbarossa, the Germans had pushed just a little too far and the Russians were able to dig in and hold out.

I rather enjoyed the whole process of the mini-campaign. It gave the flavour of a much large campaign without becoming too tedious. The outcome of the battles was reasonably realistic and all the battles were fun to fight. Although I fought them as solo wargames, my playing card-driven unit activation system ensured that I could not favour either side and the combat system (which is almost entirely drawn from Richard Borg's MEMOIR '44) produced reasonably balanced results that were also unpredictable.

I will certainly use this mini-campaign structure again, and I thoroughly recommend it to other wargamers who fight solo wargames or who do not have easy access to a wargames club where they can take part in a campaign.

Tuesday, 17 February 2015

Barbarossa Mini-campaign: Battle No.2: Late arrivals

Once the Germans had broken through the Russian front-line they advanced as rapidly as they could into Soviet territory. The Russian response was to send all available units forward to meet the invaders, to defeat them, and then to throw them back across the border.

This was the second battle of my Barbarossa Mini-campaign.

Late Arrivals
This battle used Scenario 10 from Neil Thomas's ONE-HOUR WARGAMES. Both sides had six units available to take part in the battle.

The Germans had:
  • Three Infantry Units (= 12 Strength Points)
  • One Machine Gun Unit (= 4 Strength Points)
  • Two Tank Units (= 6 Strength Points)
Note: The German will become exhausted when they have lost 11 Strength Points.

The Russians had:
  • Four Infantry Units (one of which was Militia) (= 15 Strength Points)
  • One Anti-tank Gun Unit (= 2 Strength Points)
  • One Tank Unit (= 3 Strength Points)
Note: The Russians will become exhausted when they have lost 10 Strength Points.

The terrain looked like this:


The leading German troops had outstripped their supporting units and had halted in order for them to catch up. The Russians were already rushing reinforcements forward to stem the German advance, and a clash was inevitable. It was know that the German support units were moving up the road that ran through the built-up area in the corner of the wargaming board nearest the camera, and that the Russian troops would be arriving via the same road but from the opposite corner. The hill was deemed to be unclimbable and was regarded as impassable terrain.

The battle began when the first Russian units (led by their Tank Unit) entered the battlefield. The Russian Tank Unit immediately engaged the German Tank Unit ...


... and missed!

The Germans responded by moving their Machine Gun Unit out onto their right-hand flank whilst their Tank Unit fired at the Russian Tank Unit and forced it to withdraw.


Further Russian units arrived on the battlefield ...


... and this enabled the Russians to move forward.


The Russian Tank Unit's fire forced the German Tank Unit to withdraw down the road towards the built-up area ...


... whilst the Russian Anti-tank Unit was able to open fire on the German Machine Gun Unit and inflict 50% casualties on it.


At this point the first of the German support troops arrived, and this enabled the Germans to begin counter-attacking.


The German Tank Unit fired at the Russian Tank Unit and reduced its effectiveness by 33% ...


... and the German Machine Gun Unit was able to return fire upon the Russian Anti-tank Gun Unit and kill half of its gunners.


The duel between the two Tank Units continued ...


... but no further damage was caused.

A Russian Infantry Unit had moved forward and engaged the German Machine Gun Unit, but it was equally unsuccessful.


Events then began to favour the Germans when their Tank Unit was able to hit the Russian Tank Unit twice ... knocking it out.


The German Machine Gun Unit switched target and fired at the Russian Infantry Unit, but was unable to hit it.


The German Tank Unit now moved forward and forced the foremost Russian Infantry Unit to fall back.


This success was followed up by the two German Infantry Units, which advanced on either flank of the Tank Unit.


The Russians responded by moving their Anti-tank Gun Unit into the woods (thus giving it some protection) and forming a road block with their Infantry Units.


The left-hand German Infantry Unit fired at the Russian Infantry Unit in the centre of the roadblock, inflicting 50% casualties upon it.


The German Machine Gun Unit also engaged this Russian Infantry Unit, and reduced to 25% of its original strength.


The German Tank Unit chose to fire at another of the Russian Infantry Units ... with devastating effect.


At this point the Russians had reached their Exhaustion Level (they had lost 10 Strength Points) but were still in a position to defend ... which they chose to do.

(Once a side reaches its Exhaustion Level it cannot take any offensive actions such as advance, but may either retreat or fight on in the hope that they will exhaust their opponent. In this case Stalin's 'Not one step back!' order seems to have been obeyed.)

The Russians quickly proved that they were unwilling to give up their positions. The Anti-tank Unit fired at and hit the German Tank Unit ...


... and the Russian Militia Infantry Unit moved forward to support the Russian front-line.


At the same time the right-hand Russian Infantry Unit engaged the nearby German Infantry Unit and caused it to suffer 25% casualties.


The Germans reacted by moving their right-hand Infantry Unit forward, ...


... bringing further troops onto the battlefield, ...


... and wiping out the Infantry Unit in the centre of the Russian front-line.


In the hope that they could stem the German advance, the Russian Anti-tank Unit fired at the leading German Tank Unit and forced it to fall back.


The left-hand Russian Infantry Unit engaged the German Machine Gun Unit at long range, but their fire was ineffective.


The German response was vigorous and effective. The leading German Tank Unit moved forward and engaged the Russian Anti-tank Gun Unit ... and destroyed it!


The second German Tank Unit also advanced and engaged the right-hand Russian Infantry Unit. The latter was already reduced to 25% of it original strength, and this attack wiped it out.


The left-hand German Infantry Unit also moved forward and fired at the Russian Militia Infantry Unit, but the range was long and the German Unit's fire was ineffective.


The left-hand German Infantry Unit moved forward again, and this time its fire reduced the strength of the Russian Militia Infantry Unit by 33%.


The undamaged German Tank Unit advance and engaged the remaining Russian Infantry Unit, which it forced to retreat.


Both the Russian Infantry Units then fired at the nearest German Infantry Unit. The Russian Militia Infantry Unit's fire had no effect ...


... but the Russian Infantry Unit's fire did inflict a 25% loss upon the German Infantry Unit.


It was now only a matter of time before the Germans prevailed ... and when the end did come, it came very swiftly.

The right-hand German Tank Unit moved forward and fired at the remaining Russian Infantry Unit, inflicting 25% casualties on it


The left-hand German Tank Unit followed suit, and forced the Russian Infantry Unit to retreat.


Soon afterwards the leading German Infantry Unit engaged the Russian Militia Infantry ... and wiped it out!


The sole remaining Russian Infantry Unit was destroyed moments later when the left-hand German Tank Unit advanced yet again and fired at the Russian Unit.


The Germans had won the battle ... but at a cost. Its units were spread out all over the battlefield, and if the Russians were able to mount a counter-attack, the Germans could easily be pushed back. The Russians had also suffered casualties that might be difficult to replace if the campaign was to be a prolonged one.

At the end of the fighting the battlefield looked like this:


This battle was set up on Sunday night and fought in several short sessions on Monday and Tuesday. One of the joys of using the card-driven unit activation system is that it is possible to leave a battle in situ and return to it without having to worry as to which side had the initiative or whose turn it was to move their units next.

It was a real 'ding-dong' battle, and although the Russians ultimately lost, they had held up the German advance and inflicted a significant number of casualties.