Pages

Showing posts with label Itchy & Scratchy Rules. Show all posts

Monday, 11 February 2019

Itchy & Scratchy combat system revisited

One of the sets of rules that I wrote during the development of my original PORTABLE WARGAME rules were called ITCHY AND SCRATCHY. They used a combat system based on an idea that came from Archduke Piccolo, namely relating the arrangement of the pips on a D6 die to the standard NATO tactical map signs.

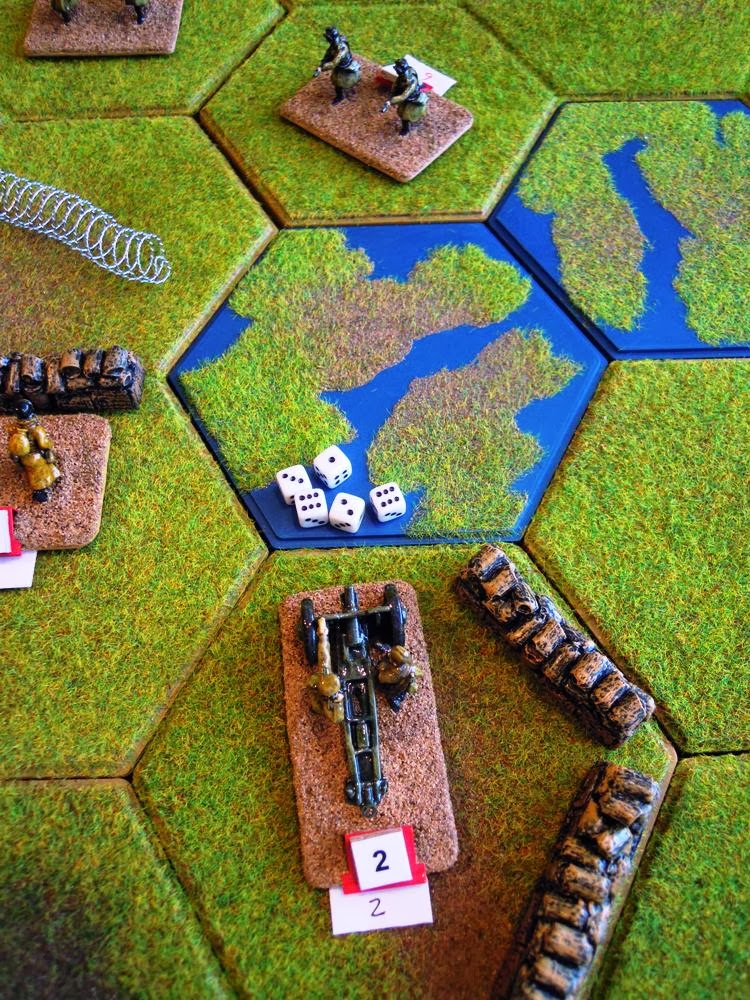
Artillery


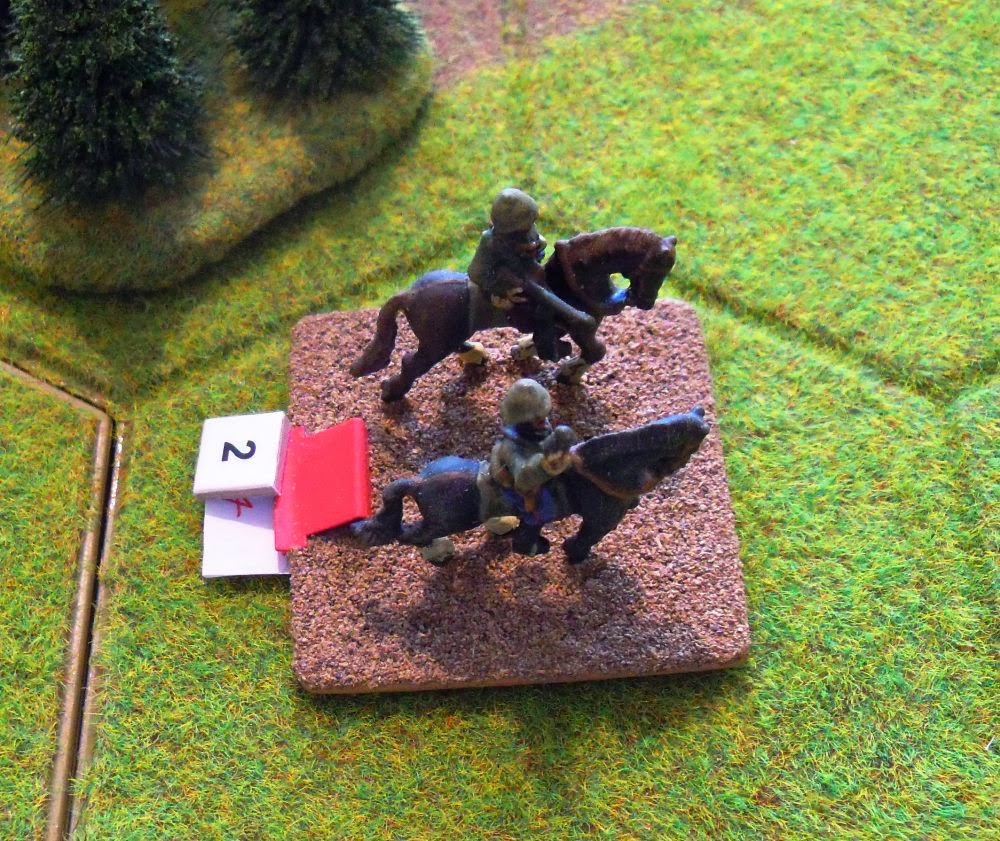
Cavalry


Infantry


Whilst I've been renovating my 20mm-scale Russian figures, I've been thinking about using a modified version of the original ITCHY AND SCRATCHY Combat Results Table in place of the existing combat system used in my PORTABLE WARGAME rules. The revised Combat Results Table (CRT) looks like this:


(You will note that this CRT is designed to be used with tanks etc. This was because I was thinking about how to use the individually-based figures I was renovating in a wargame. The CRT could easily be used with Horse and Musket armies with very little modification.)

The number of D6 dice thrown by a unit depends upon the range the units is firing at.

Notes
  1. The numbers show how many D6 dice are thrown at different ranges.
  2. The asterisk (*) indicates the number of D6 dice thrown in Close Combat (i.e. in combat with an enemy unit in an adjacent or the same grid area).
Thus, an Infantry unit firing at an enemy Cavalry unit at a range of 2 grid areas throws 4 D6s. If the D6 dice scores are 2, 2, 5, and 6, then the Cavalry unit is hit. Had the Cavalry unit been in cover, the unit would not have been hit.

I'm not sure if this will work any better or worse that the existing PORTABLE WARGAME combat systems, but it has given me some food for thought.

Sunday, 17 May 2015

Working towards a set of 'universal' wargames rules

Whilst I was on my recent cruise I had time to give quite a lot of thought to the rules I have been using in the Zubia-based mini-campaigns I have fought since Christmas ... and have come to the conclusion that I am on the verge of putting together a set of simple, fast-play wargames rules that will be adaptable to a variety of different historical periods.

The 'universal' wargames rules that are evolving are based upon the work I had previously done when I wrote the following:
  • THE PORTABLE WARGAME
  • MEMOIR OF BATTLE (MOB)
  • MEMOIR OF MODERN BATTLE (MOBAT)
  • ITCHY & SCRATCHY
They also draw heavily upon the work of Joseph Morschauser and Richard Borg.

In a nutshell the rules can be summarised as follows:
  • Units have initial strength values of 4 (infantry), 3 (cavalry), and 2 (artillery);
  • Units retain an undiminished ability to fight (i.e. they throw the same number of combat dice) until they are destroyed (i.e. their strength value is reduced to 0);
  • When one side's remaining strength value is reduced to 50% of the combined strength value they began the battle with, they cannot continue to advance from their existing positions, although they may withdraw and continue to defend themselves; when both sides are reduced to 50% of the combined strength value they began the battle with, the battle ends;
  • A card-driven unit activation system is used;
  • Unit movement is restricted by the terrain the unit is moving through and whether or not it is engaging in combat during its current activation;
  • One combat resolution system for both fire and close combat;
  • The combat resolution system uses standard D6 dice, with the number of dice thrown depending upon the range at which the combat is taking place;
  • The combat resolution system uses pairs of dice to determine 'hits' on enemy units (i.e. 1 + 1 = 'hit' on an enemy artillery unit; 2 + 2 or 3 + 3 = 'hit' on an enemy cavalry unit; 4 + 4 or 5 + 5 or 6 + 6 = 'hit' on an enemy infantry unit; enemy units in cover require these scores plus an additional pair to be 'hit')
I had initially decided to use special D6 dice similar to those used in Richard Borg's BATTLE CRY and MEMOIR '44 rules, but I found that my attempts to do so were flawed (i.e. the dice seemed to end up unbalanced) so I reverted to a simpler system based on the one used in my ITCHY & SCRATCHY rules. (The original idea for this combat resolution system came from Archduke Piccolo [see my blog entry of 14th September 2013 and his blog entry of 13th September 2013].)

These rules have now been set down on paper, but require some more play-testing before I make them more widely available. In the meantime I want to complete varnishing and basing my collection of Del Prado pre-painted 25/28mm-scale Napoleonic figures before the bicentenary of the Battle of Waterloo in June.

Tuesday, 4 February 2014

"If I was going there I wouldn't start from here"

This is exactly how I am feeling today about my attempts to meld together elements of Richard Brooks' OP14 rules with the combat mechanisms from my ITCHY AND SCRATCHY rules. Yesterday I thought that I was almost there ... but the cold light of today showed that not only was I wrong but that I had made several quite fundamental errors that were going to require a complete re-write of what I had so far produced.

The problem is that I had thought that what I was doing was going to be a simple 'cut and paste' job that would require a little bit of tidying up at the end. That is how I started out ... and that is why I have not got to where I wanted to be.

I am now in something of a quandary and need to find an answer to the following questions:
  • Do I persist with my current draft and try to iron out the problems?
  • Do I start again from scratch?
  • Do I walk away from my idea for the time being with the intention of returning to it at a later date?
  • Do I give up trying to do what I set out to do and move onto a new project?
I am very tempted to answer 'No', 'No', 'Possibly', and 'Yes' to these questions ... but before I do I intend have a good night's sleep first.

Monday, 3 February 2014

Itchy and Scratchy meets OP14: the first draft ... and the siren call of Morschauser!

Thanks to a bad bout of insomnia last night, I rose early this morning and finished writing the first rough draft of my latest wargame rules. As regular blog readers will know, these combine elements of my own ITCHY AND SCRATCHY rules with some from Richard Brooks' OP14 rules.

When I call then a first rough draft I mean that they are very rough indeed. In fact I know that there a still a few things that need to be ironed out before I can even begin thinking about play-testing them. As I am going to be rather busy for the rest of today (I have an important Lodge meeting this afternoon and evening) and for most of tomorrow (we had a guest staying overnight), I will have to leave the 'ironing' until later in the week.

During my bout of sleeplessness I began thinking about the various Morschauser-based rules I have written over the years ... and how much fun and enjoyment they have given me. This morning I glanced through the computer file containing those rules, and began to hear (in my imagination) the siren call of Morschauser ... and I must admit that 'going back to Morschauser basics' has a tremendous appeal.

I am trying to resist ... but I doubt if I will be able to do so for very long!

Sunday, 2 February 2014

Seduced by Morschauser

I spent most of the morning finishing off cutting up and shredding the remaining laurel branches that had broken off and fallen down during the recent storms. I then raked up all the dead leaves that had also come down ... and now I have a large green wheelie bin full of leaves and shredded laurel branches and a largish pile of laurel logs.

By the time I had finished I was feeling rather tired and did little else before lunch. After lunch I helped my wife to try to sort out the information she had acquired concerning her father's army career. We used a variety of different documents provided by the Army Records Department as well his Pay Book and Soldiers Book. None of the documents showed a complete breakdown of where he was, what unit/formation he served with, and the places he served in throughout his service. In the end I used a spreadsheet to enter and sort the information, and we finally have a slightly less confused idea about his army career, although there still appear to be some anomalies and quite a few gaps.

Towards the latter part of the afternoon I decided to try to do some more work on my combined OP14 and ITCHY AND SCRATCHY wargame rules ... but despite my best intentions I was ‘dragged’ away by a recent addition to my collection of articles written by or about Joseph Morschauser. This happened because the VINTAGE WARGAMING blog had published a copy of Joseph Morschauser's contribution to the 1966/67 edition of Donald Featherstone's WARGAMERS YEARBOOK and I had printed off a copy of what he had written.

Over the years I have been transcribing and saving all the relevant articles that I can find. As a result I have a small but gradually expanding archive of Morschauser's work ... and this afternoon – as a consequence of reading the latest addition to my collection – I made the mistake of sitting back and reading through everything in the archive, with the result that I did very little work on anything else.

One thing in the latest article did make me sit up and think. It was the following paragraph:
I have been playing around with grids and small war game boards for some time now and have finally developed a workable and interesting method of conducting full-scale battles on a 3 by 3 foot board lined with a 3 inch grid. To push things to the limit so to speak I have designed this one for use with 54mm troops figuring that if it were possible to fight a full battle with these on such a small board any other scale would work.
Visions of some of my Britains 54mm figures being used on my small tabletop suddenly came to mind ... as did the idea for a 'Very Little Wars' game! I even went into my toy/wargames room to see if I had a large enough piece of green felt on which to mark out a 12 x 12 grid of 3-inch squares before sanity returned and I decided that I needed to try to get one project finished first before I started another.

Yet again I had almost been seduced away from what I should have been doing by Morschauser!

Saturday, 1 February 2014

A short break in the weather

For the first time in what seems like an age it was not raining this morning ... and it has not started yet!

As a result I decided to spend some time in the garden cutting up and shredding the laurel hedge branches that had broken off and fallen down during the recent storms. After a couple of hours work I had managed to get all the branches together and had cut up and shredded about a third of them.

The time I spent gardening gave me the opportunity to do some thinking about how I am going to combine some elements of Richard Brooks' OP14 wargame rules with those drawn from my own ITCHY AND SCRATCHY wargame rules ... and with luck I should be able to start work on the first draft later today.

Sunday, 12 January 2014

Itchy and Scratchy wargames rules: An update

During my recent cruise I did manage to spend some time working on the latest draft on my ITCHY AND SCRATCHY NAVAL wargames rules.

The main changes that I finally introduced (after quite a lot of thought) can be summarised as follows:
  • The Flotation Values of all ship types have been increased.
  • Ships can turn without having to move forward first.
  • Torpedoes now reduce a target ship’s Flotation Value by 2D6.
  • Rules for minefields have been added.
I hope to be able to play-test this new draft of the rules in the near future.

I also produced an amended version of the ITCHY AND SCRATCHY rules so that they can be used to fight early twentieth century battles. The data for smooth-bore artillery has been removed and new data (and rules) for tanks, armoured cars, and motorised transport have been added.

Friday, 20 December 2013

Some more thinking needs to be done ... but not for a week or two

After giving it some considerable thought I have decided that I am going to put any further development of my ITCHY AND SCRATCHY NAVAL wargame rules to one side for a week or so. In the past - when I have been unable to decide what particular changes to make to a set of wargame rules - I have found that setting the whole thing to one side for a time allows me to review it with a fresh perspective ... and usually leads to a quicker and better solution.

Thursday, 19 December 2013

A bit of a re-think

The work I did re-visiting the play-test of my ITCHY AND SCRATCHY NAVAL rules seemed to confirm that my proposed changes to the Gunfire Results were a good idea ... but overnight I realised that there was a serious flaw in my thinking. Getting rid of the difference between the effects of hits on armoured and unarmoured ships would unduly increase the chance that an armoured ship's speed could be curtailed. Likewise the armament of an armoured ship was going to be as easy to disable as it was if the ship was unarmoured.

Obviously these changes will need to be rejected ... but I still think that the Flotation Values need to be increased to ensure that ships' survivability is increased. I also think that increasing the damage caused by torpedoes needs to be examined. My first thoughts are to increase the damage caused in lost Flotation Value from 1D6 to 2D6 ... but that would make them very destructive ... possibly too destructive. (The average score from 1D6 is 3.5 whereas the average score from 2D6 is 7 ... which is quite a big jump.)

Wednesday, 18 December 2013

A play-test re-visited

One of the advantages of photographing each and every move and dice throw during a play-test is that enables one to go back and look at the effect of changes that might be made to the rules … and that it what I have done today. I wanted to see whether the possible changes that I am thinking about making to my ITCHY AND SCRATCHY NAVAL wargame rules would have produced a very different outcome. I have done the analysis and my results are shown below.

(The analysis has been done turn-by-turn, with the original results shown first and in italics.)

Flotation Values
    Original play-test
    • Tsarina = 10; Monopoli = 6
    New Rules
    • Tsarina = 16 (4 x 2 x 2); Monopoli = 9 (4 x 1.5 x 1.5)
Turn 1
    Original play-test
    • Neither ship fires.
    • Flotation Values at the end of the turn: Tsarina = 10; Monopoli = 6
    New Rules
    • Neither ship fires.
    • Flotation Values at the end of the turn: Tsarina = 16; Monopoli = 9
Turn 2
    Original play-test
    • Tsarina fires: No effect
    • Monopoli fires: No effect
    • Flotation Values at the end of the turn: Tsarina = 10; Monopoli = 6
    New Rules
    • Tsarina fires: Hit on Monopoli – one FV lost
    • Monopoli fires: Hit of Tsarina – one FV lost
    • Flotation Values at the end of the turn: Tsarina = 15; Monopoli = 8
Turn 3
    Original play-test
    • Tsarina fires: Hit on Monopoli – one FV lost
    • Monopoli fires: No effect
    • Flotation Values at the end of the turn: Tsarina = 10; Monopoli = 5
    New Rules
    • Tsarina fires: Two hits on Monopoli – two FV lost
    • Monopoli fires: Hit of Tsarina – one FV lost
    • Flotation Values at the end of the turn: Tsarina = 14; Monopoli = 6
Turn 4
    Original play-test
    • Tsarina fires (Turret): Hit on Monopoli – one Gun Turret knocked out
    • Tsarina fires (Broadside Battery): Hit on Monopoli – one FV lost
    • Monopoli fires: No effect
    • Flotation Values at the end of the turn: Tsarina = 10; Monopoli = 4
    New Rules
    • Tsarina fires (Turret): Two hits on Monopoli – one Gun Turret knocked out and Movement Rate reduced by one grid area
    • Tsarina fires (Broadside Battery): Two hits on Monopoli – two FV lost
    • Monopoli fires: Hit of Tsarina – one FV lost
    • Flotation Values at the end of the turn: Tsarina = 13; Monopoli = 4
Turn 5
    Original play-test
    • Tsarina fires: No effect
    • Monopoli fires: No effect
    • Flotation Values at the end of the turn: Tsarina = 10; Monopoli = 4
    New Rules
    • Tsarina fires: No effect
    • Monopoli fires: No effect
    • Flotation Values at the end of the turn: Tsarina = 13; Monopoli = 4
Turn 6
    Original play-test
    • Tsarina does not fire: -
    • Monopoli fires torpedo: Hit on Tsarina – four FV lost
    • Flotation Values at the end of the turn: Tsarina = 6; Monopoli = 4
    New Rules
    • Tsarina does not fire: -
    • Monopoli fires torpedo: Hit on Tsarina – four FV lost
    • Flotation Values at the end of the turn: Tsarina = 9; Monopoli = 4
Turn 7
    Original play-test
    • Tsarina fires: Hit on Monopoli – one FV lost
    • Monopoli does not fire: -
    • Flotation Values at the end of the turn: Tsarina = 6; Monopoli = 3
    New Rules
    • Tsarina fires: Hit on Monopoli – one FV lost
    • Monopoli does not fire: -
    • Flotation Values at the end of the turn: Tsarina = 9; Monopoli = 3
Conclusions
The result of the battle was not significantly different although under the new rules the Monopoli should have broken off from the action at the end of Turn 4 and not tried to torpedo the Tsarina. By increasing every ship’s Flotation Value it is possible to simplify the gunfire rules, and I think that this is the way forward I would like to explore in future play-tests.

Tuesday, 17 December 2013

Itchy and Scratchy Naval wargame rules: Possible changes/improvements

In the light of the recent play-test of the first draft of the rules, I have been giving some thought to possible changes that I could make.

The possible changes include:
  • Reducing the movement rates for all ship types by one grid area: This should have the effect of 'enlarging' the currently available tabletop as it would take the models longer to move across it.
  • Allowing ships to turn without having to move forward one grid area first: This should also have the effect of 'enlarging' the existing tabletop as it would enable ships to manoeuvre within a smaller area.
  • Introducing a Flotation Value formula that takes into account a model's dimensions (in inches) and its level of armour: For example a heavily armoured battleship that is 4-inches long and 2-inches wide would have a Flotation Value of 32 (4 x 2 x 4 = 32), a lightly armoured cruiser that is 4-inches long and 1.5-inches wide would have a Flotation Value of 12 (4 x 1.5 x 2 = 12), and an unarmoured torpedo boat that is 4-inches long and 1-inch wide would have a Flotation Value of  4 (4 x 1 x 1 = 2).
  • Revising and simplifying the Gunfire Results table to remove the differences between hits on armoured and unarmoured ships: This change would be dependant upon the introduction of the Flotation Value formula as guns would inflict more hits.
None of these changes should affect the basic mechanics of the rules and hopefully will improve them.

Monday, 16 December 2013

Confrontation in the Fezian Sea: A play-test of the Itchy and Scratchy Naval wargame rules

The following play-test battle was set up to test the first draft of my ITCHY AND SCRATCHY NAVAL wargame rules. It was set in the Imagi-world of 1891 and was fought between warships of the Rusland and Fezian Navies.

Background
After the earlier fighting around the island of Naverona, when ships of the Rusland Navy engaged the Fezian coastal defences twice (see The Guns of Naverona and Return to Naverona), the Fezians bought a new armoured cruiser from the Parker Brothers shipyard. The ship was – in fact – a copy of a similar ship that they had built for the Rusland Navy and was named Monopoli in Fezian service.

Soon after entering service with the Fezian Navy Monopoli was ordered to patrol a disputed area of the Fezian Sea that was known to be frequented by the Rusland battleship Tsarina. The captain of the Monopoli was ordered to confront this 'blatant and provocative aggression into the waters of the peace-loving Fezian people' and to ensure that the Ruslanders were made aware that they could no longer regard the Fezian Sea as their 'Mare Nostrum'.

Not long after sunrise the lookouts on both the Monopoli and Tsarina spotted smoke on the horizon, and their respective captains turned their ships to turn towards the smoke to investigate. A confrontation was now inevitable.


Turn 1
Neither ship altered course or opened fire on their opponent but the crews of both ships began to prepare for battle.


Turn 2
The Tsarina then turned towards the Monopoli and opened fire with her main armament ... but caused no damage.


The Monopoli also turned and closed the range. She then fire at the Tsarina, but her gunfire was equally ineffective.


Turn 3
The Tsarina's captain seemed intent upon maximising the destructive power of his main armament, and brought his ship to almost point-blank range before he ordered his guns to fire. At that range it was almost impossible to miss ... and the Monopoli was holed below the waterline.


The Monopoli's captain tried to move his ship so that it was out of the arc-of-fire of the Tsarina's main guns before opening fire on the Rusland battleship ... but although the Monopoli's guns managed to hit their target, the shells had no effect on the heavily armoured hull of the battleship.


Turn 4
The Tsarina now turned across the stern of the Monopoli and fired at her ... and knocked out the cruiser's rearmost gun.


As the Monopoli was also in range of the Tsarina's starboard battery of light guns, these were also fired at the cruiser ... holing her yet again below the waterline.


The Monopoli turned so as to lengthen the range and to try to come around the stern of the Tsarina. She then fired at the Tsarina ... and missed!


Turn 5
The Tsarina moved abeam of the Monopoli, fired at her ... and missed ...


... and the Monopoli continued to try to go astern of the Tsarina, firing (and missing) as she did so.


Turn 6
Both ships were now trying to get astern of the other. The Tsarina's main armament did no damage to the Monopoli ...


... but a miscalculation on the part of the Tsarina's captain allowed the Monopoli to get astern of the Tsarina ... and to fire a torpedo!


Although the Tsarina was only just in range of the torpedo, the Monopoli's torpedo did not miss ... and caused considerable underwater damage to the Rusland battleship.


Turn 7
The Tsarina's captain realised that his ship was in danger of being sunk by the Fezia cruiser, and decided that he should terminate the action as quickly as possible and get his damaged ship back to port so this could be repaired.

The Tsarina's rear medium gun fired at the Monopoli, which deterred the cruiser from closing the range and continuing the battle ...


... thus ending this short but sharp confrontation.

Conclusions
The rules worked better than I had expected, and the play-test battle was exactly what I had hoped it would be ... a quick, fun, 'knock-about' naval battle that was not too unrealistic. I hope to do some more work developing these rules over the next few weeks, but I do need to build some more model ships before the next play-test.

Now where did I put all that basswood?

Sunday, 15 December 2013

Itchy and Scratchy Naval wargame rules ... or should that be Bangy and Sinky?

I finally managed to put my ideas down on paper ... and here they are. They are totally untested, so please do not complain ... yet!

The point of my ITCHY AND SCRATCH NAVAL wargame rules is that they are designed for a quick and fun 'knock-about' naval wargame that can be fought out on a simple grid (preferably a hexagonal one made from Hexon II) using small, cartoon-style models of 1860 to 1890 warships. The do not profess to be anything else ... and should be regarded in this light.

ITCHY AND SCRATCH NAVAL WARGAME RULES
Ships
  • Ships are allocated a Flotation Value (FV) and a Movement Rate.
  • A ship’s combat ability depends upon the type of weapons that the ship is equipped with and the range at which it is firing.
Flotation Value (FV)
  • Type of Ship = Flotation Value
  • Battleship = 10
  • Old Battleship = 8
  • Armoured Cruiser = 6
  • Unarmoured Cruiser = 4
  • Torpedo Boat = 2
Flotation Value Rules
  • Ships are allocated a Flotation Value (FV) before the battle begins; these may be adjusted in order to take into account the ship’s design, armour, and overall fighting power.
  • Ships lose Flotation Value as a result of enemy action, and these reductions must be recorded (i.e. on a roster or by the use of markers).
  • When a ship’s Flotation Value (FV) is reduced to 0, the ship is sunk and it is removed from the tabletop.
Exhaustion Point
  • Before the battle begins both sides calculate their Exhaustion Point. This is one half of the side’s total initial Flotation Values, rounded up.
  • When a side has lost that proportion of its initial Flotation Values, it has reached its Exhaustion Point.
  • A side that has reached its Exhaustion Point must immediately stop taking aggressive action (i.e. it will continue to fight to defend itself, but will turn away from the enemy and attempt to disengage).
  • When both sides have reached their Exhaustion Point the battle ends.
Turn Sequence
  1. For individual ship vs. ship actions, a D6 die is thrown by both sides and the side with the highest score always activates its ship first each turn.
  2. For larger battles each side is allocated a playing card colour (i.e. Red or Black).
  3. A playing card for each ship – of the relevant colour – is withdrawn from a normal pack of playing cards, shuffled, and placed face down somewhere convenient near to the tabletop.
  4. When the battle starts, the top playing card is turned over and the side that has been allocated that playing card colour activates one of their ships. Once that ship has moved and/or fired (both guns and/or torpedoes), the next playing card is turned over … and so on until both side’s ships have moved and/or fired (both guns and/or torpedoes) in turn, subject to any restrictions laid down in the rules.
  5. Both sides must then check to see if they have reached their Exhaustion Point. Once that has been done, the turn is complete, the playing cards can be re-shuffled, and the next turn can commence.
Movement
  • Type of Ship = Movement Rate
  • Battleship = 3 grid areas
  • Old Battleship = 3 grid areas
  • Armoured Cruiser = 4 grid areas
  • Unarmoured Cruiser = 4 grid areas
  • Torpedo Boat = 5 grid areas
Movement Rules
  • All movement is measured through the edges of the grid areas not the corners.
  • A ship may be moved only once each turn.
  • A ship may turn from facing one edge of a grid area to an adjacent edge of the same grid area after moving forward a gird area; this turn reduces its movement by 1 grid area.
  • A ship may turn from facing one edge of a grid area to an adjacent edge of the same grid area without moving forward a gird area (i.e. on the spot); this turn reduces its movement by 2 grid areas.
  • A ship may change its direction of movement any number of times during its move but must end its move facing the edge of the grid area not the corner.
  • A ship may not start, pass through, or end its move in the same grid area as another ship.
Gunfire
  • Heavy Gun battery or turret (max. range = 9 grid areas): 6-6-6-4-4-4-2-2-2
  • Medium Gun battery or turret (max. range = 6 grid areas): 6-6-4-4-2-2
  • Light Gun battery or turret (max. range = 5 grid areas): 6-4-4-2-2
  • QF Gun battery or mounting (max. range = 3 grid areas): 6-4-2
Notes
  • The numbers show how many D6 dice are thrown per gun battery or per turret at different ranges.
  • It is assumed that a gun battery or turret is armed with one or two guns. If the gun battery or turret has more than two guns, increase the number of D6 dice thrown by 2.
Gunfire Rules
  • All ranges are measured through the edges of the grid areas not the corners.
  • All the guns in each gun battery or in each turret must fire at the same target.
  • Each ship may fire only once each turn, although each of the ship’s gun batteries or turrets may engage a different target.
  • Ships may only fire at targets that are in direct line-of-sight and the targets must be within the arcs-of-fire of the gun battery or turret firing at them.
  • The target ship is identified. The requisite number of D6 dice is thrown for each gun battery or turret the firing ship is firing with and the range at which the firing is taking place. The results are then read from the Gunfire Results shown below.
Gunfire Results
  • Double 1: Destroys a gun battery or turret on an unarmoured ship
  • Double 1 + Any other double: Destroys a gun battery or turret on an armoured ship.
  • Double 2 or Double 3: Reduces an unarmoured ship’s movement rate by 1 grid area.
  • Double 2 or Double 3 + Any other double: Reduces an armoured ship’s movement rate by 1 grid area.
  • Double 4 or Double 5 or Double 6: Reduces an unarmoured ship’s Flotation Value by 1.
  • Double 4 or Double 5 or Double 6 + Any other double: Reduces an armoured ship’s Flotation Value by 1.
  • All damage takes immediate effect. When a ship’s Flotation Value (FV) is reduced to 0, the ship is sunk and it is removed from the tabletop.
Torpedoes
  • Number of D6 thrown (max. range = 3 grid areas): 6-4-2
Torpedo Rules
  • Only ships armed with torpedoes may fire them.
  • No ship may be armed with more than two torpedoes.
  • No ship may fire more than one torpedo each turn.
  • All ranges are measured through the edges of the grid areas not the corners.
  • Torpedoes are fired either directly ahead, directly astern, or directly abeam; they may not be fired at an angle.
  • The target ship is identified. The requisite number of D6 dice is thrown for the range at which the torpedo is being fired. The results are then read from the Torpedo Results shown below.
Torpedo Results
  • Any double: The torpedo has hit the target ship and reduced the target ship’s Flotation Value by 1D6.
  • All damage takes immediate effect. When a ship’s Flotation Value (FV) is reduced to 0, the ship is sunk and it is removed from the battlefield.

Examples of ships
A battleship


This battleship is armed with Heavy Gun battery or turret (forward), a Medium Gun battery (aft), and two Light Gun batteries (one each side) plus two torpedoes.

An armoured cruiser


This armoured cruiser is armed with two Medium Gun batteries (one forward and one aft) plus two torpedoes.

Saturday, 14 December 2013

It sounds painful ... but I hope that it isn't!

I have had an idea clumping around in my head over the past week or two ... and it is that it should be possible to devise a simple set of ironclad-era naval wargame rules based on my ITCHY AND SCRATCHY rules. For want of a better title I have called them the ITCHY AND SCRATCHY NAVAL wargame rules. (Had I called them the itchy and scratch navel rules, they might have sounded unpleasant ... or even painful!)

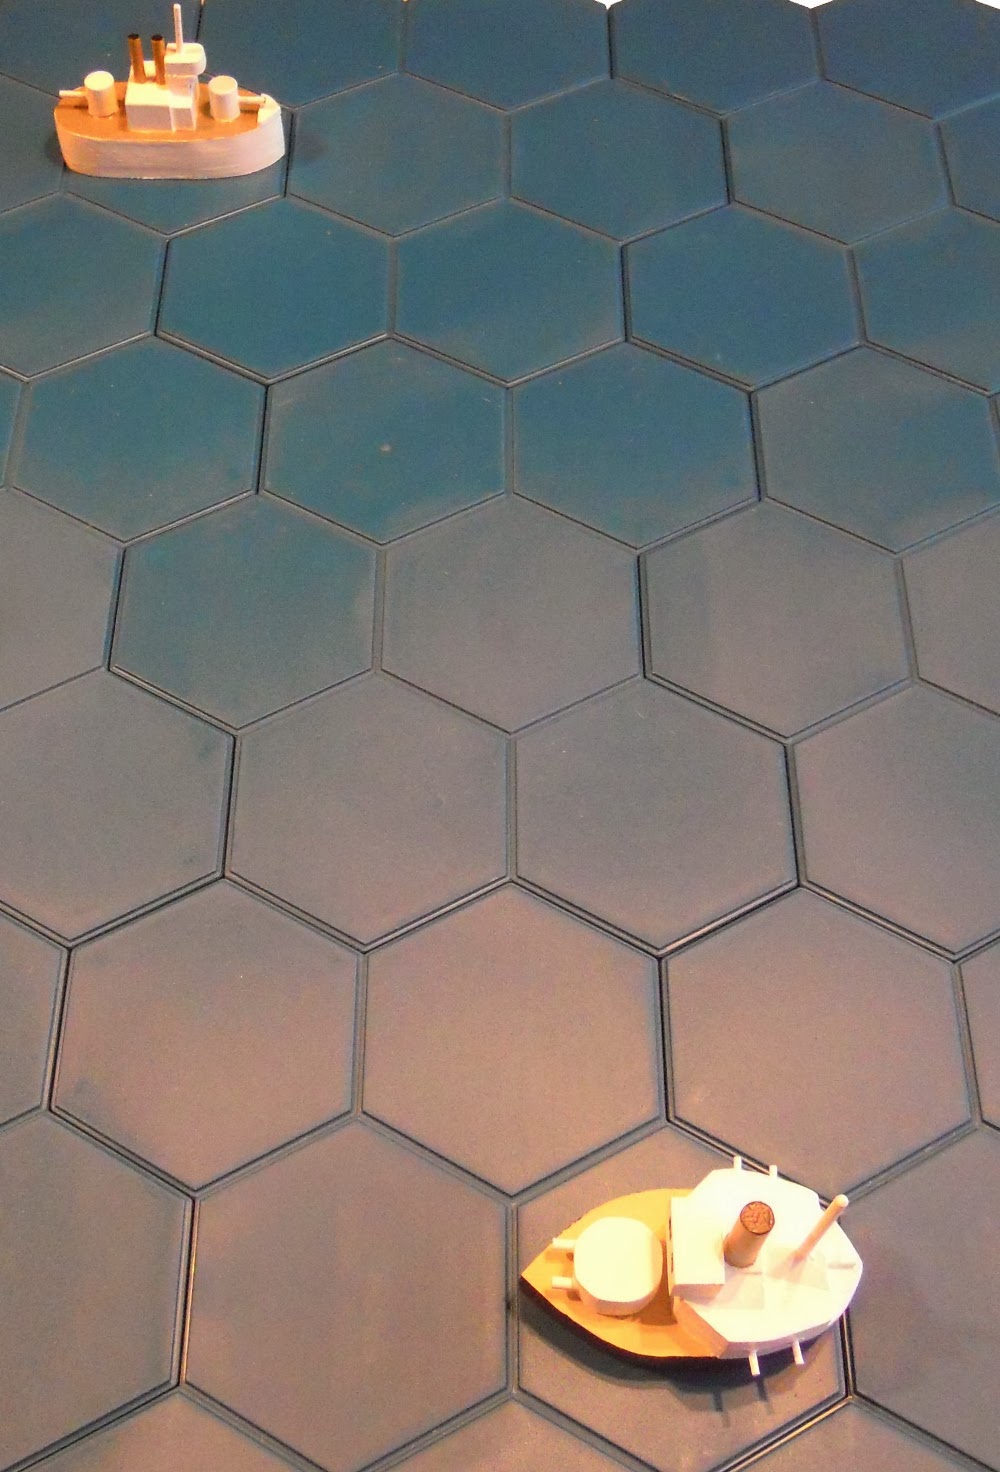
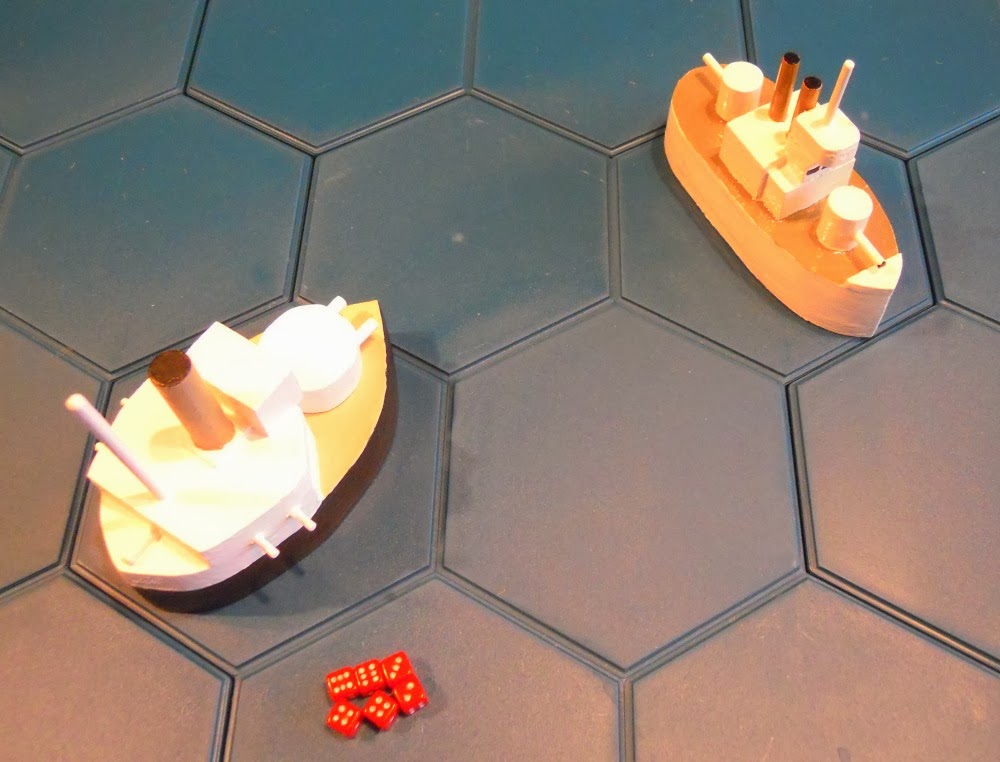
Ideal candidates for a play-test of my ITCHY AND SCRATCHY NAVAL wargame rules.
I have yet to put pen to paper - or, more accurately, finger to keyboard - but I am thinking along the lines of ships moving 3, 4, or 5 grid areas per turn (depending upon ship type) and using the same gun ranges as in the current ITCHY AND SCRATCHY rules. Hits would be scored on targets using a similar D6-based dice system to that already used in the ITCHY AND SCRATCHY rules (e.g. A pair of 1s will hit and damage an unarmoured ship whereas a pair of 1s and another double will hit and damage an armoured ship). Allocation of damage caused by hits would require a second D6 die throw (e.g. 1 = Hit on armament that knocks out a gun; 2 or 3 = Hit on machinery that reduces speed; 4, 5, or 6 = Hit on hull that can cause a ship to sink).

It is very early days as yet, but I think that it should not take me very long to get a working set of rules ready for play-testing ... hopefully before Christmas.

Friday, 29 November 2013

A further incident from the Rusland Civil War: The bridge over the River Malyava (or yet another Itchy and Scratchy play-test)

For the next play-test of my ITCHY AND SCRATCHY rules I decided to re-visit the Rusland Civil War.

This play-test was set up so that I could try out a couple of ideas that had been occupying my mind over the previous days, namely the use of the rules with multi-figure based units and a playing card-driven unit activation system where each unit was allocated a specific playing card (as outlined in my blog entry).

Scenario
Major General Lentilov had a problem. He had been set the task of removing a large stockpile of weapons and ammunition from the town of Sittangrad on the River Malyava before revolutionary forces under the command of ColCom (Column Commander) Kornilov captured the town. In order to do this Lentilov had to hold the town – and its bridge – until the end of the day (i.e. for six turns).

Although he had only arrived in Sittangrad a few days before he received the order to abandon the town after its valuable contents had been removed, he had managed to order the construction of a series of defences (including trenches and barbed wire) behind which his troops could fight.


He did not have very many troops, but what he had were good:
  • Major General Lentilov: SP = 1 (Black 1)
  • 100th Artillery Battery: SP = 2 (Black 2)
  • 101st Machine Gun Battalion: SP = 2 (Black 3)
  • 102nd Rifle Battalion: SP = 4 (Black 4)
  • 103rd Rifle Battalion: SP = 4 (Black 5)
  • 104th Rifle Battalion: SP = 4 (Black 6)
  • Exhaustion Point: The loss of 9 SP
ColCom Kornilov commanded a much larger force … but its quality was somewhat variable. The infantry and cavalry were raw militia, but he had been given some artillery recruited from the Red Banner Fleet:
  • ColCom Kornilov: SP = 1 (Red 1)
  • Red Banner Artillery Battery: SP = 2 (Red 2)
  • 201st Cavalry Regiment: SP = 2 (Red 3)
  • 202nd Cavalry Regiment: SP = 2 (Red 4)
  • 203rd Rifle Battalion: SP = 3 (Red 5)
  • 204th Rifle Battalion: SP = 3 (Red 6)
  • 205th Rifle Battalion: SP = 3 (Red 7)
  • 206th Rifle Battalion: SP = 3 (Red 8)
  • 207th Rifle Battalion: SP = 3 (Red 9)
  • Exhaustion Point: The loss of 11 SP
Kornilov’s orders were to capture Sittangrad at all costs before the arms and ammunition that was know to be there were conveyed across the River Malyava.

Turn 1
Col Com Kornilov moved his forces towards Sittangrad. Major General Lentilov chose not to open fire on the advancing troops as he intended to hold his fire until they were much closer.


Turn 2
At the behest of ColCom Kornilov, the Red Banner Artillery Battery opened fire on the 101st Machine Gun Battalion, but the range was too great to achieve any serious results.


The 207th Rifle Battalion moved forward ...


... and in response Major General Lentilov changed his position so that he could support and command the 101st Machine Gun Battalion.


The 100th Artillery Battery then engaged the Red Banner Artillery Battery but the target was too far away for it to suffer any casualties.


202nd Cavalry Regiment advanced on the right wing ...


... whilst the Red Banner Artillery Battery fired for a second time at the 101st Machine Gun Battalion ... with the same negative result.


In the centre the 205th Rifle Battalion moved forward ...


... supported by the 206th Rifle Battalion.


On the left the 204th Rifle Battalion moved closer to the enemy trenches ...


... but it was then overtaken by the 203rd Rifle Battalion.


On the right the 201st Cavalry Regiment moved up behind the 202nd Cavalry Regiment.


Turn 3
The 205th Rifle Regiment charged forward into the barbed wire. (I decided that any unit stopped by barbed wire would not be allowed to engage in any form of combat until the barbed wire was removed.)


This gave Major General Kornilov the opportunity to order the 101st Machine Gun Battalion to fire at 205th Rifle Regiment ... with devastating results!


The 204th Rifle Regiment advanced towards the enemy defences and fired at the 104th Rifle Battalion, but was unable to cause them any casualties.


The 202nd Cavalry Regiment charged into the barbed wire on the left flank of the defences around Sittangrad ...


... and the Red Banner Artillery Battery fired at the 101st Machine Gun Battalion. The artillery was on target but yet again it was ineffectual.


The 103rd Rifle Battalion opened fire on the 202nd Cavalry Regiment ... and emptied half of the Regiment's saddles!


The 102nd Rifle Battalion fired at the remnants of the 205th Rifle Battalion ... and wiped them out!


The 101st Machine Gun Battalion shot at the 203rd Rifle Battalion and inflicted a casualty.


The 100th Artillery Battery fired over open sights at the oncoming 204th Rifle Battalion and caused it its first casualty.


On the other flank the 207th Rifle Battalion sought cover in the nearby wood ... and will no doubt incur the wrath of its political masters in the very near future for not showing a sufficiently aggressive attitude.


The 104th Rifle Battalion joined in the general firefight that had developed along the line of Sittangrad's defences, but was unable to inflict any casualties on the 203rd Rifle Battalion.


In the centre the 206th Rifle Battalion moved into the barbed wire protecting one face of the position occupied by the 101st Machine Gun Battalion.


At this point ColCom Kornilov ordered the Red Banner Artillery Battery to fire at the troublesome 101st Machine Gun Battalion. Their fire missed the 101st Machine Gun Battalion ... but hit and killed Major General Lentilov!


Whilst this was happening, the 203rd Rifle Battalion moved into the field of barbed wire in front of the 104th Rifle Battalion ...


... and on the right flank the 201st Cavalry Regiment joined the depleted 202nd Cavalry Regiment.


(At this point in the battle the ColCom Kornilov's troops had lost 6SP and their opponents had lost only 1 ... but it was their General, Major General Lentilov.)

Turn 4
Despite the loss of their commander, the 101st Machine Gun Battalion was undaunted and inflicted serious casualties upon the 206th Rifle Battalion.


The 204th Rifle Battalion fired over the marshy area at the 100th Artillery Battery, but caused no casualties.


The 202nd Cavalry Regiment managed to remove the barbed wire and engaged the 103rd Rifle Battalion in close combat. The 202nd Cavalry Regiment won the close combat, and the 103rd Rifle Battalion was reduced to half strength. (The 103rd Rifle Battalion could have given ground, but preferred to accept an additional casualty in order not to be forced to retreat.)


The Red Banner Artillery Battery tried to repeat its earlier success but was unable to hit the 101st Machine Gun Battalion.


The 103rd Rifle Battalion counter-attacked the 202nd Cavalry Regiment ... and completely destroyed it!


The 207th Rifle Battalion emerged from the wood and advanced towards the enemy positions.


The 104th Rifle Battalion fired at the 203rd Rifle Battalion, but were unable to inflict any casualties upon them.


The 203rd Rifle Battalion then removed the barbed wire that had earlier halted their advance and charged forward to engage the 104th Rifle Battalion. Despite the intensity of the fighting, neither side suffered any casualties.


The 100th Artillery Battery fired at the 204th Rifle Battalion and caused them a further casualty.


The 201st Cavalry Regiment finally fought their way through the barbed wire in front to the enemy's defences and attacked to 103rd Rifle Regiment. Neither side suffered any casualties ...


... but the 201st Cavalry Regiment was forced to withdraw.


In the centre the 206th Rifle Battalion attacked the 101st Machine Gun Battalion, but immolated itself in the process.


(At this point the attackers had reached their Exhaustion Point.)

The 102nd Rifle Battalion opened fire on the 201st Cavalry Regiment, but the range was too great and the fire too inaccurate for them cause any casualties.


ColCom Kornilov encouraged the Red Banner Artillery Battery to make more attempt to destroy the 101st Machine Gun Battalion ... but although they were on target the trenches prevented the 101st Machine Gun Battalion from suffering any casualties.


Realising the he was not going to be able to capture the bridge over the River Malyava by nightfall, ColCom Kornilov recalled his troops ... and effectively signed his own death warrant for failing to achieve his objective.


Although their casualties had been relatively light, the death of Major General Lentilov was a blow from which his army would take time to recover. They had achieved all that they had been asked to do ... but the loss of such a great general had been a high price to pay.

Conclusions
  • The simplest version of the playing card-driven unit activation that I outlined in my earlier blog entry worked very well indeed, and produced some interesting results.
  • The tabletop was unencumbered with playing card tiles, which – from my point of view – improved the whole look of the battle.
  • One unforeseen by-product of the playing card-driven unit activation was the aid the cards gave me when I was writing the turn-by-turn battle report. I had kept the cards in the order that they were turned over and this helped me to keep an accurate record of which units were activated in what order.
  • Using multi-figure unit bases and magnetic strength markers ensured that units did not 'dwindle away' but remained intact until they were destroyed. This was aesthetically much more pleasing on the eye ... and has given me something to think about as I had previously be of a mind to only use single-figure bases in future.