Pages

Showing posts with label World War I. Show all posts

Friday, 4 July 2025

William Algernon Tapsell DCM (and bar), MM

One name that stood out on the display at the Abbey Wood Memorial Garden was William Algernon Tapsell. He had served and died during the First World War and had been awarded the Distinguished Conduct Medal (DCM) twice as well as the Military Medal (MM).

The former medal was established in 1854 and ranked just below the Victoria Cross (VC). It was awarded to NCOs and enlisted personnel for 'distinguished, gallant and good conduct in the field', and its equivalent for officers was the Distinguished Service Order (DSO). During the First World War, 24,620 DCMs were awarded, with 472 personnel receiving it twice, and nine being given the award three times.

The Military Medal was instituted in 1916, although retrospective awards for 1914 onwards were made. It was awarded to other ranks for 'acts of gallantry and devotion to duty under fire'. During the First World War, 115,589 Military Medals were awarded, with 5,796 personnel receiving it twice, 180 being given the award three times, and one person receiving it four times! The latter was Private Ernest Albert Corey, a stretcher bearer in the 55th Australian Infantry Battalion.

William Algernon Tapsell was born on 6th January 1893 and he was baptised at All Saints Church, Belvedere, on 9th April that year. His parents were Algernon Tapsell (a coachman) and Mary Jane Tapsell. They were living at 12, The Grove, Abbey Wood. In 1901 William was living at 2, Grove Road, Abbey Wood, and attending Plumstead High Street School (now Bannockburn School), having previously attended Knee Hill School, Abbey Wood.

William joined the Army underage (his birthday is recorded as being 11th January 1891 and his service number indicates that he was recruited in 1909) and served with the 2nd Battalion, Lincolnshire Regiment. When war broke out in 1914, the battalion was in Bermuda. It returned to England on 3rd October 1914, and was deployed to France as part of the 25th Brigade, 8th Division, landing at Le Havre on 6th November 1914. The battalion took part in the Battle of Aubers Ridge in May 1915 and the Battle of the Somme in Autumn 1916.

By 1917 William was a Corporal serving with the 6th (Service) Battalion of the Lincolnshire Regiment, a Kitchener battalion that had been raised in Lincoln in August 1914. The battalion had taken part in the Gallipoli campaign as part of 33rd Brigade, 11th (Northern) Division before spending time in Egypt. It was deployed to France in July 1916 to the Somme and subsequently took part in the Battles of Fleurs-Courcelette and Thiepval. During 1917 the battalion took part in operations on the Ancre (January to March) and the Battles of Messines (June), Langemarck (August), Polygon Wood (September to October), Broodseinde (October), and Poelcapelle (October).

He was awarded the Military Medal by August 1917 as it appeared in the London Gazette on 21st August 1917. This was followed in September that year when he was awarded the Distinguished Conduct Medal on 17th September twice for separate acts of gallantry.

The citation for the first award was as follows:

For conspicuous gallantry and devotion to duty in assisting to dig out nineteen men who had been buried in a dug-out by a gas shell. Finding it impossible, owing to darkness, to work in a gas helmet, at imminent risk of his life he removed his own, and by his efforts successfully extricated some of the men. The dug-out was full of lethal gas fumes, and six of the men affected subsequently died. He set a splendid example of fearless devotion and self-sacrifice.

The citation for the second award was as follows:

For conspicuous gallantry and devotion to duty when in command of battalion scouts. Having been ordered to reconnoitre in front of our advancing patrols, his party came under heavy and unexpected rifle and machine gun fire. In spite of this, however, after warning the patrols behind him, he continued to push forward until, owing to several casualties, further advance was impossible, whereupon he withdrew very skilfully with all his wounded back to our lines. Throughout the action he displayed splendid coolness and presence of mind and an utter disregard for personal safety.

William was promoted to the rank of sergeant and then commissioned as a Second Lieutenant in the 1st battalion 'for service in the field' on 27th April 1918. He died of his wounds on 18th September 1918, and was buried in St Sevre Cemetery, Rouen.

William's medals were sent to his parents, who were living at 3, The Grove, Abbey Wood ... although his dependent is listed as Mrs Rose, Dundonald House, Hamilton, Bermuda, who is thought to have been the mother of his illegitimate child, and who received his weekly death pension of six shillings and six pence.

Saturday, 31 May 2025

The 109th anniversary of the Battle of Jutland … and some wonderful wargaming memories

Today marks the 109th anniversary of the initial stages of the biggest naval battle of the Great War, the Battle of Jutland.

Map showing the course of the Battle of Jutland.

Over the years, many naval wargamers have re-fought this crucial battles, and I took part in two such wargames. The first – which was staged the the US Naval War College in the Queen’s House at the National Maritime Museum in Greenwich – was in November 2018, and the second staged by the Jockey’s Fields Irregulars in Holborn, London in December 2021.

The former used rules written by the staff of the US Naval War College in 1922 in light of the experience gained and data gathered during the Great War, ...

An example of the individual ship record cards used in the US Naval War College's 1922 Naval War Game.

... and the latter used a simplified, fast-play version of Fletcher Pratt's Naval War Game. Both used 1:1200th-scale model ships ... and the sight of so many model ships was stunning!

The final positions of the British and German fleets at the end of the Jockey's Fields re-fight of the Battle of Jutland..

Now that I can no longer crawl about on the floor, I doubt if I’ll ever be able to take part in such large naval wargames in the future … but I have some wonderful memories of those two wargames!

Thursday, 15 May 2025

The Battle of Néry

Having read Professor Gary Sheffield’s recent battle report, I decided to find out more about this small but significant early Great War battle.

The Battle of Néry was fought on 1st September 1914 during the from Mons. The British 1st Cavalry Brigade were in the process of leaving their overnight bivouac when they were attacked by the German 4th Cavalry Division.

The British 1st Cavalry Brigade (commanded by Brigadier-General Charles James Briggs) comprised the following units:

  • 2nd Dragoon Guards (Queen's Bays)
  • 5th (Princess Charlotte of Wales's) Dragoon Guards
  • 11th (Prince Albert's Own) Hussars
  • 1st Signal Troop, Royal Engineers
  • L Battery, Royal Horse Artillery (6 x 13-pounder guns)
  • 1st Cavalry Brigade Machine Gun Squadron Machine Gun Corps

The German 4th Cavalry Division (commanded by General Otto Wladislaus Eduard Konstantin von Garnier) comprised the following units:

  • 3rd Cavalry Brigade
    • 2nd (Pomeranian) Cuirassiers Queen
    • 9th (2nd Pomeranian) Uhlans
  • 17th Cavalry Brigade
    • 17th (1st Grand Ducal Mecklenburgian) Dragoons
    • 18th (2ndGrand Ducal Mecklenburgian) Dragoons
  • 18th Cavalry Brigade
    • 15th (Hannover) Hussars Queen Wilhelmina of the Netherlands
    • 16th (Schleswig-Holstein) Hussars Emperor Francis Joseph of Austria, King of Hungary
  • Horse Artillery Abteilung of the 3rd (1st Brandenburg) Field Artillery General-Feldzeugmeister Regiment
  • 2nd Guards Machine Gun Detachment
  • Pioneer Detachment
  • Signals Detachment
  • Heavy Wireless Station
    • 18 Heavy Wireless Station
    • 19 Light Wireless Station
    • 10 Light Wireless Station
  • 12 Cavalry Motorised Vehicle Column

The Germans unknowingly approached the British position through the early morning fog and were spotted at 5.25am by a patrol of the 15th Hussars. Fighting started fifteen minutes later when the advanced units of the German division were engaged by British machine guns and horse artillery. In response, the German commander ordered his troops to dismount and make an assault on the village of Néry.

During the battle, most of the cavalry fought dismounted. All but one of L Battery, Royal Horse Artillery's guns were knocked out early during the fighting, but the remaining one stayed in action for two and a half hours and engaged the German Horse Artillery. (The gun is now on display at the Imperial War Museum, Lambeth, London.) Three of that gun's crew (Captain Edward Kinder Bradbury, Battery Sergeant Major George Thomas Dorrell, and Sergeant David Nelson) were awarded the Victoria Cross for their actions during the battle and the battery was subsequently awarded the honorific title 'Néry'.

The last gun of L Battery, Royal House Artillery in action at Néry.

British reinforcements (the 4th Cavalry Brigade – which comprised Household Cavalry Composite Regiment, 6th Dragoon Guards (Carabiniers), and 3rd (King's Own) Hussars – with I Battery, Royal Horse Artillery, and 1st Battalion, Middlesex Regiment) arrived at around 8:00am and counter-attacked the Germans. This forced the Germans to retreat and the German 4th Cavalry Division was unfit to return to combat for several days.


The Victoria Cross recipients were:

  • Captain Edward Kinder Bradbury (16th August 1881 – 1st September 1914) was given the award posthumously.
  • Battery Sergeant Major George Thomas Dorrell (7th July 1880 – 7th January 1971) rose to the rank of brevet Lieutenant-Colonel.
  • Sergeant David Nelson (3rd April 1887 – 8th April 1918) rose to the rank of Major by the time he was killed in action at Lillers, France.

L (Néry) Battery was formed in India in 1809 as 3rd Troop, Bengal Horse Artillery. It served with distinction during the Indian Mutiny, and Gunner William Connolly (c. 1816 – 31st December 1891) was awarded a Victoria Cross on 7th July 1857 for his heroism during the Battle of Jhelum, India.

After the mutiny, it formed part of the Bengal Army (the largest of the three Presidency Armies in British India), and it was renamed L Battery Royal Horse Artillery in 1889.

The battery is currently equipped with light armoured vehicles and is 1st Regiment, Royal Horse Artillery's Tactical Group Battery.

Tuesday, 13 May 2025

Other people’s Portable-style Wargames: The Battle of Néry

Recently, Professor Gary Sheffield re-fought the Battle of Néry with Stuart Davies using the latter’s PORTABLE WARGAME-style rules.


Stuart’s rules (with some Optional rules suggested by Gary) are summarised below:

THE RULES

Units

  • Infantry Company: 2 figures.
  • Infantry Battalion: 4 Infantry Companies PLUS a Machine Gun battery.
  • Cavalry Squadron: 1 figure.
  • Cavalry Regiment: 4 Cavalry Squadrons PLUS a Machine Gun battery
  • Machine Gun and Artillery Batteries: Strength indicated by the number of gun crew (i.e. a 4-gun battery will have 4 crew figures)
  • (Optional rule:  Machine Gun batteries have a maximum of 2 crew figures but each figure throws 2D6 and hit on 3, 4, 5, or 6 in the open. However, the Machine Gun jams on a 1 on D6 (i.e. either 50% or 100% of guns cannot fire in that turn)).
  • (Optional rule: Field Artillery has a range of 12 squares and throws 2D6 dice per gun per battery.)

Turn sequence

  • The moves were card driven.
  • At the beginning of each turn each unit on both sides is dealt a card from the same pack, and that determined the order of activation.
  • Thus if a unit gets the King of Spades (the highest possible normal card) it will move first, but one with the Ace of Clubs (the lowest possible card) moves last.
  • If a unit gets a Joker, that trumps all court cards, and that unit can decide to go first or last.
  • (Optional rule: A Joker means a unit can decide when to move/fire, which can be at any point in turn except when another unit is moving/firing.)
  • Units can choose to reserve their fire, i.e. not use open fire during their turn but wait until a target appears.

Movement

  • Units move up to the following distances:
    • Infantry: Move 2 squares.
    • Cavalry: Move 4 squares.
    • Horse artillery: Move as cavalry.
  • All can make a half move and then fire.
  • All movement is orthogonal.
  • Deduct 1 square of movement to mount/dismount, limber and unlimber.
  • It is therefore possible to do multiple actions in same turn.

Firing

  • Weapon ranges:
    • Rifles: 4 Squares.
    • Carbines: 3 Squares.
    • Horse Artillery: 8 Squares.
    • Machine Guns: 6 Squares.
  • Each figure in a unit throw a D6 die to fire. (See optional rules for Machine Guns and Field Artillery above.)
  • Dice scores to hit:
    • 6 to hit in hard cover.
    • 6 or 5 to hit in soft cover.
    • 4. 5, or 6 to hit to hit in the open.
    • Add 1 to dice to hit if close range.
    • Deduct 1 from dice to hit if firing carbine.
  • Artillery and Machine Guns nominate primary target directly to front but can hit targets in squares either side of target square.


BATTLE REPORT

The opening positions. The British are at the bottom of the photograph.

The Germans emerge from the wood and mist and come under a storm of British rifle and machine gun fire.

British Machine Gun destroys a German Machine Gun.

Heavy fighting on the outskirts of Nery.

The British reinforcements arrive in the shape of the 4th Cavalry Brigade!

The British advance and the Germans prepare to retreat.

1st Life Guards overrun a German Horse Artillery battery,

The situation at the end of the battle.


Please note that the photographs featured above are © Professor Gary Sheffield.

Wednesday, 2 October 2024

Not Quite Mechanised

It been quite a while coming ... but at last, Chris Kemp's NOT QUITE MECHANISED: TABLETOP OPERATIONAL WARGAMING 1914-1945 is now on sale!

These were the first proper operational-level wargame rules that I ever used, and they had a significant impact on my wargaming ideas at the time and ever since. They were also the inspiration for what became Tim Gow's MEGABLITZ operational-level wargame rules, ...

... and although both use very different game mechanisms, they are – in my humble opinion – both excellent sets of rules. (See here for a more detailed background to the development of the latter.)

I've known Chris Kemp since we both attended the first ever Conference of Wargamers (COW) back in 1980, and he began developing what became NOT QUITE MECHANISED in the years afterwards. I am lucky enough to own a copy of the first draft of the rules and was able to take part in several of the developmental play-test battles that have taken place in the interim.

As originally drafted, they did not use a grid but over recent years Chris has adapted the rules so that they do ... and there is no doubt that this has had a major impact on their playability.

The book is divided into twenty sections:

  1. Index
  2. Modelling the Game and Scales. How to Organise the Toy Soldiers
  3. Pre-Battle Organisation
  4. Timescales
  5. Unit Quality/Endurance
  6. Measuring Range
  7. Defining Contact
  8. Starting the Game
  9. Resolving Combat
  10. Logistics and Markers
  11. Miscellaneous
  12. Example Game Turn
  13. Sample Orders of Battle
  14. Player Notes
  15. Designers Notes
  16. Acknowledgements
  17. Bibliography and Further Reading
  18. About the Author
  19. Glossary
  20. Playsheet
A particular strength of these rules is the fact that they can be used to fight operational-level battles on a tabletop at several different levels, these being:

  • Front Scale
  • Corps Scale
  • Divisional Scale
  • Regimental Scale

Unusually for a set of wargame rules, Chris' rules include logistics and medical units, the latter being able to remove hit markers from units they are in contact with during the reorganisation phase of each turn, assuming – of course – that the unit is not under fire or involved in combat at the time.

Chris Kemp's blog - which is (not surprisingly) entitled NOT QUITE MECHANISED - has a host of battle reports and other goodies including numerous ORBATs. The most recent of these is called 'Building Rubbish Germans' and is the ORBAT for a Corps Scale German M1944 Infantry Division.

A Corps Scale German M1944 Infantry Division ... but lacking its schnelle Batallion, Pioniere and horses.

I cannot recommend this book too highly ... and even if you don't use the rules, I hope that you will find it as inspirational and informative as I have.


NOT QUITE MECHANISED: TABLETOP OPERATIONAL WARGAMING 1914-1945 was written by Chris Kemp and published in 2024 by Not Quite Mechanised Publications (ISBN 978 1 4452 7312 9).


Please note that photograph featured above is © Chris Kemp.

Sunday, 15 September 2024

Steamer Wars Hexed

Back in 2014, the doyen of British naval wargamers – David Manley – published a set of wargame rules specifically for wargamers who wanted to fight the gunboat battles that took place on Lake Tanganyika during the the Great War. It was entitled STEAMER WARS: WW1 NAVAL WARGAMES ON LAKE TANGANYIKA AND BEYOND ...

... and was republished in 2020.

When David Crook (the author of THE PORTABLE IRONCLADS WARGAME book of rules) decided that he want to refight the battles between the Royal Navy and German Navy gunboats on Lake Tanganyika, he looked at David Manley's rules ... and adapted them so that they would work on a hexed tabletop. The result was STEAMER WARS: WW1 NAVAL WARGAMES ON LAKE TANGANYIKA AND BEYOND: TACTICAL RULES HEX ADAPTATION.

The book is twenty pages long and is split into six sections:

  • Foreword
  • Introduction
  • Generic Vessel Data
  • The Rules
  • Specific Ship Data Tables, Lake Tanganyika Campaign
  • Adaptor's Notes

The rules a easy to understand, do not require much more than a D10 die and a couple of D6 dice, some means of recording each vessel's damage, a hexed tabletop, and some suitable models. The following images show examples of some of the book's pages:

For some idea how the rules work, David Crook has published a very thrilling battle report on his blog, A WARGAMING ODYSSEY.


STEAMER WARS: WW1 NAVAL WARGAMES ON LAKE TANGANYIKA AND BEYOND: TACTICAL RULES HEX ADAPTATION was written by David Crook and published in 2024 by David Manley's Long Face Games. It is available to buy from Wargame Vault in PDF format for £3.50.

Wednesday, 28 August 2024

Mimi and Toutou Go Forth ... revisited

Many years ago I wrote a simple set of naval gunboat rules so that I could take a game to COW (Conference of Wargamers) about operations on Lake Tanganyika during the Great War. I later published them in GRIDDED NAVAL WARGAMES.

Last weekend, fellow blogger David Crook asked for copies of the damage record cards I had drawn for the game as he wanted to use the rules. As he needed damage record cards for several other ships that took part in these operations, I drew them for him. As a result, I now have a total of six damage record cards and these are shown below:

HMS Mimi

HMS Toutou

HMS Fifi (the captured SMS Kingani)

SMS Kingani

SMS Hedwig von Wissmman

SMS Graf von Goltz

Monday, 26 August 2024

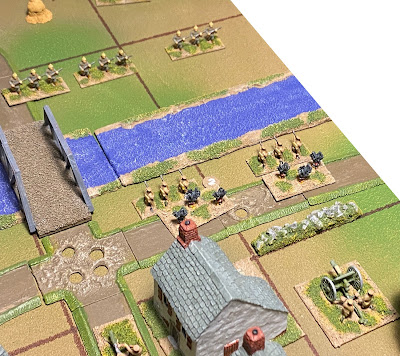
Other people's Portable Wargames ... Nick Huband's Battle of Mons battle report

On the day before the 110th anniversary of the Battle of Mons (23rd August), Nick Huband refought the battle on a 6 x 6 square grid using his World War I adaptation of the Portable Wargame rules. He shared the following description of the wargame on the Portable Wargame Facebook page as well as the photographs featured below.

I used the 'Over The Top' rules in the Second Portable Wargame Compendium with a few tweaks; if a square is attacked by a single unit, every unit in the square is attacked simultaneously (this reflects the punishing effect of "bunching"), rifle range is two squares and I left out the reserve areas as they're not really needed in the early encounter battles. The 6 x 6 board is a very condensed version of the battlefield with the Mons-Conde canal running across the centre of the board and the town of Mons on the right.

The opposing forces were similarly condensed with twelve battalions (stands) of German infantry, two of Jaeger and two of cavalry, supported by four stands of artillery and three of machine guns. The British forces comprised ten battalions of infantry, three stands of artillery and one machine gun stand. The stretcher bearers, dressing station, and despatch rider are just eye candy! Strength points were 70 SPs for the Germans and 45 SPs for the British. The length of the game was set at 10 turns.

The Germans representing the 18th Division of Kluck's First Army arrived from the north sequentially and deployed to assault the canal and bridge on the British right. On turn 4, Jaeger and Cavalry arrived to threaten the British left flank (the cavalry were dismounted as I haven't got any suitable German cavalry on foot).

The action proceeded much as the actual action, a grinding advance by the Germans to reach the canal with both sides suffering from rifle and artillery fire (I'm beginning to understand the value of good artillery preparation!).

By turn 7 the Germans had crossed the bridge and there was fierce fighting in the town. On the other flank after a lengthy exchange of fire across the canal, the dismounted German cavalry finally rushed across the bridge threatening, the British left flank.

By turn 9, towards the end of the day, the Germans were gaining the upper hand in the street fighting and the British had reached their exhaustion point and broke off the action. Casualties were 33 SPs for the Germans and 24 SPs for the British. This is very close to the estimated casualty ratio based on 1,600 British casualties and some 2,000 German casualties (based on analysis of German records - and not by Terence Zuber). Also the game took 9 turns, just under a day (10 turns) just as it did historically. This gives me some confidence in the effectiveness of the rules.

The start of the action with the Germans just coming into view.
The Germans start to deploy.
British defenders of the canal under shellfire.
The German attack developing with the cavalry and Jaeger coming up on the left.
Hand-to-hand fighting in the town.
Fighting on the left flank.
The struggle for the town continues until the British reach their Exhaustion Point and break off the action.

Please note that photographs featured above are © Nick Huband.

Friday, 25 August 2023

The historiography of World War I: The latest Military History Plus podcast

I managed to listen to the last of the current series of Military History Plus podcasts yesterday … and it was yet another excellent one!

Professor Gary Sheffield and Dr Spencer Jones are both well-known for their research and writings about this conflict, and I cannot think of any other historians who are better placed to discuss its historiography.

In my opinion they pretty well demolish the emotive (and inaccurate) idea that the British Army were ‘lions led by donkeys’. I first came across this interpretation of history when I read Alan Clarke’s THE DONKEYS back in the mid-1960s, and at the time it was the popular view of how warfare was conducted on the Western Front. It’s probably true to say that Clarke’s book, when coupled with the study of the ‘war poets’ as part of the secondary school curriculum and Joan Littlewood’s 1963 stage musical of ‘Oh, What a Lovely War! (and Richard Attenborough’s 1969 film version) embedded this in popular culture. Add ‘Blackadder goes forth’ into the mixture, and I suspect that this point-of-view still predominates.

However, certainly since the centenary of the outbreak of the war, this has begun to change … thanks to the work done by Messrs Sheffield and Jones amongst others. Far more people now accept that the British Army and its commanders learned the hard lessons meted out to them, and by the time of the Hundred Days campaign in 1918, they were more than capable of defeating the Germans. It has even been written that the British Army of 1918 was probably the best army that the country has ever sent into battle.

I thoroughly recommend that anyone with even the vaguest interest in the Western Front from 1914 to 1918 should listen to this podcast.

Wednesday, 2 November 2022

The East Africa Campaign 1914-18: Von Lettow Vorbeck’s Masterpiece

In yet another example of apparent synchronicity, a copy of David Smith’s THE EAST AFRICAN CAMPAIGN 1914-18: VON LETTOW VORBECK’S MASTERPIECE was delivered. This campaign was one of the main inspirations for Eric Knowles’s Madasahatta Campaign and coming so soon after Carl Luxford’s wonderful gift of Askaris, Arabs, and African Colonial figures, I have an urge to set up and fight a mini-campaign set somewhere in a mythical version of Africa.

The book nine sections and an index:

  • Origins of the Campaign
  • Chronology
  • Opposing Commanders
    • British
    • German
    • South African
  • Opposing Forces
    • Orders of Battle
  • Opposing Plans
  • The East African Campaign
    • Part I: The British offensive
    • Part II: The railway war
    • Part III: The South African offensive
    • Part IV: The Germans withdraw
    • Part V: The final stage
  • Aftermath
  • The battlefield today
  • Further reading
  • Index

THE EAST AFRICAN CAMPAIGN 1914-18: VON LETTOW VORBECK’S MASTERPIECE was written by David Smith, illustrated by Graham Turner, and published in 2022 by Osprey Publishing as No.379 in their Campaign series (ISBN 978 1 4728 4891 8).

Thursday, 10 February 2022

Trench assault: An ideal setup for a Fast Play 3 x 3 Portable Wargame?

After I had written the recent blog post about Nick Huband's excellent 15mm World War One PORTABLE WARGAME army, he sent me a tidied up version of his sketch map of a FP3x3PW trench system.

As soon as I saw Nick's sketch, I was reminded of a map of the Battle of Ayala I saw year's ago in Robert J Icks' FAMOUS TANK BATTLES: FROM WORLD WAR I TO VIETNAM.

The battle was fought during the Chaco War and was the largest set piece battle of the war. The Bolivians attacked the Paraguayan-held trenches around Ayala from two main directions in order the straighten out the salient to the west of Ayala, around Nanawa. The two 'wings' of the attack were conducted by three infantry battalions (each with 450 rifles and 20 machine guns) supported by a dismounted cavalry regiment equipped with flamethrowers, two 65mm mountain guns, and two Stokes mortars. In addition, the right wing had two Vickers 6-ton tanks and the left wing had a 6-ton tank and two Carden Lloyd tankettes. In reserve were three additional infantry regiments (each of two battalions) on the right, one in the centre, and two on the left.

The battle began with a Bolivian 'massed' fifteen-minute-long artillery barrage by twenty-five field guns and twelve howitzers (the largest artillery barrage ever seen in South America up to that date!) and the explosion of a mine on the left wing. Unfortunately the mine tunnel was too short, and when it exploded its effect on the Paraguayan defences was minimal.

The battle was conducted in temperatures of up to 95˚F, the tank crews kept having to be replaced due to fatigue and heat exhaustion, and weapons jammed and rounds 'cooked off' due to the heat. The attack drove in the Paraguayan defenders, but never broke through the trench line, and in the end the Bolivians called off their attack after suffering horrendous casualties.

This battle looks like an ideal candidate for a FP3x3PW battle ... and I know someone who already has the figures to do it!


FAMOUS TANK BATTLES: FROM WORLD WAR I TO VIETNAM by Robert J Icks, Colonel (AUS Ret.) was published in 1972 by Profile Publications Limited (ISBN 0 85383 280 3).

Tuesday, 8 February 2022

Nick Huband's World War One Portable Wargame armies

A couple of days ago, Nick Huband (who I have know for many years) sent me some photographs of the latest additions to his 1914-era World War 1 collection. The figures were all made by Peter Laing, the originator of the 15mm wargames figure, and although the figures may appear crude by modern standards, they were ideal wargames figures ... and at one stage owned several hundreds of them.

As can be seen from the following photographs, Nick seems to have a knack of painting his figures with just enough detail to make them look very effective without having to go overboard.

In addition to his photographs, Nick sent me his proposed trench layout for a FP3x3PW set during the Great War:

It seems to me that this sort of battle is ideally suited to the FP3x3PW concept, and I look forward to seeing Nick's battle report.


Please note that the images featured above are © Nick Huband.