Pages

Showing posts with label Dominion of .... Show all posts

Saturday, 25 July 2026

Wargaming and the 'cult of prettiness': Some thoughts and questions

The comment made by John Treadaway as an aside to the review of the Fourth Portable Wargame Compendium that was published in the August issue of MINIATURE WARGAMES really got under my skin ... and what follows are some thoughts about what I think of as the cult of prettiness' in wargaming.

First, some personal history …

I bought my first metal wargame figures (20mm Crimean War infantry and cavalry) from Hinton Hunt in 1968. I painted them with the only model paints that were available to me back then ... Humbrol gloss enamel paint! To be honest, they were pretty awful ... but I still have them although they now live in storage.

My next figures were Miniature Figurine Prussian Napoleonic infantry, and these were painted with Humbrol matt enamel paint ... and were far more presentable (I had developed some skill with a paintbrush by then!). In fact, I am still using them although they have now been given a coat of gloss varnish to protect them from damage.

All these figures had bases that were painted green and the Hinton Hunt figures were glued to balsa wood unit bases. My rules were based on those written by Donald Featherstone (WAR GAMES) and Brigadier Peter Young and Colonel James Lawford (CHARGE!) although over time I did buy other rule books … which were almost universally produced in small batches and sold with simple card covers. If they had illustrations, these card-covered rule books had line drawings – possibly including one on the cover – and diagrams.

The first wargame magazine I bought was MINIATURE WARFARE … and after the first few issues, that had some colour printed on the cover but only ever included monochrome photographs.

The cover of the third issue of MINIATURE WARFARE (April 1968).

It was not until the late Duncan MacFarlane edited and published the first issue of MINIATURE WARGAMES in 1983 that colour photographs became the norm in wargame magazines … and from that day onward, I feel that the invidious 'cult of prettiness' began to creep into the hobby.

The cover of the first issue of MINIATURE WARGAMES (March 1983).

Some people in the hobby seemed very keen to get photographs of their figures and terrain – often on display at shows around the country – published in magazines … and I in no way condemn this as I enjoy seeing other people’s wargame stuff in use. However, over time this appeared to have a deleterious effect on some of the wargames one saw at shows, with more and more seemingly becoming dioramas on which figures occasionally moved. Alongside them were other games that were played on simpler terrain and simple rules, and these often attracted participants rather than spectators.

I well remember attending a major wargame show in London twenty years ago (It was SALUTE!) and overhearing members of the ‘best in show’ judging team say – as they passed the participation game I was running – that my game was all right for a club night, but really wasn’t what they wanted to see at such a prestigious wargame show. The game attracted over thirty players during the course of the day; the ‘best in show’ had no participants as it was classed as a demonstration wargame (i.e. members of the club staging the game were the only people allowed to take part)

I therefore pose the following question … which of these two games generated more fun and enjoyment? I leave the answer up to you, the reader of this blog post.

Now, regular blog readers will know that I follow the BUDGET MODEL RAILWAYS channel on YouTube. Its creator is an ex-wargamer who now builds model railways as cheaply as he can, and several times he has said something about railway modelling that is equally applicable to our hobby. He has identified a trend among some railway modellers to collect locomotives, rolling stock, buildings etc., for a grand project that they plan to undertake when they retire … and that they never manage to achieve. He advocates building and using small layouts – some of which are capable of expansion at a later date – rather than waiting until you’ve got time to build your grand project.

Isn’t there a similar phenomenon in wargaming? How many wargamers plan for years to fight some massive battles using beautifully painted figures on sculpted terrain in their dedicated wargame room … and never actually manage it? It’s a wonderful dream … but that dream can easily become a nightmare that absorbs large amounts of time and money. Wouldn’t it be better for them to spend that time and money fighting smaller wargames and having fun?

There are some wargamers who do achieve their ambition to build up large collections of beautifully painted figures that they can use on wonderful terrain in their wargame room … but I wonder if the 'cult of prettiness' has rather given the impression to many wargamers that this is THE ideal they should be aiming for? If so, is that actually putting some of them off the hobby?

Again, I leave the answers up to you, dear blog reader.

When I look at the list of wargame blogs that I follow, I am struck by several thoughts. Firstly, that the hobby is a wide church and has room for a wide spectrum of wargamers, ranging from people who wargame with superb figures on magnificent terrain to those who use homemade cardboard counters or wooden blocks on a hand-drawn terrain map. Secondly, that a fun but scruffy-looking wargame that uses simple rules will always be preferable to a pretty-looking wargame that is tedious and/or boring to take part in. Thirdly, that some wargamers need to be a bit more realistic in their aspirations and fight wargames that they have the time and finances to achieve and not to aim for the unattainable.

Interestingly, there is one sector of the hobby where I've seen players having lots of fun using small numbers of well-painted figures on excellent terrain ... and in this instance, I'm not referring to those wargamers who are using THE PORTABLE WARGAME, ONE-HOUR WARGAME, or DOMINION OF ... , DE BELLIS ANTIQUITATIS, or  HORDES OF THE THINGS rules!

The wargamers I am thinking about are those who are fighting skirmish-level battles and Fantasy/Science Fiction/Role-Play games. Until recently, I never seriously looked at these sorts of games, but joining a local games club made me reassess my attitude to them ... and I realised that I had – through my ignorance and some degree of historical wargaming snobbery – been misjudging this style of games.

So, has the 'cult of prettiness' gone some way toward creating an ideal within the hobby that is actually counter-productive to its long-term viability ... and is there a significant movement within the hobby that is moderating or ignoring its influence?

Finally, I leave the answer to that question up to my regular blog readers.

Friday, 24 July 2026

Thinking about the Fifth Portable Wargame Compendium

Now that my life seems to be returning to some degree of stability after the recent upheavals due to the renovation of our main bedroom and my hospital treatment, I think that it’s time that I gave some thought to putting together the next Portable Wargame Compendium.

As those of my regular blog reader who follow the Portable Wargame Facebook page will already know, the Fourth Portable Wargame Compendium was reviewed in the August issue of MINIATURE WARGAMES magazine ... some nine months after it was published! This review – which I thought was very balanced and honest – was accompanied by an aside from John Treadaway, the magazine’s editor. A screenshot of this is shown below:

I must admit that when I first read it, this comment rather annoyed me. I thought that is was sarcastic and represented an attitude to wargaming that considers pretty – and sometimes rather tedious and unimaginative wargames that emphasis style over content – as being somehow superior to the PORTABLE WARGAME and similar wargames (e.g. The DOMINION OF ... rules and Neil Thomas's ONE-HOUR WARGAMES).

Well, I can assure my regular blog readers and purchasers of the previous compendia that I will be ignoring the 'advice' that the next issue should have a picture on the cover and sticking to the existing house-style.

The covers of the first four Portable Wargame Compendia. A 'scholarly tome'? I don't know about that ... but to date, they have sold quite well, even though the cover don't have any pretty pictures on them.

I have no idea what is going to be in the next compendium ... but I'll certainly be writing regular progress reports as it comes together.

Wednesday, 14 January 2026

Some new 'Dominion of ...' books

I have just taken delivery of two of the latest books in the 'Dominion of ...' series of fast-play rule books. They are DOMINION OF THE TRENCHES: FIGHT BATTLES OF THE FIRST WORLD WAR ...

... and DOMINION OF BLITZKRIEG: FIGHT BATTLES OF THE EARLY SECOND WORLD WAR.

The former includes scenarios for fighting the following battles:

  • Battle of Mons 23rd August 1914
  • Battle of Tannenberg 22nd to 30th August 1914
  • First Battle of the Marne 6th to 12th September 1914
  • First Battle of Ypres 19th October to 22nd November 1914
  • Battle of Tanga 3rd to 5th November 1914
  • Second Battle of Ypres 22nd April to 25th May 1915
  • Battle of Gallipoli (Landing at Cape Helles) 25th April 1915
  • Battle of Gallipoli (Lone Pine) 6th to 10th August 1915
  • Battle of Salaita Hill 12th February 1916
  • Battle of Verdun 21st February to 18th December 1916
  • Battle of Lake Naroch 18th to 30th March 1916
  • Battle of Lutsk (start of the Brusilov Offensive) 4 to 6th June 1916
  • First Battle of the Somme 1st July to 18th November 1916
  • Battle of Romani 3rd to 5th August 1916
  • Second Battle of Arras 9th April to 16th May 1917
  • Third Battle of Ypres (Passchendaele) 31st July to 10th November 1917
  • Battle of Mahiwa 15 to 19th October 1917
  • Battle of Caporetto 24th October to 19th November 1917
  • Battle of Beersheba 31st October 1917
  • Battle of Cambrai 20th November to 7th December 1917
  • Second Battle of the Somme (German Spring Offensive - Operation Michael) 21st March to 5th April 1918
  • Battle of Amiens 8th to 12th August 1918
  • Battle of Megiddo 19th to 25th September 1918
  • Battle of Vittorio Veneto 24th October to 4th November 1918

The latter book contains scenario for the following battles:

  • Battle of Shanghai 13th August to 26th November 1937
  • Battle of Khalkhin Gol 11th May to 16th September 1939
  • Battle of Mokra 1st to 3rd September 1939
  • Battle of the Bzura 9th to 19th September 1939
  • Battle of Suomussalmi 30th November 1939 to 8th January 1940
  • Battle of Narvik 9th April to 10th June 1940
  • Battle of Sedan 10th to 15th May 1940
  • Battle of Gembloux Gap 14th to 15th May 1940
  • Battle of Arras 21st May 1940
  • Battle of Sidi Barrani 9th to 11th December 1940
  • Battle of Tobruk 10th April to 27th November 1941
  • Battle of Thermopylae 24th April 1941
  • Battle of Crete 20th May to 1st June 1941
  • Battle of Bialystok–Minsk 22nd June to 9th July 1941
  • Battle of Smolensk 10th July to 10th September 1941
  • Battle of Kiev 23rd August to 26th September 1941
  • Siege of Leningrad 8th September 1941 to 27th January 1944
  • Battle of Moscow 2nd October 1941 to 7th January 1942
  • Battle of Jitra (Malaya) 11th to 13th December 1941
  • Battle of Bataan (Philippines) 7th January to 9th April 1942
  • Battle of Singapore 8th to 15th February 1942
  • Battle of Toungoo (Burma) 24th to 29th March 1942
  • Second Battle of Kharkov (Ukraine) 12th to 28th May 1942
  • Battle of Gazala 26th May to 21st June 1942

That's quite a lot to get one's teeth into, and I look forward to playing many of the above over the next year.


DOMINION OF THE TRENCHES: FIGHT BATTLES OF THE FIRST WORLD WAR and DOMINION OF BLITZKRIEG: FIGHT BATTLES OF THE EARLY SECOND WORLD WAR were both written by Stephen Parker and published by Ork Publishing. They can be bought online in PDF format from Wargame Vault (cost £4.40/$5.90) and in paperback from Lulu.com (£6.40).

Sunday, 14 September 2025

News of the next ‘Dominion of …’ rules to be published

Last night, Steve Parker - the creator of the ‘Dominion of …’ rules - left a comment on my blog that contained the following news:

Next up is:
  • Dominion of the Red and White (Russian Civil War) and
  • Dominion of the Back of Beyond.
After that, maybe:
  • Dominion of the Trenches - WW1 including Africa, Middle East, Italy.

I expect that these will turn out to be at least as popular as the previous books ... and may well be the most popular so far! (I will certainly be buying copies!)


Since I wrote this blog post, Steve Parker has been in contact with the following additional information:

Just a bit more detail then. The first book Dominion of the Red and White will be similar to my current books with 24 battles from the Russian Civil War, Baltic Wars of Independence and the Polish-Soviet War. There are a couple of amusing tweaks to the activation system and replacement of defeated units that hopefully model these chaotic battles better. Dominion of the Back of Beyond is of course set in the East during this period but set at a lower level with detailed descriptions of the different factions (18?). The lower level allows the different units to include Machine Guns, Tachankas, Armoured Cars, Chinese swordsmen etc. where in the bigger battles they are not really separate units.

Having read this, I am now absolutely certain that I will be buying both of these books!

Monday, 8 September 2025

The paperback edition of Dominion of the Blue and the Grey has been published

He's done it yet again! Only a month after he published DOMINION OF OTTO VON BISMARCK, Steve Parker has published yet another book in the 'Dominion of ...' series. This latest book is aimed at the American Civil War, and is entitled DOMINION OF THE BLUE AND GREY.

It follows the same format as the previous books in the series, so I will not repeat myself other than to state that is has American Civil War-appropriate rule changes. These are:

  • Revised rally rules.
  • Amended activation rules.
  • Rules for generals influencing the battle.

As in previous books, there are scenarios for 24 historical battles. These include a brief background to the battle, relevant army lists, deployment details, and brief account of the actual battle. The battles covered are:

  • First Bull Run (First Manassas) (1861)
  • Wilson’s Creek (Oak Hills) (1861)
  • Fort Donelson (1862)
  • Pea Ridge (Elkhorn Tavern) (1862)
  • Shiloh (1862)
  • Seven Pines (Fair Oaks) (1862)
  • Gaines’s Mill (1862)
  • Second Bull Run (Manassas) (1862)
  • Antietam (Sharpsburg) (1862)
  • Perryville (1862)
  • Fredericksburg (1862)
  • Stones River (Murfreesboro) (1863)
  • Chancellorsville (1863)
  • Vicksburg (1863)
  • Brandy Station (1863)
  • Gettysburg (1863)
  • Chickamauga (1863)
  • Missionary Ridge (Chattanooga) (1863)
  • The Wilderness (1864)
  • Kennesaw Mountain (1864)
  • Atlanta (1864)
  • Franklin (1864)
  • Nashville (1864)
  • Bentonville (1865).

I have already ordered my copy of the paperback from Lulu and hope to receive it within the next ten days.

Tuesday, 12 August 2025

Even more ideas generated by using the 'Dominion of the Spear and Bayonet' rules

Further to my earlier blog posts (here and here), I have been thinking about the tabletop battlefield I might use for my hybrid rules.

In the DOMINION rules, the tabletop looks like this:

In the FAST-PLAY 3 x 3 PORTABLE WARGAME the tabletop looks like this:

I have been looking at two possible hybrid tabletop layouts, both of which combine aspects of the above. The first is a slight reworking of the FP3x3PW …

… and the second adds a further rank of squares to create a tabletop that has a 3 x 4 grid plus reserve areas.

I hope to experiment with both tabletop layouts over the coming weeks in the hope that a preferred layout emerges.

Sunday, 10 August 2025

Preparing to refight the Battles of Dybbøl and Als

The recent publication of Steve Parker's DOMINION OF OTTO VON BISMARK has provided me with an excuse to do some background research before I refight the Battles of Dybbøl and Als.

I have several books that deal with the Second Schleswig War, including:

  • THE SECOND SCHLESWIG WAR 1864: PRELUDE, EVENTS AND CONSEQUENCES which was written by Inge Adriansen and Jens Ole Christensen and published by the Tøjhusmuseet (now the Danish War Museum) in 2013 (ISBN 978 8787 37527 6) ... and I bought my copy from the museum when I visited it in December 2014.

  • 1864: THE FORGOTTEN WAR THAT SHAPED MODERN EUROPE was written by Tom Buk-Swienty, translated into English by Annette Buk-Swienty, and published in English by Profile Books in April 2015 (ISBN 978 1 781 25276 5). (It was originally published in Denmark in 2008 by Gyldendal, entitled 1864: SLAGTEBÆNK DYBBØL [which can be translated as ‘The Dybbøl Slaughterhouse’].)

The latter formed the basis of the Danish TV/film series 1864. This was produced to mark to 150th anniversary of the war between Denmark and Prussia which ended with Denmark losing control of the Duchies of Schleswig, Holstein, and Lauenburg.

When I visited the Tøjhusmuseet in 20214, the museum was staging a special exhibition about the war, and I was able to take several photographs of the displays.

As one would expect, there are numerous paintings ...

The Danish trenches during the siege of Dybbøl. (by Jørgen Valentin Sonne)
The counter-attack of the Danish 8th Brigade during the Battle of Dybbøl. (by Vilhelm Rosenstand))

... and line illustrations that cover the war.

The Danish ironclad, Rolf Krake, which took part in the Battle of Als.
Prussian soldiers storming the Danish positions during the Battle of Dybbøl.

All very inspiring!

Saturday, 9 August 2025

Mea culpa! … I got the name of the battle wrong!

Toby E, who is one of my regular blog readers, has pointed out that I got the name of the exemplar battle wrong in my recent review of THE DOMINION OF OTTO VON BISMARCK, ...

... I identified the battle as the Battle of the Alma … but it was actually the Battle of Balaclava!

The Battle of the Alma ...
... and the Battle of Balaclava. Not easy to confuse ... except in the case of this writer!

Oops! As Captain Bertorelli (of ‘ALLO ‘ALLO! fame) would have said, ‘What a mistake-a to make-a!'

Tuesday, 5 August 2025

Dominion of Otto von Bismarck has been published

He’s done it again! It is less than a month since the DOMINION OF NAPOLEON BONAPARTE was published and now Steve Parker has published another 'Dominion of ...' set of rules, this time the DOMINION OF OTTO VON BISMARCK.

The rules have a similar structure and game mechanisms to those in the previous editions in this series but include some period-specific rules to make them suitable for solo wargamers who want to refight mid to late nineteenth century European battles.

As usual, the armies 'cost' 12 points and most units 'cost' 2 points each.

Units fall into one of the following categories:

  • Line Infantry: Infantry that fight in a linear formation and rely on firepower to defeat their opponents.
  • Column Infantry: Infantry that fight in assault columns and rely on numbers to overpower their opponents.
  • Cavalry: Cavalry were used to scout ahead of their main force, to harass a defeated opponent, and to mount well-timed charges that was intended to break an opponent's resistance.
  • Artillery: Includes all types artillery.

Units can be given attributes that reflect particular tactical advantages and/or unit quality. These are:

  • Defence advantage (D): Troops in fortifications, behind a river, uphill of their opponents, or who are particularly difficult to defeat have a defensive advantage. This advantage adds 1 point to the 'cost' of a unit.
  • Attack advantage (E): Elite or veteran units or units armed with superior weapons may have an attack advantage. This advantage adds 1 point to the 'cost' of a unit.
  • Unreliable disadvantage (UR): Troops who are poorly trained, inexperienced, or understrength, may be regarded as unreliable. This disadvantage reduces the 'cost' of a unit by 1 point.

Examples of typical units include:

  • Infantry reinforcements – unreliable Column Infantry (cost 1 point)
  • French infantry armed with Chassepot rifles – Line Infantry (cost 2 points)
  • Prussian infantry armed with needle guns fighting the above French – Column Infantry (cost 2 points)
  • Prussian infantry armed with needle guns fighting the Austrians – elite Line Infantry (cost 3 points)
  • Prussian massed artillery – elite Artillery (cost 3 points)

A typical pair of armies (in this case for the Battle of the Alma, which is the battle used in the rules as an exemplar) are:

  • Russian:
    • 2 x Cavalry (mainly Hussars) (2 points each = 4 points)
    • 3 x Column Infantry (2 points each = 6 points)
    • 1 x Artillery (2 points)
    • Total – 12 points
  • Allies (Turks and British):
    • 2 x Cavalry (British Light and Heavy Brigades) (2 points each = 4 points)
    • 3 x unreliable fortified Column Infantry (Turkish infantry in defences) (2 points each = 6 points)
    • 1 x Line Infantry (93rd Highlanders) (2 points)
    • Total = 12 points

The combat rules include specific sections that cover unreliable units, infantry vs. infantry, cavalry vs. cavalry, cavalry vs. infantry, fighting artillery, outflanking attacks, rallying, and terrain.

The rules also include army lists and dispositions for twenty-four battles:

  • Crimean War:
    • The Alma (1854)
    • Balaclava (1854)
    • Inkerman (1854)
    • Eupatoria (1855)
    • Chernaya River (1855)
    • Sevastopol (1855)
  • Second Italian War of Independence:
    • Palestro (1859)
    • Magenta (1859)
    • Solferino (1859)
  • Garibaldi’s Expedition of the Thousand:
    • Calatafimi (1860)
    • Volturno (1860)
  • Second Schleswig War:
    • Dybbøl (1864)
    • Als (1864)
  • Third Italian War of Independence:
    • Custoza (1866)
  • Austro-Prussian War:
    • Langensalza (1866)
    • Trautenau (1866)
    • Königgrätz (Sadowa) (1866)
  • Franco-Prussian War:
    • Wissembourg (1870)
    • Wörth (1870)
    • Spicheren (1870)
    • Mars-la-Tour (1870)
    • Gravelotte (1870)
    • Sedan (1870)
    • Coulmiers (1870)

These rules will allow me to use my collection of Belle Époque figures and I hope to refight some of the battles featured on this list … particularly the Battles of Dybbøl and Als.


The DOMINION OF OTTO VON BISMARCK rules were written by Steve Parker and published in 2025 by Orc Publishing. They can be bought in PDF format from Wargame Vault for $5.90/£4.40.

Monday, 4 August 2025

Thinking about the Fourth Portable Wargame Compendium

I have had several requests for information about the next PORTABLE WARGAME COMPENDIUM … so I suppose that it’s about time that I started work on it.

As people who have read one or more of the previous issues will know, I rely on contributions from the numerous users of the various PORTABLE WARGAME rules and I am therefore issuing a request for suitable articles. For the first time, I’d like to include articles that relate to the ‘DOMINION OF …’ rules as well because although they aren’t part of the PORTABLE WARGAME stable, they are very much portable wargame rules.

I cannot pay for contributions BUT any author whose article (or articles) is accepted and published in the next Compendium will get a free copy of the hardback and softback editions, a free PDF edition, and a credit on the Amazon webpage.

If you would like to contribute to the next PORTABLE WARGAME COMPENDIUM, please contact me at theportablewargame @ gmail.com … but leave out the gaps in the email address!

Thursday, 24 July 2025

Some more ideas generated by using the 'Dominion of the Spear and Bayonet' rules

Having redefined the various types of units, I then began to think about developing a combat matrix that would work with these 'new' units. My current working draft is shown below.


The following matrix shows the modified D6 die scores required to hit an enemy unit.

Please click on the image to enlarge it.

The combat modifiers are:

Please click on the image to enlarge it.

Some examples of how the combat matrix works

  • A unit of Skirmishers infantry fire at a unit of Shock infantry. They must throw a modified D6 die score of 4 or more to hit the Shock infantry. The Shock infantry then charge the unit of Skirmishers infantry, and they only need a modified D6 die score of 3 or more to hit the Skirmishers infantry.
  • A unit of Rifles infantry fire at a unit of Firearms infantry at a range of 2 grid areas. They must throw a modified D6 die score of 5 or more to hit the Firearms infantry. The Firearms infantry must move forward 1 grid area to fire back. If they do, they also require a modified D6 die score of 5 or more to hit the Rifles infantry.
  • A unit of Shock cavalry charge a unit of Shock infantry. They require a modified D6 die score of 4 or more to hit the Shock infantry. In reply, the Shock infantry also require a modified D6 die score of 4 or more to hit the Shock cavalry.

Tuesday, 22 July 2025

Some ideas generated by using the 'Dominion of the Spear and Bayonet' rules

Using Steve Parker's DOMINION OF THE SPEAR AND BAYONET rules has given me pause for thought regarding my own PORTABLE WARGAME rules, particularly the draft Belle Époque version that I have been working on for some months.

At present, units are defined by arm (e.g. infantry, cavalry, artillery) and quality (e.g. elite, average, and poor) ... but using the DOMINION rules has made me re-examine this, and I have come up with the following ideas regarding units.


Types of unit

  • Rifles: These units are armed with modern magazine rifles capable of delivering considerable firepower at several hundred yards/metres. They can fight at close quarters but not as effectively as Shock units and are best suited to fighting at some distance from the enemy.
  • Firearms: These units are armed with obsolete firearms (e.g. single-round rifles or black powder muskets) capable of delivering considerable firepower at a hundred yards/metres or less. They can also fight at close quarters but not as effectively as Shock units.
  • Skirmishers: These units fight in dispersed formations, and although these have less effective firepower than Rifle or Firearm units, they are also less easy to hit. They can fight at close quarters but nowhere near as effectively as Rifle, Firearm, or Shock units, and are best suited to fighting at some distance from the enemy.
  • Shock: These units fight in compact formations at close quarters and rely on numbers and impetus to destroy enemy units. They are vulnerable to fire from Rifles, Firearms, and Skirmishers, but can be superior in close quarter combat to other units.
  • Artillery: These units are armed with cannons and can deliver considerable firepower at several hundred – if not thousand – yards/metres. They do not expect to fight at close quarters unless matters are going badly for their side.
  • Supply: These units have very little combat power but can fight at close quarters if attacked. Their main function is to act as a source of supply on the battlefield and to represent an army’s train... including its medical services, which can be vital in returning lightly wounded personnel to the frontline.
  • Command: These units represent an army’s commander and staff. Their presence can increase a unit’s effectiveness, but if destroyed, their loss can cripple an army’s morale and seriously reduce its capacity to win a battle. They do not expect to fight at close quarters unless in extremis.

Units in European-style armies

  • Infantry units armed with magazine rifles. (These can be Rifles [3 SPs] or Skirmishers [2 SPs].)
  • Mounted cavalry units armed with magazine carbines and swords/lances. (These are Shock [2 SPs].)
  • Dismounted cavalry units armed with magazine carbines. (These are Skirmishers [2 SPs].)
  • Machine Gun units armed with automatic machine guns (e.g. Maxim Guns). (These are Rifles [2 SPs].)
  • Artillery units armed with guns mounted on carriages fitted with recoil mechanisms. (These are Artillery [2 SPs].)

Units in Native-style armies

  • Infantry units armed with obsolete rifles and/or muskets. (These are Firearms [3 SPs] or Skirmishers [2 SPs].)
  • Infantry units armed with spears and/or swords. (These are Shock [3 SPs].)
  • Cavalry units armed with obsolete carbines and/or swords and/or lances (These are Shock [2 SPs].)
  • Machine Gun units armed with mechanical machine guns (e.g. Gatling Guns). (These are Firearms [2 SPs].)
  • Artillery units armed with guns mounted on carriages that are not fitted with recoil mechanisms. (These are Artillery [2 SPs].)

Units common to all armies

  • Supply: units armed with hand-held weapons that are purely for self-defence. (These are Supply [1 SP].)
  • Command: units armed with hand-held weapons that are purely for self-defence. (These are Command [Notionally 6 SPs for the calculation of a side’s Exhaustion Point].)

Friday, 18 July 2025

Dominion of Napoleon Bonaparte has been published

The latest in the 'Dominion of ...' series of rules has been published ... the much-awaited DOMINION OF NAPOLEON BONAPARTE.

The rules have the same structure and game mechanisms as the previous ones in the series, but includes certain period-specific rules to make them suitable for solo wargamers who want to refight Napoleonic period battles.

Armies 'cost' 12 points and most units 'cost' 2 points each.

Units fall into one of the following categories:

  • Line Infantry: These are infantry that fight in line and rely on firepower. Typically, these are British, Austrian, later Prussian, later Portuguese and some Spanish infantry units. Frequently used in a defensive role.
  • Column Infantry: These are infantry that fight in columns and rely on overwhelming numbers. Typically, these are French, Russian, early Prussian, early Portuguese and Spanish infantry units. Frequently used in an attacking role.
  • Light Infantry: These are infantry that are used for skirmishing. Examples include British Riflemen, Austrian Grenzers, and French Voltigeurs.
  • Heavy Cavalry: These are heavy and medium cavalry that rely of shock to defeat their opponents. Typically, these include Horse Grenadiers, Cuirassiers, Carabineers, and Dragoons.
  • Light Cavalry: Typically, these include Hussars, Uhlans, Chasseurs, Light Dragoons, and Cossacks.
  • Artillery: These include field and siege artillery.

Units can be given attributes that reflect particular tactical advantages and/or unit quality. These are:

  • Defence advantage (D): Troops in fortifications, behind a river, or uphill of their opponents have a defensive advantage. Likewise, certain disciplined units (e.g. Elite or veteran Column Infantry) may also have a defensive advantage. This advantage adds 1 point to the 'cost' of a unit.
  • Attack advantage (E): Elite or veteran units may have an attack advantage (e.g. Elite Line Infantry and Elite Heavy Cavalry). This advantage adds 1 point to the 'cost' of a unit.
  • Unreliable disadvantage (UR): Troops who are poorly trained, inexperienced, or understrength, may be regarded as unreliable. This disadvantage reduces the 'cost' of a unit by 1 point.

Examples of typical units include:

  • British Hussars: Light Cavalry (cost 2 points)
  • French Imperial Guard Infantry: Disciplined Column Infantry (cost 3 points)
  • British infantry in a village: Elite Line Infantry in fortifications (cost 4 points)

A typical pair of armies (in this case for the Battle of Salamanca, which is the battle used in the rules as an exemplar) are:

  • British:
    • 1 Unit of Dragoons (2 points)
    • 1 Unit of Hussars (in surprise flank attack) (2 points)
    • 1 Unit of elite Line Infantry (3 points)_
    • 2 Units of Line Infantry (2 points each = 4 points)
    • 1 Unit of unreliable Artillery (1 point)
    • Total = 12 points
  • French:
    • 1 Unit of Dragoons (2 points)
    • 2 Units of disciplined Column Infantry (3 points each = 6 points)
    • 1 Unit of unreliable Column Infantry (surprised) (1 point)
    • 1 Unit of unreliable Column Infantry (Sarrut with reinforcements) (1 point)
    • 1 Unit of Artillery (2 points)
    • Total = 12 points

The combat rules include specific sections that cover pre-battle artillery fire, unreliable units, infantry vs. infantry, cavalry vs. cavalry, cavalry vs. infantry, fighting artillery, and rallying.

The rules also include army lists and dispositions for twenty-five battles:

  • Montenotte (11th to 12th April 1796)
  • Lodi (10th May 1796)
  • Rivoli (14th to 15th January 1797)
  • Pyramids (Embabeh) (21st July 1798)
  • Marengo (14th June 1800)
  • Austerlitz (Battle of the Three Emperors) (2nd December 1805)
  • Jena (14th October1806)
  • Auerstedt (14th October 1806)
  • Eylau (7th to 8th February1807)
  • Friedland (14th June 1807)
  • Bailén (16th to 19th July 1808)
  • Roliça (17th August 1808)
  • Vimeiro (21st August 1808)
  • Corunna (16th January 1809)
  • Wagram (5th to 6th July 1809)
  • Talavera (27th to 28th July 1809)
  • Salamanca (22nd July 1812)
  • Borodino 1812 (7th September)
  • Berezina (26th to 29th November 1812)
  • Vitoria (21st June 1813)
  • Leipzig (Battle of the Nations) (16th to 19th October 1813)
  • Hanau (30th to 31st October) 1813
  • Quatre Bras (16th June 1815)
  • Ligny (16th June 1815)
  • Waterloo (18th June 1815)

My collection of Napoleonic figures is currently in storage, but as soon as I can gain access to them, I hope to refight some of the battles featured on this list.


The DOMINION OF NAPOLEON BONAPARTE rules were written by Steve Parker and published in 2025 by Orc Publishing. They can be bought in PDF format from Wargame Vault for $5.90/£4.40.


Whilst researching her genealogy, my wife came across an interesting story that was originally published in The Advertiser (South Australia) on Tuesday, February 23, 1999. It tells of research carried out by Robert Torrens (who is described as a local historian) into a story that Bonaparte's grandfather was actually William Bayne, who fled abroad from Balloch (a village near Crieff in Perthshire, Scotland) in the aftermath of the failed Jacobite Rebellion of 1745. The ship the family were sailing in was wrecked off Corsica, and they were treated so well by the local population that they settled on the island, where they were known as Bayne (or Buon) and his party. Subsequently, his sons were called the Buon-de-party or Bonapartes.

This is a wonderful piece of genealogical whimsy, as it is generally accepted that Napoleon's paternal ancestors were minor nobility (the Cadolingi di Borgonuovo) from Tuscany, who had emigrated to Corsica at some point during the late 15th century. His maternal ancestors (the Ramolinos) were also a minor noble family, but that they originally came from Lombardy. Napoleon's grandfather was Sebastiano Nicola Buonaparte (not William Bayne!) and his parents were Carlo Maria Buonaparte and Maria Letizia Ramolino. They were living in Maison Bonaparte in Ajaccio, Corsica, when Napoleon (whose baptismal name was Napoleone di Buonaparte) was born there on 15th August 1769.

Thursday, 26 June 2025

The Battle of Omdurman refought using Dominion of the Spear and Bayonet

Background to the battle

Following the fall of Khartoum in 1885, the British and Egyptians withdrew from the Sudan. Under British leadership, the Egyptian Army was reformed, better trained, and expanded, and by 1896 the Khedival forces - led by General Herbert Kitchener, the Sirdar (or Commander) of the Egyptian Army - were ready to return to the Sudan and destroy the Mahdists.

The offensive was a relatively slow but very deliberate one, with each stage planned to prepare for the next. On 21st September 1896, Dongola was captured, and Abu Hamed followed on 7th August 1897. At the Battle of the Atbara River on 7th April 1898, Mahdist forces - led by Osman Digna and Khalifa Abdullah - were decisively beaten and the line of march along the River Nile to Khartoum was open. On 1st September 1898, the Anglo-Egyptian army - with the support of a powerful flotilla of gunboats - arrived at Karary, some seven miles from Omdurman - the capital of the Mahdist state - where the Mahdist army was encamped.

The British force comprised:

  • Attached British troops
    • 21st Lancers
    • 32nd Field Battery, Royal Artillery
    • 37th Howitzer Battery, Royal Artillery
    • Two 40-pounder guns, Royal Artillery
  • First Infantry Division (commanded by Major General Gatacre)
    • 1st Brigade (commanded by Brigadier General Wauchope)
      • 1st Battalion, Royal Warwickshire Regiment
      • 1st Battalion, Lincolnshire Regiment
      • 1st Battalion, Seaforth Highlanders
      • 1st Battalion, Queen’s Own Cameron Highlanders
      • 6 Maxim guns
      • Detachment, Royal Engineers
    • 2nd Brigade (commanded by Brigadier General Lyttelton)
      • 1st Battalion, Grenadier Guards
      • 1st Battalion, Northumberland Fusiliers
      • 2nd Battalion, Lancashire Fusiliers
      • 2nd Battalion, Rifle Brigade
      • 4 Maxim guns
      • Detachment, Royal Engineers
  • Attached Egyptian troops
    • 9 Squadrons, Egyptian Cavalry
    • 1 Battery, Egyptian Horse Artillery
    • 4 Field Batteries, Egyptian Artillery
    • 10 Maxim guns
    • 8 Companies, Camel Corps
  • Second Division (commanded by Major General Hunter)
    • 1st Brigade (commanded by Colonel Macdonald)
      • 2nd Egyptian Infantry Battalion
      • IX Sudanese Infantry Battalion
      • X Sudanese Infantry Battalion
      • XI Sudanese Infantry Battalion
    • 2nd Brigade (commanded by Colonel Maxwell)
      • 8th Egyptian Infantry Battalion
      • XII Sudanese Infantry Battalion
      • XIII Sudanese Infantry Battalion
      • XIV Sudanese Infantry Battalion
    • 3rd Brigade (commanded by Colonel Lewis)
      • 3rd Egyptian Infantry Battalion
      • 4th Egyptian Infantry Battalion
      • 7th Egyptian Infantry Battalion
      • 15th Egyptian Infantry Battalion
    • 4th Brigade (commanded by Colonel Collinson)
      • 1st Egyptian Infantry Battalion
      • 5th Egyptian Infantry Battalion
      • 17th Egyptian Infantry Battalion
      • 18th Egyptian Infantry Battalion
    • Camel Transport

It is estimated that the Mahdist force numbered approximately 50,000.

The course of the battle

The battle began around 6.00am. Some 8,000 men under Osman Azrak advanced straight at the waiting Anglo-Egyptian force. These were followed by a similar number of troops who had been waiting to the northwest. The Anglo-Egyptian artillery opened fire when the advancing Mahdists were just under two miles away from the leading Anglo-Egyptian troops, and inflicted severe casualties on the Mahdists. The latter continued their advance until they came into range of the Anglo-Egyptian Maxim guns and infantry. This frontal attack faltered in the face of this firepower and none of the attackers got closer than 50 yards from the Anglo-Egyptian frontline units. A flanking move on the right was also checked, and there were bloody clashes on the opposite flank that scattered the Mahdist forces there.

Whilst the Anglo–Egyptian infantry were causing significant casualties on the Mahdists, the cavalry and camel corps that were deployed to north of the main force were threatened by about 15,000 Mahdists. The commander of the Anglo-Egyptian mounted troops attempted to use his cavalry to draw away some of the advancing Mahdists whilst the camelry moved towards the infantry’s zariba. Two gunboats moved so they could use their guns to support the cavalry and prevent a Mahdist attack on the zariba’s flank.

Kitchener then ordered his army to advance on Omdurman in several columns. The 21st Lancers were sent ahead to clear the route to Omdurman. Unfortunately, they were attacked by 2,500 Mahdists who were hidden in a depression. After a short but bloody skirmish clash, the Lancers drove the Mahdists off.

The Anglo-Egyptian force moved left in echelon towards the Surkab ridge and then towards the south. During the advance, the rear was a brigade of 3,000 mainly Sudanese troops was at the rear, and this force was unexpectedly threatened by 15,000 enemy troops who came from behind the ridge. The brigade turned to face the oncoming Mahdists, and despite intense pressure, they held their position and caused considerable casualties. Further infantry and the Maxim guns were diverted to support the Sudanese, and the Mahdist forces were forced to retreat in considerable disorder.

Now that this threat was eliminated, the advance continued and Omdurman was occupied.


THE REFIGHT

The forces involved

Mahdists

  • 1 x Cavalry
  • 5 x Spearmen

British

  • 1 x Cavalry
  • 1 x Dismounted Cavalry (Skirmishers)
  • 2 x Elite Disciplined Infantry

Opening positions

Turn 1

The Mahdist Spearmen attacked the British Line Infantry in the left sector. The Mahdist Spearmen threw a 3 ...

... and in reply the British Line Infantry threw a 4 (plus 1 for being Elite) and destroyed the Mahdist Spearmen.

The Mahdists moved a unit of Spearmen into the left sector to replace the destroyed Mahdist Spearmen.

The British Line Infantry attacked the Mahdist Spearmen in the centre sector. The British Line Infantry threw a 6 (plus 1 for being Elite) ...

... and destroyed the Mahdist Spearmen.

The Mahdists moved their remaining unit of Spearmen into the centre sector to replace the destroyed Mahdist Spearmen.

Turn 2

The Mahdist Spearmen attacked the British Line Infantry in the left sector. The Mahdist Spearmen threw a 2 ...

... and in reply the British Line Infantry threw a 1 (plus 1 for being Elite).

Neither side suffered any casualties.

The British Line Infantry attacked the Mahdist Spearmen in the centre sector. The British Line Infantry threw a 6 (plus 1 for being Elite) ...

... and destroyed the Mahdist Spearmen.

The Mahdists moved their Cavalry into the centre sector to replace the destroyed Mahdist Spearmen.

Turn 3

The Mahdist Cavalry attacked the British Line Infantry in the centre sector. The Mahdist cavalry threw a 1 ...

... and in reply the British Line Infantry threw a 5 (pus 1 for being Elite) ..

... and destroyed the Mahdist Cavalry.

The British Line Infantry attacked the Mahdist Spearmen in the left sector. The British Line Infantry threw a 6 (plus 1 for being Elite) ...

... and destroyed the Mahdist Spearmen.

... and won the battle!


A video version of this battle report can be found here on the Wargaming Miscellany YouTube channel.

Saturday, 21 June 2025

Two more 'Dominion of ...' books of rules have been published

Steve Parker has published two more 'Dominion of ...' books of rules, DOMINION OF MARLBOROUGH AND PETER THE GREAT ...

and DOMINION OF PATRIOTS AND REDCOATS.


The DOMINION OF MARLBOROUGH AND PETER THE GREAT rules cover the main battles of the War of the Spanish Succession and the Great Northern War .

There are seven different types of unit:

  • Line Infantry: These are infantry that fight in close formation and rely on firepower and bayonets to destroy enemy units.
  • Pikemen and Claymores: Infantry that are trained or prefer to fight hand-to-hand (e.g. Russian pikemen and Claymore-armed Highlanders).
  • Gå-på Infantry: Swedish Infantry who normally fired at very short range before charging their opponents.
  • Dragoons: Mounted troops armed with carbines who normally dismount and fight in skirmish order.
  • Pistoliers: Cavalry who still used the caracole formation who preferred to engage the enemy with their pistols.
  • Sabres: Cavalry who were armed with swords and who charged their opponents, sometimes after firing at them with their pistols (e.g. British, Dutch, Russian, and Swedish Cavalry
  • Artillery: It includes all artillery.

The book includes Army Lists for twenty-four battles:

  • Monmouth’s Rebellion
    • Battle of Sedgemoor (6th July 1685)
  • Nine Years’ War
    • Battle of Walcourt (25th August 1689)
    • Battle of Fleurus (1st July 1690)
    • Battle of Steenkerque (3rd August 1692)
    • Battle of Neerwinden (29th July 1693)
  • Williamite War in Ireland
    • Battle of the Boyne (1st July 1690)
  • War of the Spanish Succession
    • Battle of Chiari (1st September 1701)
    • Battle of Luzzara (15th August 1702)
    • Battle of Schellenberg (2nd July 1704)
    • Battle of Blenheim (13th August 1704)
    • Battle of Elixheim (18th July 1705)
    • Battle of Ramillies (23rd May 1706)
    • Battle of Turin (7th September 1706)
    • Battle of Almanza (25th April 1707)
    • Battle of Oudenarde (11th July 1708)
    • Battle of Malplaquet (11th September 1709)
    • Battle of Villaviciosa (10th December 1710)
    • Battle of Denain (24th July 1712)
  • Great Northern War
    • Battle of Narva (30th November 1700)
    • Battle of Düna (19th July 1701)
    • Battle of Kliszów (9th July 1702)
    • Battle of Holowczyn (14th July 1708)
    • Battle of Poltava (28th June 1709)
  • Jacobite Rebellion 1715
    • Battle of Sheriffmuir (13th November 1715)


The DOMINION OF PATRIOTS AND REDCOATS rules cover the main battles of the American War of Independence/American Revolutionary War.

There are six different types of unit:

  • Line Infantry: These are infantry that fight in close formation and rely on firepower to destroy enemy units (e.g. Early British Infantry, American Continental Army infantry, Militia in close formation, French Infantry units.)
  • Skirmishers: These are infantry or cavalry who fight in a dispersed formation and rely on firepower or missile weapons to destroy enemy units at a distance (e.g. British and French Light Infantry, Militia fighting in skirmish order, dismounted Dragoons, Native Americans firing from cover).
  • Bayonets: These are infantry units that fire a volley and then charge their opponents (e.g. British and Hessian Regular Infantry).
  • Tomahawks: Native American and First nation warriors who prefer to fight in hand-to-hand combat.
  • Cavalry: These are mounted troops who rely on charging their opponents as opposed to dismounting and shooting.
  • Artillery: It includes all artillery.

Examples of units include:

  • Trained militia armed with muskets and fighting in close formation – Line Infantry (cost 2 points).
  • Militia armed with muskets, fighting in a dispersed formation, and using cover – Skirmishers (cost 2 points).

The book includes Army Lists for twenty-four battles:

  • Lexington and Concord (1775)
  • Bunker Hill (1775)
  • Quebec (1775)
  • Long Island (1776)
  • White Plains (1776)
  • Fort Washington (1776)
  • Trenton (1776)
  • Princeton (1777)
  • Oriskany (1777)
  • Bennington (1777)
  • Brandywine (1777)
  • First Saratoga (1777)
  • Germantown (1777)
  • Second Saratoga (1777)
  • Monmouth (1778)
  • Stono Ferry (1779)
  • Newtown (1779)
  • Savannah (1779)
  • Camden (1780)
  • King’s Mountain (1780)
  • Cowpens (1781)
  • Guilford Courthouse (1781)
  • Eutaw Springs (1781)
  • Siege of Yorktown (1781).


The DOMINION OF MARLBOROUGH AND PETER THE GREAT and DOMINION OF PATRIOTS AND REDCOATS rules were written by Steve Parker and published in 2025 by Orc Publishing. They can be bought in PDF format from Wargame Vault for $5.90/£4.40.

Friday, 20 June 2025

The Battle of Tamai refought using Dominion of the Spear and Bayonet

Background to the battle

During the campaign to relieve the besieged Egyptian forces in Khartoum, an expedition – led by Major-General Sir Gerald Graham – was sent to Suakin on the Red Sea coast of the Sudan to destroy the Mahdist forces led by Osman Digna. The British defeated Digna's army at the Second Battle of El Teb on 29th February 1884 but were unable to destroy it. A second attempt was made a fortnight later on 13th March 1884 and the resulting battle is known as the Battle of Tamai.

The British force comprised:

  • Squadron from 10th Hussars
  • Squadron from 19th Hussars
  • 1st Battalion, The Black Watch (Royal Highlanders)
  • 3rd Battalion, The King's Royal Rifle Corps
  • 1st Battalion, York and Lancaster Regiment
  • 1st Battalion, Gordon Highlanders
  • 2nd Battalion, The Royal Irish Fusiliers
  • Royal Marine Light Infantry
  • Royal Navy Naval Brigade
  • 6th Battery, 1st Brigade, Scottish Division, Royal Artillery
  • M Battery, Royal Horse Artillery

It is estimated that the Mahdist force numbered approximately 10,000.

The course of the battle

During the night of 12th March 1884, the British camped close to the position occupied by the Mahdists. During the night several Mahdist riflemen kept up a desultory fire on the British camp and inflicted a few casualties.

At daybreak the artillery open fired on the Mahdist skirmishers who were driven off. General Graham ordered the infantry to form up into two brigade-sized infantry squares and to advance. One square was commanded by Colonel Davis and the other by Colonel Buller. General Graham accompanied Colonel Davis' square.

The main Mahdist force was discovered hidden in a ravine by a scouting party, and General Graham ordered the Black Watch to advance and clear the enemy from the ravine. This left a gap in the square ... and a sudden Mahdist attack exploited this. As a result, the remaining troops in the square found themselves fighting a brutal hand-to-hand battle against the Mahdists.

The Black Watch fell back on the square, and after intense fighting and volley fire from Colonel Buller's square and dismounted cavalry, the square was able to reform. The British then resumed their advance, drove the remaining enemy troops out of the ravine, and caused the surviving Mahdists (including Osman Digna) to flee.


THE REFIGHT

The forces involved

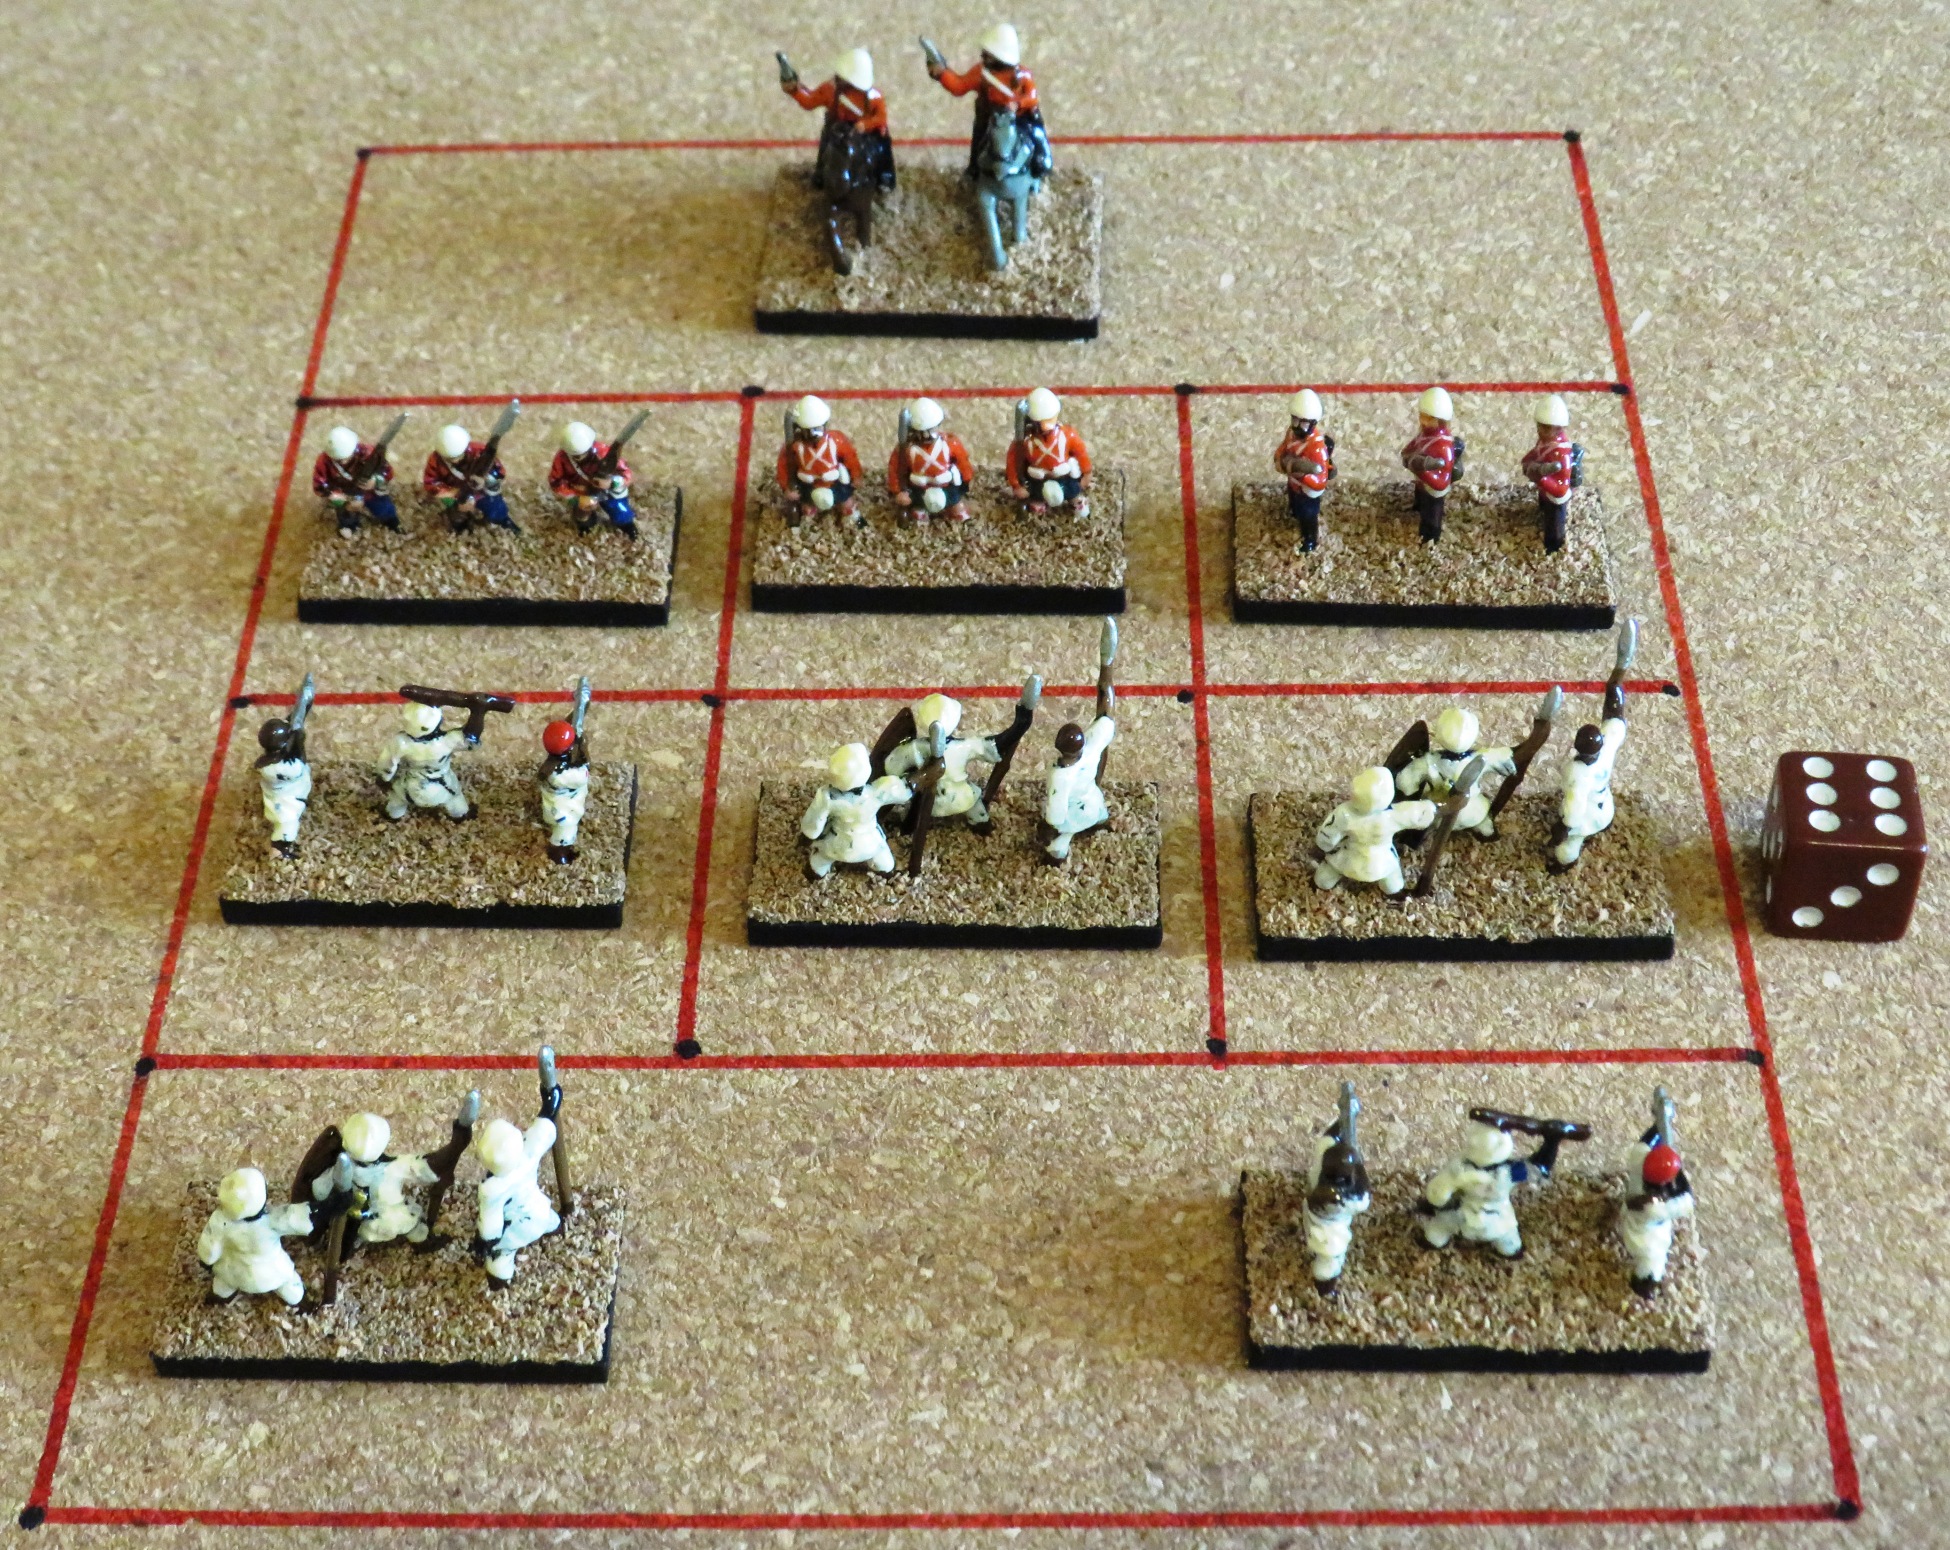
British

  • 1 x Cavalry
  • 1 x Dismounted Cavalry (Skirmishers)
  • 2 x Elite Disciplined Infantry

Mahdists

  • 1 x Cavalry
  • 2 x Ambushers (armed with swords)
  • 3 x Spearmen

Opening positions

Turn 1

The British Line Infantry attacked the Mahdist Cavalry in the left sector. The British Line Infantry threw a 2 (plus 1 for being Elite) ...

... and in reply the Mahdist Cavalry threw a 1.

Neither side suffered any casualties.

The Mahdist Spearmen attacked the British Skirmishers in the right sector. The Mahdist Spearmen threw a 2 ...

... and in reply the British Skirmishers threw a 2.

Neither side suffered any casualties.

Turn 2

The British Line Infantry attacked the Mahdist Cavalry in the left sector for a second time. The British Line Infantry threw a 6 (plus 1 for being Elite) ...

... and destroyed the Mahdist Cavalry.

The Mahdists moved a unit of Ambushers into the left sector to replaced the destroyed Mahdist Cavalry.

The Mahdist Spearmen attacked the British Skirmishers in the right sector for a second time. The Mahdist Spearmen threw a 6 ...

... and destroyed the British Skirmishers.

The British moved their Cavalry into the right sector to replaced the destroyed British Skirmishers.

Turn 3

The British Line Infantry attacked the Mahdist Spearmen in the centre sector. The British Line Infantry threw a 5 (plus 1 for being Elite) ...

... and destroyed the Mahdist Spearmen.

The Mahdists moved a unit of Ambushers into the centre sector to replace the destroyed Mahdist Spearmen.

The Mahdist Ambushers attacked the British Line Infantry in the left sector. The Mahdist Ambushers threw a 4 ...

... and in reply the British Line Infantry threw a 2 (plus 1 for being Elite).

Neither side suffered any casualties.

Turn 4

The British Cavalry attacked the Mahdist Spearmen in the right sector. The British Cavalry threw a 5 ...

... and destroyed the Mahdist Spearmen.

The Mahdists moved their last unit of Spearmen into the right sector to replace the destroyed Mahdist Spearmen.

The Mahdist Ambushers attacked the British Line Infantry in the centre sector. The Mahdist Ambushers threw a 3 ...

... and in reply the British Line Infantry threw a 3 (plus 1 for being Elite).

Neither side suffered any casualties.

Turn 5

The British Line Infantry attacked the Mahdist Ambushers in the left sector. The Mahdist Ambushers threw first, and threw a 1 ...

...and in reply the British Line Infantry threw a 2 (plus 1 for being Elite).

Neither side suffered any casualties.

The Mahdist Ambushers attacked the British Line Infantry in the centre sector. The Mahdist Ambushers threw a 1 ...

... and in reply the British Line Infantry threw a 4 (plus 1 for being Elite) and destroyed the Mahdist Ambushers.

The Mahdists were now reduced to two units.

Turn 6

The British Line Infantry in the centre sector outflanked the Mahdist Spearmen in the right sector. The British Line Infantry threw a 5 (plus 1 for being Elite) and destroyed the Mahdist Spearmen ...

... and won the battle!


A video version of this battle report can be found here on the Wargaming Miscellany YouTube channel.