I have finally managed to stage a few play-tests of the pre-dreadnought naval wargame rules I intend to use at this year's Conference of Wargamers (COW2016). Each play-test took the form of a simple scenario that pitched different numbers and types of ships against each other.
Scenario 1: Protect the convoy
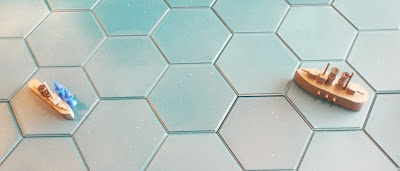
In this scenario a single protected cruiser is attacking a small convoy that is being escorted by a pair of destroyers. The cruiser's task is to destroy as many of the merchant ships as it can; the destroyers' task is to protect the convoy and – if possible – drive off the attacking cruiser.
Turn 1
The cruiser came into sight of the convoy and the destroyers moved forward to engage the cruiser whilst the convoy turned away.

The cruiser fired at the nearest destroyer, and hit it, causing it to lose 2 flotation points.
Turn 2
The cruiser managed to evade the destroyers, ...

... and opened fire on the nearest merchant ship ... which it missed! It also engaged the other destroyer with its secondary armament, hitting it once and causing it 1 flotation point of damage.

Both destroyers fired their torpedoes at the cruiser. The torpedoes from the destroyer immediately behind the cruiser missed, but the other destroyer's torpedoes hit home and inflicted the loss of 2 flotation points of damage on the cruiser.

Turn 3
The cruiser continued to pursue the convoy, and the destroyers attempted to distract it from doing so.

The cruiser fired at and hit the destroyer that was abeam of it with its secondary armament and caused it to lose a further 2 flotation points. At the same time the cruiser fired at one of the merchant ship with its main armament, and hit it.

Turn 4
The destroyers' tactics seemed to be working, and one of them managed to interpose itself between the cruiser and the convoy.

In the ensuing exchange of gunfire the destroyers failed to hit the cruiser, but the cruiser hit and sank the destroyer that was immediately astern of the convoy.

Turn 5
It now appeared that the cruiser had the convoy at its mercy, ...

... and very soon it had hit – and sank – one of the merchant ships.

Turn 6
As the cruiser manoeuvred into a position what it could sink the convoy one by one, the remaining destroyer rushed in ...

... and in the exchange of gunfire it was sunk ... but not before inflicting sufficient damage on the cruiser to force her to turn away and to leave the convoy to escape.

This was a sharp little action, and proved that destroyers can pose a potent threat to large ships if they are properly handled.
Scenario 2: Hunting a raider
An armoured cruiser has evaded the blockade and has been attacking merchant shipping. Two protect cruisers have tracked her down, and have to sink her or damage her so that she has to surrender or return to port.
Turn 1
The two protected cruisers initially approached in line ahead formation, but on seeing their enemy, they split away from each other in order to force the armoured cruiser to split its fire between two targets.

In fact the armoured cruiser was able to engage one of the protected cruisers at extreme range, but without hitting its target.

Turn 2
With both forces approaching each other at maximum speed, it was not long before all the ships were involved in an artillery engagement.

Whilst the two protected cruisers were unable to do much damage to their armoured opponent (it suffered the loss of 1 flotation point) ...

... the latter's heavy main armament was able to inflict considerable damage on one of the two protected cruisers. (It lost 4 flotation points to one of the enemy ship's salvos!)
Turn 3
When the damaged protected cruiser moved out of gun range, the armoured cruiser now concentrated its fire on the other protected cruiser ...

... and inflicted a similar level of damage (the loss of 4 flotation points) as it had to its other opponent. In return the protected cruiser was able to inflict only minor damage (the loss of 1 flotation point) on the armoured cruiser.

Turn 4
The ships now began to circle each other ...

... firing as best they could but inflicting little damage on each other in the process. (The armoured cruiser was hit by a single shell and lost 1 flotation point.)

Turn 5
The armoured cruiser was able to turn inside the turning circle of the nearest protected cruiser, ...

... and whilst its main armament engaged the other protected cruiser (with no effect), it was able to fire its bow torpedo tube at the nearest protected cruiser, with quite deadly effect. (The torpedoes caused the loss of 3 flotation points, thus forcing the protect cruiser to withdraw from the battle as best it could.) That protected cruiser's gun proved to be poorly aimed, and it was unable to inflict any damage of the armoured cruiser.

Turn 6
The armoured cruiser fell upon its damaged enemy and at point-blank range opened fire with all its main and secondary guns.

The result was a foregone conclusion ... the protected cruiser was sunk ... but not before it had fired its own guns and its port side torpedo tube, all of which caused extensive damage to the armoured cruiser! (The armoured cruiser lost a total of 4 more flotation points, which meant that it was now forced to withdraw from the battle.)

Turn 7
Both cruisers now circled each other warily ...

... and the armoured cruiser inflict further damage on the protected cruiser. (It lost 1 more flotation point.)

Turn 8
The protected cruiser now tried to move outside of the range of armoured cruiser's main armament ...

... but it suffered further damage. (It lost yet another flotation point.)

Turn 9
Now that the protected cruiser had moved out of range, the armoured cruiser began to make its way back to its home port. The damage it had suffered would keep it in dockyard hands for some time to come.
The two protected cruisers had achieved their mission ... but at a considerable cost!
Scenario 3: Jeune École
A blockading battleship is moving along the enemy coast. A small flotilla of destroyers is sent to intercept it and – if possible – damage or sink it.
Turn 1
The battleship came in sight of a flotilla of enemy destroyers that were in line abreast. Considering such craft as to be mere 'mosquitoes' that can be easily swept aside, the battleship's captain did not change course ... and neither did the destroyers!
Whilst the battleship remained on its existing course, the destroyers split into two separate groups.

Turn 2
Whilst one group of the destroyers attempted to approach the battleship from the stern, the other pair approached her from ahead and sailed down either side of her.

The battleship's response was devastating. Her port secondary armament engaged the enemy destroyer on her port side and inflicted the loss of 4 flotation points.
On her starboard side, the main armament and starboard secondary armament fired at the other destroyer, and also caused her to lose 4 flotation points.
In reply the two destroyers fired back with their puny guns ... and the battleship lost 3 flotation points!

Before they sank, the destroyers both fired a torpedo at the battleship. One cause the battleship to lose a further 3 flotation points and the other caused her to lose 1 flotation point.

Turn 3
The remaining destroyers now moved in to mount their attacks on the damaged battleship

The battleship fired her rear turret at the closer of the two destroyers ... and missed!
The destroyers then both fired a torpedo at the battleship, and the battleship lost a further 4 flotation points!

Turn 4
By this stage the battleship was badly damaged and needed to break away, but the superior speed of the destroyers allowed them to manoeuvre into a position to mount a further torpedo attack.

Although she was damaged, the battleship was still able to fight, and her guns made short work of the closest destroyer (it suffered the loss of 4 flotation points) and damaged the other, which lost 1 flotation point.

The destroyers were still able to fire their remaining torpedoes, and these slammed into the battleship with devastating effect.

The remaining destroyer stood by to receive any survivors from her sunken sister ships and the battleship. Once they were picked up, she then made her way back to base to make the world aware that the theories of the Jeune École appeared to be valid, and that from now on no unescorted battleship was safe from small, fast, torpedo-armed destroyers that were working as a team.
Note about Scenario 3:
The Jeune École (Literally 'Young School') was a strategic naval concept developed during the 19th century and adopted for a time by the French Navy. It advocated the use of small, powerfully equipped vessels (e.g. torpedo boats) to combat a blockading enemy battle fleet along with the use of fast cruisers to attack and sink enemy merchant ships.
Scenario 4: Line of Battle
Two enemy battle squadrons are sailing towards each other. They each comprise two battleships and an armoured cruiser, and the armoured cruisers are leading their respective battle lines.
Turn 1
Initially both sides continued to sail towards each other.
Turn 2
Once the leading ships of the opposing battle line got within range of each other, one began to turn to starboard to cross the enemy line's 'T'.

The two leading ships (the armoured cruisers) then fired at each other, and both inflicted some damage on its opponent.

Turn 3
In order to prevent their 'T' being crossed, the other battle line also began to turn, but in their case it was to port. Seeing this manoeuvre, the other side's armoured cruiser also turned to port, again in the hope of crossing the enemy 'T'. Unfortunately, in doing so it began to move ahead of its slower compatriots.

The armoured cruisers fired at each other, and yet again inflicted damage on each other.

One of the battleships was also able to join in the exchange of gunfire, and promptly hit the enemy's armoured cruiser.

Turn 4
The two opposing armoured cruisers now turned so that they were sailing on parallel courses. In their wake the battleships began to manoeuvre to follow suit.

The armoured cruisers let rip at each other with their main armaments, ...

... their secondary armaments, ...

... and then their beam torpedo tubes. Both ships were by now extensively damaged, and it one case (the armoured cruiser on the left) this caused her to sink almost at once.

Whilst this deadly engagement was under way, the battleships began firing at each other. One side was able to concentrate its fire on the other side's leading battleship, and heavy damage was inflicted on it. This was not, however, a one-sided exchange, and the the leading battleship on the other side was also badly damaged.

Turn 5
As the badly damaged armoured cruiser began to turn away to seek safety, the two groups of battleships sailed on parallel courses.

Unfortunately one battleship was masked by its sister ship, and as a result it was not able to join in what turned out to be a very one-sided exchange of gunfire. The damage inflicted on its sister ship was so severe that it turned over and sank.

Turn 6
The remaining battleship now began to turn away, not wishing to continue to fight in such an apparently one-sided battle.

As it did so the pair of battleships engaged her and inflicted considerable damage on her ... but in a magnificent piece of shooting her rear turret hit the leading enemy battleship with several shells ... and the enemy ship exploded and sank!

Both sides now withdrew to lick their wounds and to repair the damage their ships had received.
Comments:
These four play-tests have been extremely helpful and I need to take some time to think about the changes that need to be made in the light of the results. I hope to do that over the next few days.
Scenario 1: Protect the convoy
In this scenario a single protected cruiser is attacking a small convoy that is being escorted by a pair of destroyers. The cruiser's task is to destroy as many of the merchant ships as it can; the destroyers' task is to protect the convoy and – if possible – drive off the attacking cruiser.
Turn 1
The cruiser came into sight of the convoy and the destroyers moved forward to engage the cruiser whilst the convoy turned away.

The cruiser fired at the nearest destroyer, and hit it, causing it to lose 2 flotation points.

Turn 2
The cruiser managed to evade the destroyers, ...

... and opened fire on the nearest merchant ship ... which it missed! It also engaged the other destroyer with its secondary armament, hitting it once and causing it 1 flotation point of damage.

Both destroyers fired their torpedoes at the cruiser. The torpedoes from the destroyer immediately behind the cruiser missed, but the other destroyer's torpedoes hit home and inflicted the loss of 2 flotation points of damage on the cruiser.

Turn 3
The cruiser continued to pursue the convoy, and the destroyers attempted to distract it from doing so.

The cruiser fired at and hit the destroyer that was abeam of it with its secondary armament and caused it to lose a further 2 flotation points. At the same time the cruiser fired at one of the merchant ship with its main armament, and hit it.

Turn 4
The destroyers' tactics seemed to be working, and one of them managed to interpose itself between the cruiser and the convoy.

In the ensuing exchange of gunfire the destroyers failed to hit the cruiser, but the cruiser hit and sank the destroyer that was immediately astern of the convoy.

Turn 5
It now appeared that the cruiser had the convoy at its mercy, ...

... and very soon it had hit – and sank – one of the merchant ships.

Turn 6
As the cruiser manoeuvred into a position what it could sink the convoy one by one, the remaining destroyer rushed in ...

... and in the exchange of gunfire it was sunk ... but not before inflicting sufficient damage on the cruiser to force her to turn away and to leave the convoy to escape.

This was a sharp little action, and proved that destroyers can pose a potent threat to large ships if they are properly handled.
Scenario 2: Hunting a raider
An armoured cruiser has evaded the blockade and has been attacking merchant shipping. Two protect cruisers have tracked her down, and have to sink her or damage her so that she has to surrender or return to port.
Turn 1
The two protected cruisers initially approached in line ahead formation, but on seeing their enemy, they split away from each other in order to force the armoured cruiser to split its fire between two targets.

In fact the armoured cruiser was able to engage one of the protected cruisers at extreme range, but without hitting its target.

Turn 2
With both forces approaching each other at maximum speed, it was not long before all the ships were involved in an artillery engagement.

Whilst the two protected cruisers were unable to do much damage to their armoured opponent (it suffered the loss of 1 flotation point) ...

... the latter's heavy main armament was able to inflict considerable damage on one of the two protected cruisers. (It lost 4 flotation points to one of the enemy ship's salvos!)
Turn 3
When the damaged protected cruiser moved out of gun range, the armoured cruiser now concentrated its fire on the other protected cruiser ...

... and inflicted a similar level of damage (the loss of 4 flotation points) as it had to its other opponent. In return the protected cruiser was able to inflict only minor damage (the loss of 1 flotation point) on the armoured cruiser.

Turn 4
The ships now began to circle each other ...

... firing as best they could but inflicting little damage on each other in the process. (The armoured cruiser was hit by a single shell and lost 1 flotation point.)

Turn 5
The armoured cruiser was able to turn inside the turning circle of the nearest protected cruiser, ...

... and whilst its main armament engaged the other protected cruiser (with no effect), it was able to fire its bow torpedo tube at the nearest protected cruiser, with quite deadly effect. (The torpedoes caused the loss of 3 flotation points, thus forcing the protect cruiser to withdraw from the battle as best it could.) That protected cruiser's gun proved to be poorly aimed, and it was unable to inflict any damage of the armoured cruiser.

Turn 6
The armoured cruiser fell upon its damaged enemy and at point-blank range opened fire with all its main and secondary guns.

The result was a foregone conclusion ... the protected cruiser was sunk ... but not before it had fired its own guns and its port side torpedo tube, all of which caused extensive damage to the armoured cruiser! (The armoured cruiser lost a total of 4 more flotation points, which meant that it was now forced to withdraw from the battle.)

Turn 7
Both cruisers now circled each other warily ...

... and the armoured cruiser inflict further damage on the protected cruiser. (It lost 1 more flotation point.)

Turn 8
The protected cruiser now tried to move outside of the range of armoured cruiser's main armament ...

... but it suffered further damage. (It lost yet another flotation point.)

Turn 9
Now that the protected cruiser had moved out of range, the armoured cruiser began to make its way back to its home port. The damage it had suffered would keep it in dockyard hands for some time to come.
The two protected cruisers had achieved their mission ... but at a considerable cost!
Scenario 3: Jeune École
A blockading battleship is moving along the enemy coast. A small flotilla of destroyers is sent to intercept it and – if possible – damage or sink it.
Turn 1
The battleship came in sight of a flotilla of enemy destroyers that were in line abreast. Considering such craft as to be mere 'mosquitoes' that can be easily swept aside, the battleship's captain did not change course ... and neither did the destroyers!
Whilst the battleship remained on its existing course, the destroyers split into two separate groups.

Turn 2
Whilst one group of the destroyers attempted to approach the battleship from the stern, the other pair approached her from ahead and sailed down either side of her.

The battleship's response was devastating. Her port secondary armament engaged the enemy destroyer on her port side and inflicted the loss of 4 flotation points.
On her starboard side, the main armament and starboard secondary armament fired at the other destroyer, and also caused her to lose 4 flotation points.
In reply the two destroyers fired back with their puny guns ... and the battleship lost 3 flotation points!

Before they sank, the destroyers both fired a torpedo at the battleship. One cause the battleship to lose a further 3 flotation points and the other caused her to lose 1 flotation point.

Turn 3
The remaining destroyers now moved in to mount their attacks on the damaged battleship

The battleship fired her rear turret at the closer of the two destroyers ... and missed!
The destroyers then both fired a torpedo at the battleship, and the battleship lost a further 4 flotation points!

Turn 4
By this stage the battleship was badly damaged and needed to break away, but the superior speed of the destroyers allowed them to manoeuvre into a position to mount a further torpedo attack.

Although she was damaged, the battleship was still able to fight, and her guns made short work of the closest destroyer (it suffered the loss of 4 flotation points) and damaged the other, which lost 1 flotation point.

The destroyers were still able to fire their remaining torpedoes, and these slammed into the battleship with devastating effect.

The remaining destroyer stood by to receive any survivors from her sunken sister ships and the battleship. Once they were picked up, she then made her way back to base to make the world aware that the theories of the Jeune École appeared to be valid, and that from now on no unescorted battleship was safe from small, fast, torpedo-armed destroyers that were working as a team.
Note about Scenario 3:
The Jeune École (Literally 'Young School') was a strategic naval concept developed during the 19th century and adopted for a time by the French Navy. It advocated the use of small, powerfully equipped vessels (e.g. torpedo boats) to combat a blockading enemy battle fleet along with the use of fast cruisers to attack and sink enemy merchant ships.
Scenario 4: Line of Battle
Two enemy battle squadrons are sailing towards each other. They each comprise two battleships and an armoured cruiser, and the armoured cruisers are leading their respective battle lines.
Turn 1
Initially both sides continued to sail towards each other.
Turn 2
Once the leading ships of the opposing battle line got within range of each other, one began to turn to starboard to cross the enemy line's 'T'.

The two leading ships (the armoured cruisers) then fired at each other, and both inflicted some damage on its opponent.

Turn 3
In order to prevent their 'T' being crossed, the other battle line also began to turn, but in their case it was to port. Seeing this manoeuvre, the other side's armoured cruiser also turned to port, again in the hope of crossing the enemy 'T'. Unfortunately, in doing so it began to move ahead of its slower compatriots.

The armoured cruisers fired at each other, and yet again inflicted damage on each other.

One of the battleships was also able to join in the exchange of gunfire, and promptly hit the enemy's armoured cruiser.

Turn 4
The two opposing armoured cruisers now turned so that they were sailing on parallel courses. In their wake the battleships began to manoeuvre to follow suit.

The armoured cruisers let rip at each other with their main armaments, ...
... their secondary armaments, ...

... and then their beam torpedo tubes. Both ships were by now extensively damaged, and it one case (the armoured cruiser on the left) this caused her to sink almost at once.

Whilst this deadly engagement was under way, the battleships began firing at each other. One side was able to concentrate its fire on the other side's leading battleship, and heavy damage was inflicted on it. This was not, however, a one-sided exchange, and the the leading battleship on the other side was also badly damaged.

Turn 5
As the badly damaged armoured cruiser began to turn away to seek safety, the two groups of battleships sailed on parallel courses.

Unfortunately one battleship was masked by its sister ship, and as a result it was not able to join in what turned out to be a very one-sided exchange of gunfire. The damage inflicted on its sister ship was so severe that it turned over and sank.

Turn 6
The remaining battleship now began to turn away, not wishing to continue to fight in such an apparently one-sided battle.

As it did so the pair of battleships engaged her and inflicted considerable damage on her ... but in a magnificent piece of shooting her rear turret hit the leading enemy battleship with several shells ... and the enemy ship exploded and sank!

Both sides now withdrew to lick their wounds and to repair the damage their ships had received.
Comments:
These four play-tests have been extremely helpful and I need to take some time to think about the changes that need to be made in the light of the results. I hope to do that over the next few days.


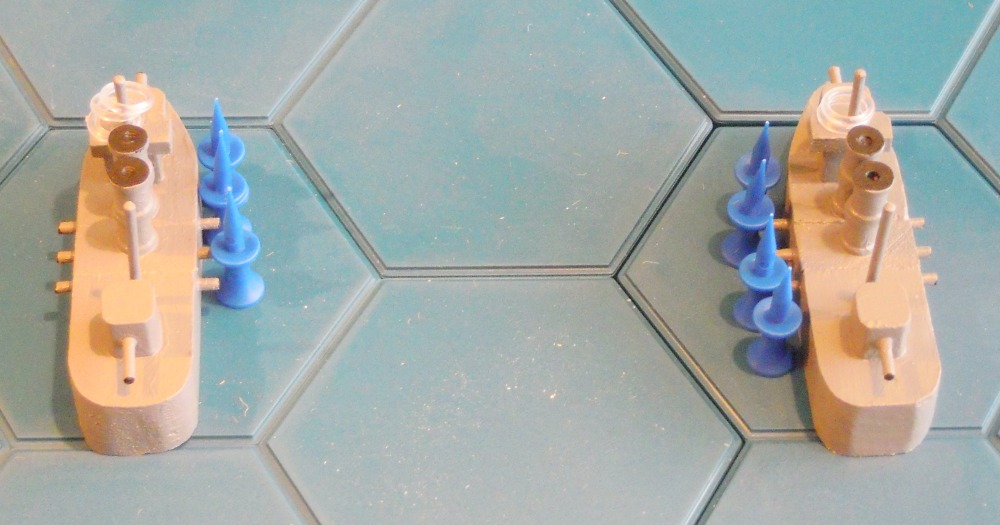
Very entertaining scenarios Bob with each type of ship behaving accordingly to it's status. May I suggest adding some Ensigns to the Naval ships to distinguish friend from foe ( as in the photos it can be confusing which Naval ship belongs to which Navy)- or as a suggestion entirely re-paint one of your fleets a much- much darker grey...other than this- well done on your Naval Project. Regards. KEV.
ReplyDeleteKev,
DeleteThanks for your very helpful comments.
I tried to devise scenarios that would test the rules ... and I think I got it reasonably right.
I have some small, coloured 'Post It'-type stickers that will be ideal for use as flags, and I intend to use them during the forthcoming session at COW.
I may well repaint these models in the future, but not in time for COW.
All the best,
Bob
Why make it easy? :D Not being able to tell one fleet's ships from another's seems pretty much an occupational hazard of naval warfare.
DeleteEdwin King,
DeleteVery true, but for the purposes of the game it might help some the players if they knew which ships were on the same side as they were ... and which were not!
All the best,
Bob
I thought that convoy in scenario one might have scattered.
ReplyDeleteOtherwise an interesting collection. It will be fun when you expose other players to the command situation.
Jim Duncan,
DeleteThe convoy could have scattered ... but I had visions of a repeat of PQ17 if they had.
I have learned quite a few lessons from my play-tests, and will incorporate what I have learned into the next draft of the rules.
All the best,
Bob
Great fun. Thanks for taking the time and making the effort to post your play test sessions.
ReplyDeleteWilliam Stewart,
DeleteI am very pleased that you enjoyed these battle reports. I certainly enjoyed fighting these battles, and a learned a lot of useful lessons in the process.
All the best,
Bob
I've downloaded your free rules and they make excellent sense - thank you very much!
ReplyDeleteWhat movement and flotation points are you using for your merchant vessels? Do you think that 2/3 hexes movement and 4fp's sound about right?
Edwin King,
DeleteThe latest version of the rules will be published after COW has taken place in early July. It will not be significantly different, but will have some additions to it.
After my play-tests I am going to increase the flotation points allocated to each type of ship and will be reducing the top speed of destroyers and torpedo boats from 5 hexes per turn to 4 hexes.
In my current draft of the rules, liners move 3 hexes per turn and cargo vessels move 2 hexes.
All the best,
Bob
Thank you.
DeleteIf it doesn't already have it, could you please add a note as to which ship types are equipped with torpedoes.
Edwin King,
DeleteBattleships and armoured cruisers have 1 x TT in the bow, 1 x TT in the stern, 1 x TT on either beam (all fixed)
Protected cruisers have 1 x TT in the bow, 1 x TT on either beam (all fixed)
Destroyers and torpedo boats have 2 x TT on trainable mounts (some might have 1 x fixed TT in the bow)
I hope that this is of help.
All the best,
Bob
That looks like a successful series of tests and like some quick games that would have been fun to play.
ReplyDeleteRoss Mac,
DeleteThese battles certainly were great fun to fight as well as being very informative. The rules will certainly be improved as a result of these play-tests.
All the best,
Bob
Hi Bob,
ReplyDeleteYou have certainly been busy and to great effect! The models look superb and the rules seem to be working out well. I am sure you have them polished for COW and I am looking forward to seeing the latest version in due course.
I am also looking forward to seeing a combined operations type of action - which I am sure will feature at some point!
All the best,
DC
David Crook,
DeleteCheers old chap! I am rather pleased with the way the models turned out and how effective they look on the tabletop. I was trying to achieve what I thought that a scale-up version of Jane's Naval War Game would look like if played on hexes ... and I am more that pleased with the end result.
As to the rules ... well there are bits that need a little fine-tuning, but that should not take too long to do.
Combined operations are something that I would like to try out in the future ... but not until COW is out of the way first!
All the best,
Bob
You seem to have nailed very nicely the key elements of pre-dreadnaught naval warfare. I'm sure it will arouse much interest at COW.
ReplyDeleteDavid Bradley,
DeleteThanks very much for your kind comment. Hopefully the session attendees will enjoy using the rules.
All the best,
Bob
Bob Another great playtest posting
ReplyDeleteJohntheone,
DeleteThanks very much for your very kind comment.
All the best,
Bob