Pages

Sunday, 6 March 2011

The portable wargame: Twentieth century version – First play-test

Having written the first draft of the twentieth century version of my rules for my portable wargame, I decided to see what it might look like as a game. I am a great believer in the axiom that 'if it looks right, it probably is right'.

Now almost all of my twentieth century wargames figures and models are 20mm-scale, and I already knew from a previous 'experiment' that they would not look 'right' on the vinyl chessboard I have been using recently. I them remembered that I still have the board that I made for Richard Brooks' SOLFERINO IN THIRTY MINUTES game. This is basically a large chessboard, with two different shades of green used to represent the different grid squares.

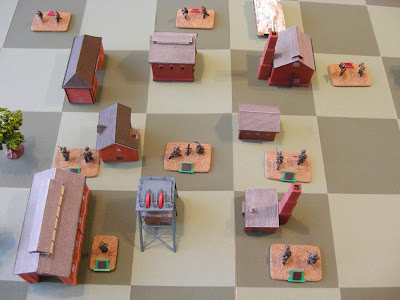
So I set up a scenario which pitted some Russian Marines (supported by a T34/76 tank) against a smaller group of German troops who are defending an industrial town. The set-up looked like this:
At this point I fully intended to pack everything back into its storage ... and then I decided to try out a few moves just to see how the rules worked. My intention was not to fight a full play-test ... but then I began to enjoy what I was doing, and things sort of went from there.

The result is not a full blow-by-blow account of the battle, but more a photo-report of the main action.

Turn 1
After artillery fire by the Russian Marine Artillery Unit, the Russian left flank advanced towards the town.
Turn 2
The Germans decided to stay put in their defences, and after yet further ineffective artillery fire, the Russian advance continued. A sharp exchange of fire destroyed one of the German Machine Gun Units of the edge of the town.
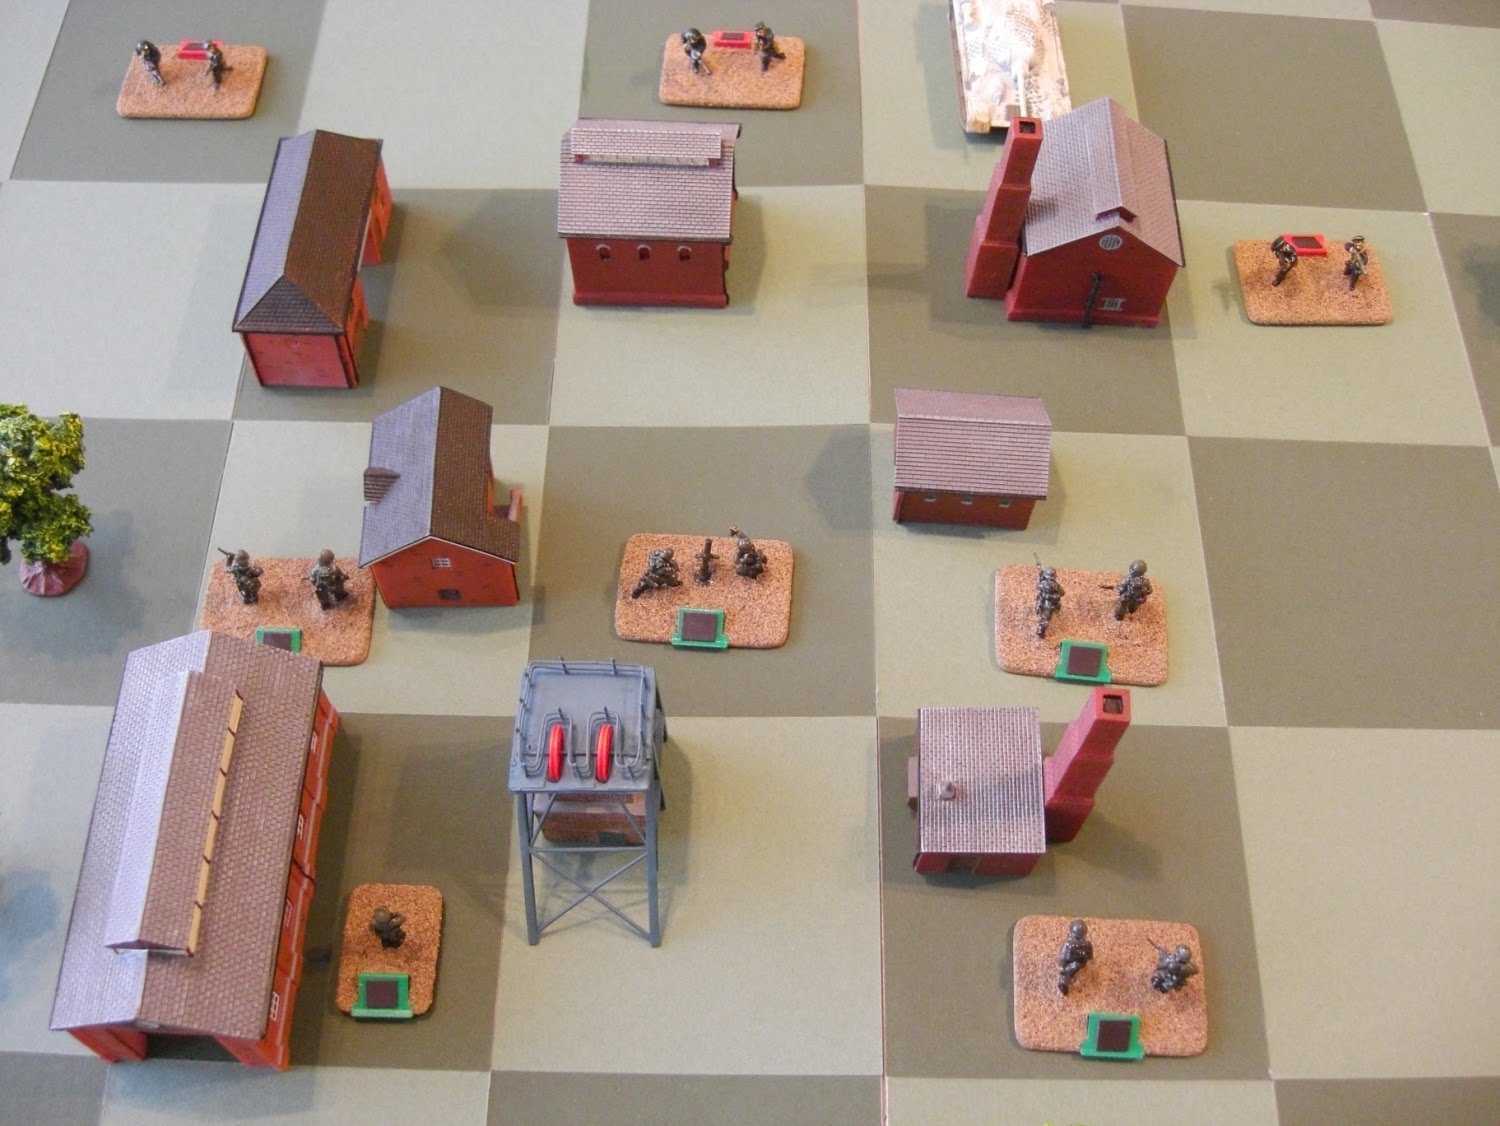
Turn 3
The Russian Marine Artillery Unit managed to knock out the German Infantry Gun Unit and the advancing Russian Marine Machine Gun Units cleared the last remaining German Unit on the edge of the town. Elsewhere, the Russian advance continued unopposed.
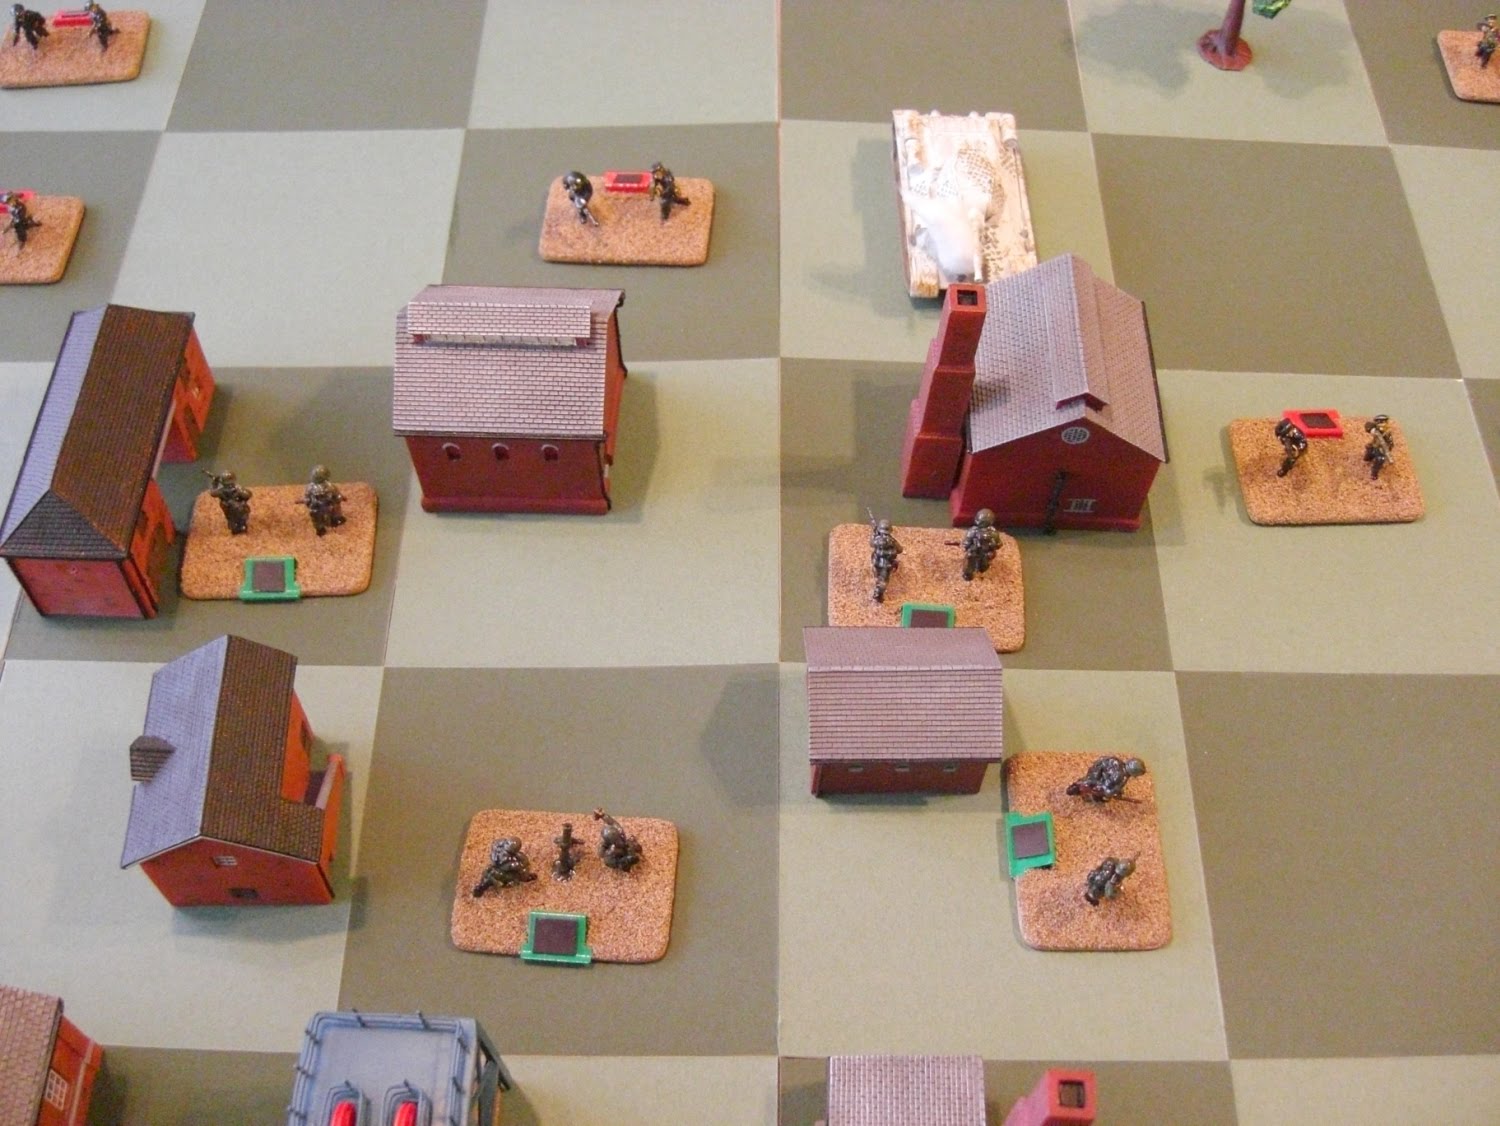
Turn 4
After further ineffective Russian artillery fire, the Germans moved forward within the town to meet the Russian attack. The German Mortar Unit scored a notable success when it knocked out the Russian Tank Unit that was just about to enter the town.
Despite the growing German resistance, the Russians continued their advance, and one of their Marine Machine Gun Units engaged the German Mortar Unit at almost point blank range ... and destroyed it. Things did not, however, go so well for the Russian Marine Infantry Unit that attacked one of the German Infantry Units. In a short but fierce close combat, the Russian Marines were wiped out.
Turn 5
The Russian Marine Artillery chose not to fire as there was a danger that one of their own Units might be hit by mistake. The Russian assault on the town continued, with one of the Russian Marine Machine Gun Units attacking and destroying a German Infantry Unit.
On the other side of town, a Russian Marine Infantry Unit fought a close combat with a German Infantry Unit. The combat was drawn, and the Russian Unit was forced to fall back.
The German response was to fall back towards the rear of the town. They were hopelessly outnumbered, and there was little likelihood that they would be able to contain the Russian advance.
At this point I saw no reason to continue the battle any further.

Comments
The rules functioned fairly well, and produced reasonable results most of the time. However, I need to look at how the rules currently represent fighting in a built-up area. In this play-test the Germans did not gain much of an advantage for being in the town, and the Russians seemed to have no problems dislodging them once they were inside the built-up area.

The portable wargame: First draft of the twentieth century version

I have just finished proof-reading the first draft of the twentieth century version of the rules I have developed for my portable wargame. It follows the same basic layout as the earlier version, and most of the game mechanisms as the same or very similar.

The main differences arise from the introduction of new weapons - such as the tank - and the elimination of rules specifically written to cover colonial battles between European and Native armies.

The first daft is now available for interested blog readers to read and/or print at:
Frontier/Modern Wargames Rules
for use with a chessboard battlefield
Please remember that these are the first draft of the rules, and are very likely to be amended in the light of play-testing.

The portable wargame: Twentieth century version

Whilst I was hors de combat yesterday, I had plenty of time to think about where to go next with my portable wargame. The rules are pretty well at the end of their development, and are suitable for fighting battles set during the mid-nineteenth century to the early twentieth century.

I know that at least one person is working on a Napoleonic Wars version of the rules I have developed from Joseph Morschauser's original 'Frontier' and 'Musket' wargame rules, and I had been thinking of developing a version for fighting battles set during the 1930s and 1940s. This morning I decided to see if such a development was possible, and during the course of the day I have been writing the first draft of this new set of rules. Unlike my previous attempts, this time I started with my existing rules and amended them to include new weapons, including Mortars, Infantry Guns, Anti-tank Guns, Armoured Cars, Tanks, Self-propelled Artillery, and Medium Artillery. The basic architecture and mechanisms of the rules remains unchanged, and I hope to be able to make this first draft available for interested blog readers to read and/or print sometime tomorrow (or even later today!).

Saturday, 5 March 2011

Little Wars: Guns, Guns, Guns ...

Over the past few months I have been trawling through eBay at regular intervals on the lookout for artillery for my as-yet-to-be-formed LITTLE WARS army (or armies). After an initial burst of enthusiasm, I settled down to buy artillery as and when it became available at reasonable prices ... and I collected the most recent purchase this morning from the local Post Office.

It was at this point that my wife made a comment about how many I was going to need to buy ... so I decided to get all my purchase together to see how large my artillery gun park was ... and it was much larger than I expected.

I now own the following artillery, all of which have been tested and will fire a matchstick a reasonable distance (with varying degrees of accuracy!):
  • Five Britains 4.7-inch Guns (one of which has a cut-down barrel)
  • Six Britains Field Guns
  • Four Crescent 18-pounder Field Guns
Some of these guns are in good condition and some are in need of repair. For example, one of the 4.7-inch guns has a split in its barrel. As it is made of zinc, it will not be easy to repair; however, if I cut the barrel down, it will remove the damaged section and make a pair for the other 4.7-inch that has a shortened barrel.

What I need to do now is to acquire both some gun grews for my existing artillery as well as some infantry and cavalry for my LITTLE WARS army.

The Artillery Gun Park:

Friday, 4 March 2011

The portable wargame: Latest draft of the rules

I have now completed the latest revisions to the draft of the rules I am using with my portable wargame. These revisions include changes to the rules relating to the activation dice and the ability of cavalry to dismount and fight on foot.

I have uploaded a pdf version for any interested blog reader to read and/or print, and it is available from the following link:
Frontier/Musket Wargames Rules
for use with a chessboard battlefield

The portable wargame: A few adjustments

As I have not gone to work today (I am going to hospital later this morning to have a minor surgical procedure to remove a wart from under my right eye), I have been able to spend some time making a few adjustments to the rules I am using with my portable wargame.

Besides tidying up the grammar in one or two places in the hope that this will make the rules clearer or less ambiguous, I have made the changes to the activation dice that I outlined in yesterday's blog entry.

I have also given some thought as to how Dismounted Cavalry Units are treated in the rules. As they are currently written, dismounting cavalry is not an option, but by the end of the nineteenth century this was quite normal. In fact, in some armies – such as the Boer armies – this was the norm. I therefore propose allowing cavalry to dismount and fight as infantry should the need arise, but with a reduced Close Combat Power whilst they are dismounted.

Thursday, 3 March 2011

The portable wargame: Changing the activation dice?

The recent comments made by Ross Mac and arthur1815 in response to the latest play-test of the Frontier/Musket wargames rules I am using with my portable wargame, have given me something to think about.

I therefore propose to retain the concept of activation dice, but to no longer use the 'Risk Express' dice for that purpose. Instead, I intend to use dice marked as follows:
  • One face will be blank
  • Two faces will be marked '1'
  • Two faces will be marked '2'
  • One face will be marked '3'
These numbers will represent the number of Units of any type that a player may activate during a turn.

This means that a player throwing four activation dice has a range of results from not being able activate any Units to being able to activate twelve Units during a turn, with six being the average number of Units they will be able to activate.

This is somewhat less restrictive than the present system, and also allows for more gifted commanders to be allocated more activation dice than less able ones.

Wednesday, 2 March 2011

Yet another milestone!

I have just realised that the average number of daily 'hits' my blog has had since I added the 'hit' counter back on 11th February, 2009, has just reached two hundred!

The last two months have seen a big surge in interest in my blog, with well over three hundred 'hits' per day being the norm. The surge seems to have started at roughly the same time that I began to write blog entries about the development of the portable wargame. This may be a coincidence, but I somehow think that the two things are not unrelated.

I have also just noticed that the 'hit' counter indicates that the total number of 'hits' my blog has had is about to reach 150,000. As I wrote in a blog entry only last month:
'I never, ever expected that anything like that number of people would be interested in 'the random thoughts of an ancient wargamer', but obviously I was wrong.'

'Big thanks go to all my regular blog readers. I'll keep writing my blog if you'll keep reading it!'
That still holds true today ... and I hope that it will continue to do so for the foreseeable future.

The portable wargame: The latest draft of the rules

After yesterday's battle report, I thought that blog readers might like to see the latest draft of the rules I used. I have therefore uploaded a pdf version, and it is available from the following link:
Frontier/Musket Wargames Rules
for use with a chessboard battlefield

Tuesday, 1 March 2011

The portable wargame: Another play-test – ‘Seize and hold!’

For this play-test I wanted to see how the rules would work when the opponents were equally matched … and how the rules relating to road movement would affect the battle. For the purposes of the play-test I selected Units from my 15mm-scale 1866-era Austrian and Prussian armies. Both sides were allocated:
  • Two Units of Light Infantry
  • Six Units of Line Infantry
  • A Field Artillery Unit
  • A Command Unit
Both sides would therefore begin the battle throwing four activation dice each.

Scenario
It has come to the attention of both the Austrian and Prussian Army Commanders that a river crossing has been left unguarded by the opposition, and both Army Commanders have ordered forces to seize and hold the bridge as quickly as possible. They are advancing on the bridge over the river in column-of-march, and will only appear on the battlefield as and when the activation dice allow them to appear.

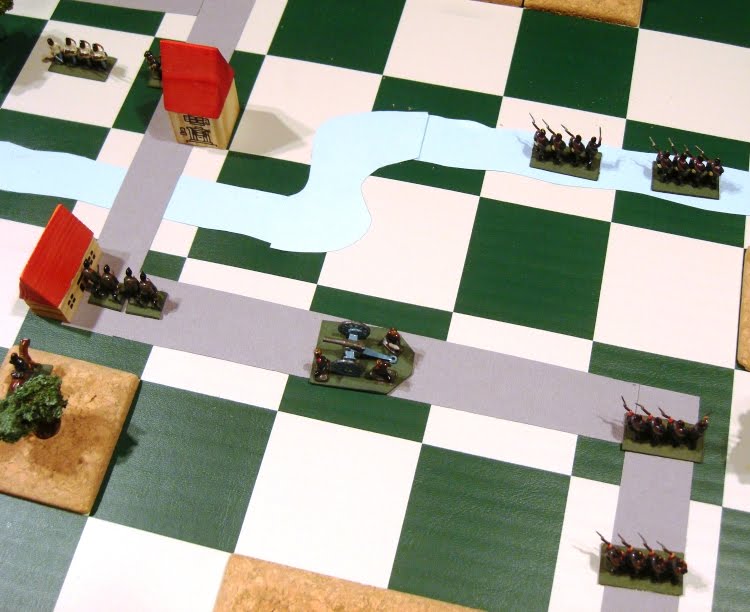
Each column is marching along the road towards the bridge, and enters the battlefield at the positions indicated on the following photograph of the battlefield:

Each side’s column-of-march is in the following order:
  • Two Light Infantry Units
  • Two Line Infantry Units
  • The Command Unit
  • The Field Artillery Unit
  • Four Line Infantry Units
Turn 1
The Prussian move first and throw four activation dice. These allow them to activate seven Infantry Units and the Command Unit, but as the Units may only entry the battlefield in the order of their column-of-march, only the leading two Infantry Units – the Prussian Light Infantry – appear at the Prussian Entry Point.

The Austrians then throw their four activation dice and can activate six Infantry Units and the Command Unit. Like the Prussians, the Austrians are constrained by the composition of their column-of-march, and only the Austrian Light Infantry enter the battlefield at the Austrian Entry Point.

The Prussian Light Infantry advancing as fast as they can down the road towards the bridge.
Like their Prussian counterparts, the Austrian Light Infantry are moving quickly forwards in order to seize the bridge.
Turn 2
This turn the Austrians move first, and their activation dice allow them to activate six Infantry Units. They therefore move their Light Infantry forward along the road to the bridge, and two Austrian Line Infantry Units enter the battlefield.

The head of the advancing Austrian column is within sight of the bridge.
The Prussian activation dice permit them to activate five Infantry Units and a Cavalry Unit (which they do not have), and they also move their Light Infantry forward so that two of their Line Infantry Units may enter the battlefield.

The leading Prussian Unit can also see their objective.
Turn 3
The Austrians move first again this turn, and their activation dice allow them to activate four Infantry Units and the Command Unit. They therefore move their Light Infantry closer to the bridge – which is now only one grid square away from the leading Austrian Unit – followed by the two Line Infantry Units that entered the battlefield last turn. The Command Unit has also arrived on the battlefield, and may soon be able to influence events as they unfold.

The leading Austrian Light Infantry Unit are now only a short distance from the bridge.
The Prussians respond by activating four Infantry Units (they could also have activated a Cavalry Unit, had they had one), and the Prussian force continues its advance. Its leading Unit is also close to the bridge, but has further to go than the Austrians.

The Prussian column marching parallel to the river. The leading Light Infantry Unit is only a short distance from the river crossing … but can they get there before the Austrians?
Turn 4
At this crucial moment, the Prussians move first. Their activation dice allow them to move two Infantry Units, the Command Unit, and the Field Artillery Unit. They rush the leading Light Infantry Units forward, and the foremost seizes the bridge and engages the leading Austrian Light Infantry Unit in close combat … and destroys it! The Prussian Command Unit and the Field Artillery Unit enter the battlefield.

The leading Prussian Light Infantry Unit seizes the bridge and engages the foremost Austrian Light Infantry Unit in close combat … which it wins!
In response, the Austrians are able to activate three Infantry Units and the Command Unit. They mount an immediate counter-attack, and the remaining Austrian Light Infantry Unit engages the Prussians holding the bridge in close combat. This is a draw, and the Austrians are forced to withdraw.

The Austrian counter-attack!
Turn 5
The Austrians move first, and their activation dice allow them to activate one Infantry Unit, the Command Unit, and the Field Artillery Unit.

The combined small arms fire of the Austrian Light Infantry Unit and one of the Line Infantry Units destroys the Prussian Light Infantry Unit on the bridge …

The Austrians open fire on the Prussians holding the bridge!
… and the remaining Austrian Line Infantry Unit rushes forward across the bridge and engages the remaining Prussian Light Infantry Unit in close combat. Unfortunately, this is a draw, and the Austrians are forced back across the bridge.

The leading Austrian Line Infantry Unit crosses the bridge to engage the Prussians.
The Prussians are able to activate three Infantry Units, the Command Unit, and the Field Artillery Unit. In response to the Austrian attack, the Prussians swing their two Infantry Units off the road towards the river, thus allowing the Command Unit to move forward to support the remaining Prussian Light Infantry Unit, and the Field Artillery Unit to move into range of the Austrian forces near the bridge. They are also able to bring a further Line Infantry Unit on to the battlefield.

The Prussian Line Infantry Units appear to be preparing to cross the river so that they can flank the Austrian position. The Prussian Field Artillery is also well positioned to open fire on the Austrian force next turn.
The Prussian Light Infantry Unit engages the Austrian Line Infantry Unit across the bridge from it with small arms fire, and although they are in cover, the Austrian Line Infantry Unit is destroyed.

The leading Austrian Line Infantry Unit is destroyed by Prussian small arms fire despite being in cover.
Turn 6
The Prussian Field Artillery fires at the grid square occupied by the nearest Austrian Unit – the remaining Austrian Light Infantry Unit – and although its fire is on target, it does no damage to the Austrian Unit.

The Prussian Field Artillery open fire on the Austrians … but has no effect.
The Austrians move first this move, and their activation dice allow them to activate four Infantry units, the Command Unit, and the Field Artillery Unit. The Commander’s first action is to move the remaining Austrian Light Infantry Unit into the built-up area near to the bridge, so that it can open fire on the Prussian Light Infantry Unit across the bridge. This proves to be ineffective, as the Prussians are in cover.

The Austrian Light Infantry fire at the Prussian Light Infantry, but inflict no casualties on them.
The Austrian Command Unit moves back to clear the road to enable the Austrian Field Artillery Unit and a Line Infantry Unit that have just entered the battlefield to move forward along it.

The newly arrived Austrian Field Artillery Unit and Line Infantry Unit march down the road towards the bridge.
The Prussian response is determined by their activation dice throws; they can move four Infantry Units, the Command Unit, and the Field Artillery Unit. The Command Unit moves off the road and into the wooded hill. The two Prussian Line Infantry Units near the river begin to wade across it, whilst the Field Artillery Unit moves along the road towards the bridge. Finally, the newly entered Prussian Line Infantry Unit marches along the road, thus making room for another Prussian Line Infantry Unit to enter the battlefield.

Two Prussian Line Infantry Units begin to wade across the river whilst the Field Artillery – and another two Line Infantry Units – move towards the bridge.
The Prussian Light Infantry open fire on the Austrian Light Infantry at the opposite end of the bridge, but with no effect.

The Prussian Light Infantry fire at the Austrian Light Infantry … but have no effect.
Turn 7
The newly arrived Austrian Field Artillery Unit has no target that it can fire at, unlike the Prussian Field Artillery Unit, which fires at the Austrian Light Infantry Unit. Unfortunately, they miss the target and their shells land harmlessly in an unoccupied grid square.

The Prussian Field Artillery Unit fires at the Austrian Light Infantry Unit near the bridge … and miss!.
The Prussians move first, and their activation dice enable them to move two Line Infantry Units and the Field Artillery Unit. As the two Line Infantry units in the river cannot move this turn as they are wading across the river, the two Prussian Line Infantry units that have only recently entered the battlefield continue their march down the road. The Prussian Field Artillery Unit moves off the road to clear the way for Line Infantry and to position themselves so that they can fire at the Austrians next turn.

The Prussian plan seems to be coming to fruition. The Prussian Light Infantry Unit hold one end of the bridge and two Prussian Line Infantry Units are moving along the road to support them. The Field Artillery Unit is also in a position to give them supporting fire .
The Prussian Light Infantry fire once again at the Austrian Light Infantry at the opposite end of the bridge … and miss yet again!

The Prussian Light Infantry fire again at the Austrian Light Infantry … but are still unable to inflict any casualties on their opponents.
The Austrian response is limited by their activation dice, which only allow them to move the Command Unit and two Infantry Units. (Two of the dice allow Cavalry units to be activated, but the Austrians do not have any).

Realising the threat posed by the Prussian Line Infantry Units that are wading across the river, the foremost Austrian Line Unit moves back on to the road and faces the on-coming Prussians. The newly arrived Austrian Line Unit advances through the grid square occupied by the Austrian Field Artillery Unit into the grid square behind the other Austrian Line Infantry Unit.

The Austrians respond to the growing threat on their left flank.
Whilst this is happening, the Austrian Light Infantry continue the firefight at the bridge with little effect.

The Austrian Light Infantry fire back at the Prussian Light Infantry, but their small arms fire is equally ineffective.
Turn 8
The Austrian Field Artillery Unit still has no target that it can fire at, but the Prussian Field Artillery Unit does, and it fires yet again at the Austrian Light Infantry Unit. This time their shells are on target, and the Austrian Light Infantry Unit is destroyed!

(Note: The destruction of this Unit automatically reduces the number of activation dice the Austrians can throw to three as they have now lost three Units.)

The Prussian Field Artillery fires with deadly effect.
The Prussians move first again this turn. Their activation dice allow them to move five Infantry units and the Command Unit. The Prussian Line Infantry Units who have been wading across the river finally reach the bank and deploy into column facing the Austrians. At the same time, the Prussian Light Infantry Unit cross the bridge and open fire on the leading Austrian Line Infantry Unit … and destroy it.

The Prussian Light Infantry Unit open fire on the leading Austrian Line Infantry Unit and wipes them out.
The remaining two Prussian Line Infantry Units continue their march towards the bridge.

The Prussians are now advancing towards the Austrians on both sides of the river.
At this point the Austrian situation is becoming untenable. Luckily the activation dice allow them to move the remaining Infantry Unit, the Field Artillery Unit, and the Command Unit, and the Austrians begin to withdraw down the road, leaving the bridge in Prussian hands. Having no Cavalry with which to pursue the Austrians, the Prussians begin to consolidate their situation around the bridge in the expectation that their might be an Austrian counter-attack in due course.

Comments
This was a very enjoyable battle that I fought solo over the course of several evenings. The terrain worked well, as did the rules – especially after I realized that the rules regarding crossing rivers needed to be changed so that it took Units three turns to wade from one bank of the river to the other (i.e. one turn to move into the grid square containing the river, one turn in the river, and one turn to move to the grid square beyond the river).

I now feel that the rules are almost at the stage where major changes are no longer required, although there will always be room for further tinkering!