I finally managed to try out Martin Rapier's hexed-based variant of the World War II rules in Neil Thomas's ONE-HOUR WARGAMES book ... and thoroughly enjoyed the experience!
I used my mini-campaign board and Hexon II hexed terrain, some of my Megablitz Soviet and German troops, and Scenario 30: 'Last Stand' from the book. The only changes I made to the rules were to use a card-driven unit activation system (as experience has shown me that this makes for a more interesting situation when fighting a solo wargame) and to allow units that have moved to fire during the same turn. (This was done to see if this speeded up the pace of the game.)
Last Stand: Morschauserland vs. Eastland
Eastland troops were trying to hold up an advance into Eastland by Morschauserland troops, who had crossed the border to try to regain control part of the disputed border area.
The Eastland commander had three units at his disposal:

The Initial Eastland Positions

Turn 1
The Morschauserland Motorized Infantry Unit advanced on the small town that was astride the road leading away from the bridge across the river. It came under fire from the Morschauser Infantry unit in the town, and dismounted before crossing the bridge and returned fire.
The Morschauserland Artillery Unit fired in support of the Motorized Infantry Unit, and were then fired upon by the Eastland Artillery Unit on the hill.
The remained of the Morschauserland force advanced towards the ford across the river.

Turn 2
The Morschauserland Motorised Infantry Unit (supported by fire from Morschauserland Artillery Unit and one of the Infantry Units) assaulted the Eastland-held town, but were unable to dislodge the Eastland Infantry Unit holding it.
The Eastland Artillery Unit continued to fire at the Morschauserland Artillery Unit, and the Morschauserland Infantry Units began to cross the river via the ford.

Turn 3
The fighting for possession of the town continued, and casualties began to mount on both sides.

At the same time, the Eastlander Tank Unit finally advanced to stem the forward movement of the Morschauserland Infantry Units that had cross the river via the ford.

Turn 4
Eventually firepower and numbers told, and the Morschauserlanders finally destroyed the towns Eastland defenders ... but at a price! (The Morschauserland Artillery Unit had been destroyed by its Eastland counterpart.)

On the other flank, the Eastland Tank Unit inflicted substantial casualties on the leading Morschauserland Infantry Unit, although not without suffering casualties of their own.

Turn 5
Whilst the Morschauserland Motorized Infantry Unit waited for its transport to catch up with it, the supporting Morschauserland Infantry Unit passed through it and advanced up the road.

On the other flank of the battlefield the fighting between the Eastland Tank Unit (supported by artillery fire from the Artillery Unit) wiped out one of the Morschauserland Infantry Units.

Turn 6
The Morschauserland Infantry Unit on the road continued its cautious advance, and the Motorized Infantry Unit was reunited with its transport. The Eastland Tank Unit withdrew slightly as its strength was becoming seriously eroded and the Morschauserland Infantry Units used this opportunity to swing towards the road.

Turn 7
It was becoming clear that the Eastlanders were not going to be able to stem the Morschauserland advance ... but they tried to inflict as much damage on the invaders as was possible.
Although the Morschauserland Infantry Unit on the road managed to get away and continue its advance into Eastland, the Eastland Artillery Unit destroyed the Morschauserland Motorized Infantry Unit and the Eastland Tank Unit eliminated one of the remaining Morschauserland Infantry Units.

The Morschauserlanders had achieved their aim of continuing their advance, but at the cost of severe losses. The Eastlanders might not have stopped the advance completely ... but they had given it a bloody nose and left the invaders seriously weakened.
In my opinion these are an excellent set of rules. I fought the whole battle in about an hour ... and I spent more time taking photographs and writing up the battle report than I did actually moving the troops and throwing the dice. I will certainly be using them again, although I do have a few developments/changes of my own that I want to try out. I will also revert to the 'move or fire' rule as written, as allowing units that have moved to fire during the same turn speeded things up a bit too much.
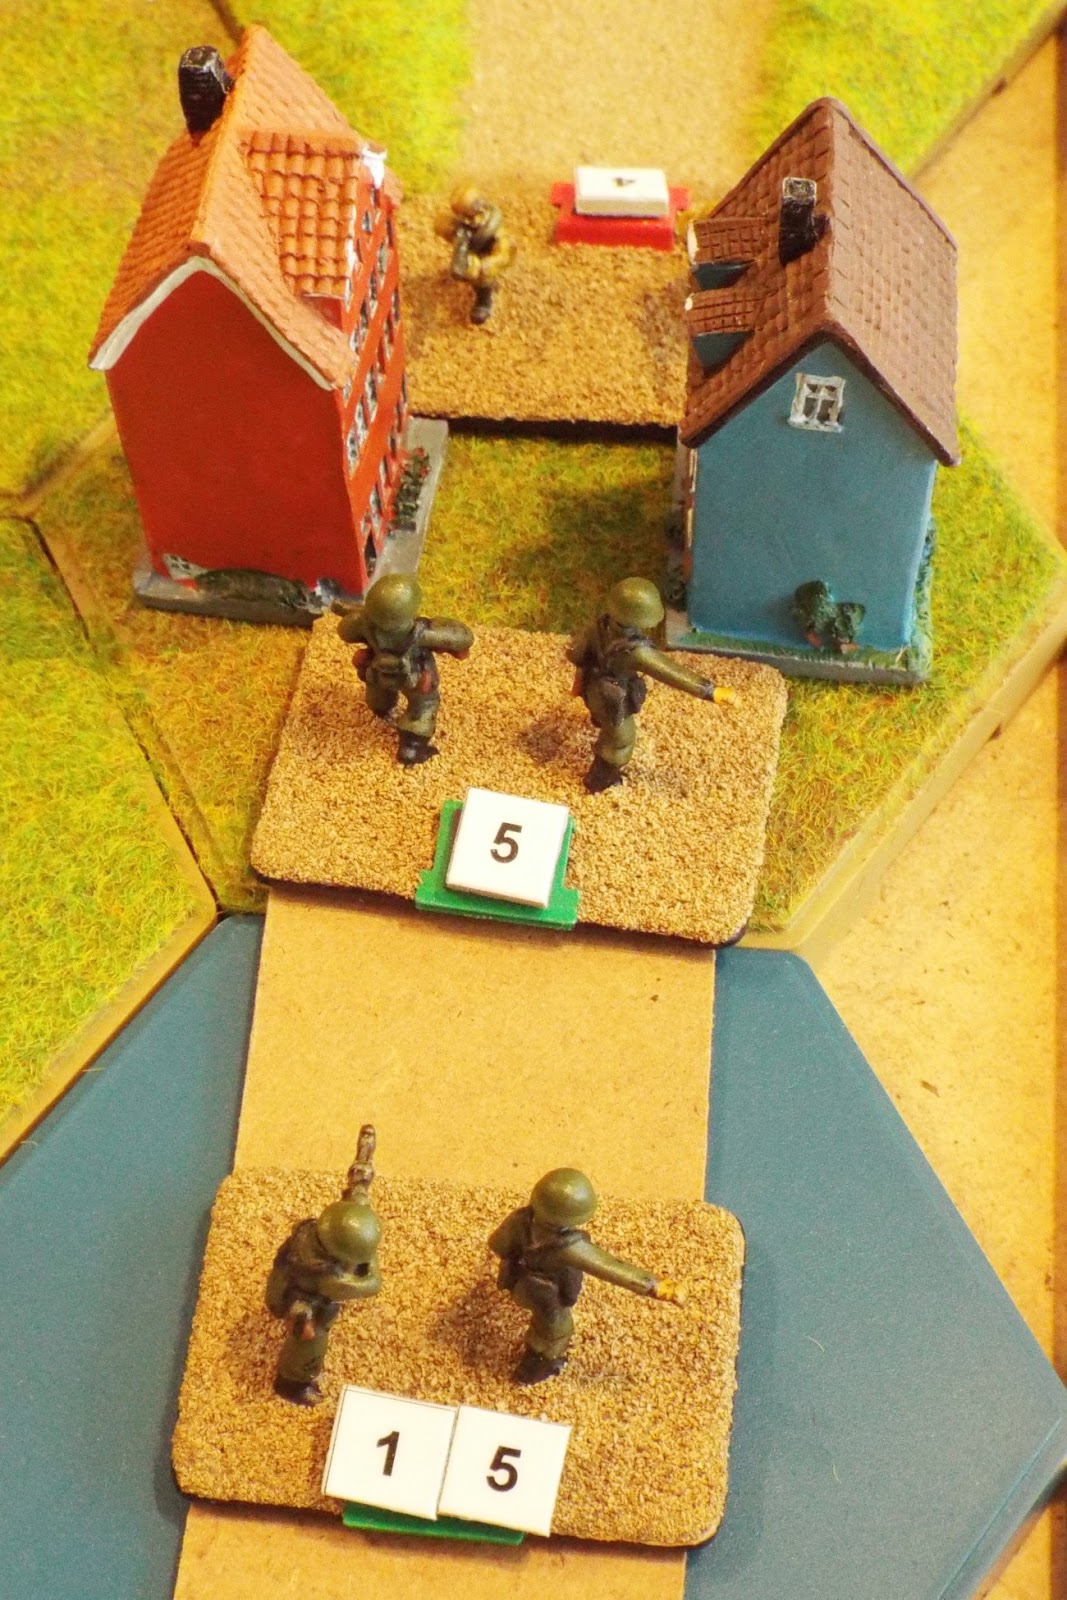
Note: I kept a note of each unit's strength by using small magnetic numbers that I originally made for my Megablitz battles. I started off using a 1 and a 5 to make up 15 (each unit's starting strength), but as units began to suffer casualties, I had to total the numbers on each base as I didn't have any number 6s, 7s, 8s or 9s. I intend to rectify this situation as soon as I can.
I used my mini-campaign board and Hexon II hexed terrain, some of my Megablitz Soviet and German troops, and Scenario 30: 'Last Stand' from the book. The only changes I made to the rules were to use a card-driven unit activation system (as experience has shown me that this makes for a more interesting situation when fighting a solo wargame) and to allow units that have moved to fire during the same turn. (This was done to see if this speeded up the pace of the game.)
The Eastland commander had three units at his disposal:
- 1 x Infantry Unit
- 1 x Artillery Unit
- 1 x Tank Unit
- 4 x Infantry Units
- 1 x Motorized Infantry Unit
- 1 x Artillery Unit

The Initial Eastland Positions

Turn 1
The Morschauserland Motorized Infantry Unit advanced on the small town that was astride the road leading away from the bridge across the river. It came under fire from the Morschauser Infantry unit in the town, and dismounted before crossing the bridge and returned fire.
The Morschauserland Artillery Unit fired in support of the Motorized Infantry Unit, and were then fired upon by the Eastland Artillery Unit on the hill.
The remained of the Morschauserland force advanced towards the ford across the river.

Turn 2
The Morschauserland Motorised Infantry Unit (supported by fire from Morschauserland Artillery Unit and one of the Infantry Units) assaulted the Eastland-held town, but were unable to dislodge the Eastland Infantry Unit holding it.
The Eastland Artillery Unit continued to fire at the Morschauserland Artillery Unit, and the Morschauserland Infantry Units began to cross the river via the ford.

Turn 3
The fighting for possession of the town continued, and casualties began to mount on both sides.
At the same time, the Eastlander Tank Unit finally advanced to stem the forward movement of the Morschauserland Infantry Units that had cross the river via the ford.

Turn 4
Eventually firepower and numbers told, and the Morschauserlanders finally destroyed the towns Eastland defenders ... but at a price! (The Morschauserland Artillery Unit had been destroyed by its Eastland counterpart.)

On the other flank, the Eastland Tank Unit inflicted substantial casualties on the leading Morschauserland Infantry Unit, although not without suffering casualties of their own.

Turn 5
Whilst the Morschauserland Motorized Infantry Unit waited for its transport to catch up with it, the supporting Morschauserland Infantry Unit passed through it and advanced up the road.

On the other flank of the battlefield the fighting between the Eastland Tank Unit (supported by artillery fire from the Artillery Unit) wiped out one of the Morschauserland Infantry Units.

Turn 6
The Morschauserland Infantry Unit on the road continued its cautious advance, and the Motorized Infantry Unit was reunited with its transport. The Eastland Tank Unit withdrew slightly as its strength was becoming seriously eroded and the Morschauserland Infantry Units used this opportunity to swing towards the road.

Turn 7
It was becoming clear that the Eastlanders were not going to be able to stem the Morschauserland advance ... but they tried to inflict as much damage on the invaders as was possible.
Although the Morschauserland Infantry Unit on the road managed to get away and continue its advance into Eastland, the Eastland Artillery Unit destroyed the Morschauserland Motorized Infantry Unit and the Eastland Tank Unit eliminated one of the remaining Morschauserland Infantry Units.

The Morschauserlanders had achieved their aim of continuing their advance, but at the cost of severe losses. The Eastlanders might not have stopped the advance completely ... but they had given it a bloody nose and left the invaders seriously weakened.
In my opinion these are an excellent set of rules. I fought the whole battle in about an hour ... and I spent more time taking photographs and writing up the battle report than I did actually moving the troops and throwing the dice. I will certainly be using them again, although I do have a few developments/changes of my own that I want to try out. I will also revert to the 'move or fire' rule as written, as allowing units that have moved to fire during the same turn speeded things up a bit too much.
Note: I kept a note of each unit's strength by using small magnetic numbers that I originally made for my Megablitz battles. I started off using a 1 and a 5 to make up 15 (each unit's starting strength), but as units began to suffer casualties, I had to total the numbers on each base as I didn't have any number 6s, 7s, 8s or 9s. I intend to rectify this situation as soon as I can.


Bob, you might try a different approach (and similar to that used in Martin and John's Mini-Jutland game) and record casualties as opposed to strength. When you get to 5 casualties place a yellow marker and a red marker for 10. That way you only need numerical markers for 1 to 5. Just a thought. Mike
ReplyDeleteHi Bob
ReplyDeleteI really like the 'abstract' style of your terrain and figures.
I hope to emulate it myself one day but in the middle dark ages. I need to know what I am doing first though!
Dear Bob,
ReplyDeleteI must be dense. I could not find any specific, hex-based OHW modifications on Martin's webpage.
I followed the "Neil Thomas" tag, and also searched for "OHW", "Hour", etc. in the search box.
I did find 1859 squared. What else did I miss?
Sincerely,
Steve
Mike,
ReplyDeleteI did consider doing what you suggest, but in the end I decided to use the magnetic strength marker method from Megablitz because it is one that I am used to using.
In the meantime I have made a new set of magnetic numbers marked for 0 to 9, and will use them in future.
All the best,
Bob
Nobby,
ReplyDeleteMy wargames seem to have developed into a form of 3D boardgame, hence the rather abstract look to my tabletop. I rather like the look, and it reminds me that I am fighting a wargame and not trying to create a moving diorama.
All the best,
Bob
Me,
ReplyDeleteMartin Rapier's rules are in the 'Files' section of the AMW (Ancient & Medieval Wargaming) group on Yahoo Groups. ('Files'). I think that you have to join the group to access the files.
I hope that this link/information is of help to you.
All the best,
Bob
I think the Eastland troops performed admirably and with honor. Great report Bob. You keep tempting me over to the hex side. I like your casualty counters too. They look much better than dice.
ReplyDeleteBrigadier General,
ReplyDeleteI am very pleased that you enjoyed this battle report. For a change I made the Morchauserlanders the aggressors ... and they did not perform as well as the Eastlanders.
The hexes do make life easier; give them a try if you get the chance.
The magnetic strength markers take time and effort to make, but once made I think that they are easier to use than small dice ... of which I have quite a few!
All the best,
Bob
Hi Bob,
ReplyDeleteThat was a great little action and you must be pleased to have gotten the kit out at home at long last! Once again it proves that you do not have to field masses of figures and vehicles to have a tactically interesting and challenging game.
I am looking forward to seeing what form your tweaks will take in due course.
All the best,
DC
I'd be a bit cautious about allowing units to move and fire in the same turn, it reduces the defenders advantage a fair bit and the game plays pretty fast anyway. Obviously more chrome could be bolted on as they are very simple.
ReplyDeleteI much prefer using the hexes as measuring and wheeling and all the associated DBx type silliness just gets in the way of the game. I'll look at putting them up on my blog this weekend so they are a bit more accessible.
David Crook,
ReplyDeleteIt was great fun fighting a solo battle at home for the first time in an age.
The rules are very flexible, and I am thinking about using them for brigade (or possibly even divisional) level battles. I am thinking of trying out six-unit armies made up as follows: 3 x Infantry Units, 1 x Artillery Unit, 1 x Cavalry/Reconnaissance Unit, and 1 x HQ/Reserve unit. I need to do a bit more thinking before I actually put pen to paper (actually fingertip to keyboard!), but with luck I hope to get something ready to play-test in a week or so.
All the best,
Bob
Martin Rapier,
ReplyDeleteHaving tried the rules, I can see why the rules are 'move or fire' rather than 'move and fire', and I will be using the latter in future.
Hexes are a 'given' as far as I am concerned when it comes to designing and playing wargames. They speed things up so much that I cannot now envisage fighting the majority of my battles on a surface that is not gridded.
Thanks for making your rules available on your blog. I think that a lot of people will want to try them out.
All the best,
Bob
Great post. Is your card activation system from Thomas' book or something you devised? Is it simply having a card for each unit, kind of like a chit draw activation?
ReplyDeleteOut of interest did you apply the scenario special rules to your game? As I recall the one nit on the hill (the artillery in your game) gets a redoubt bonus, and all units on the defending side get a combat bonus representing elite or desperate troops.
ReplyDeleteAstgamer,
ReplyDeleteThanks for your comment. I am really pleased that you enjoyed this battle report.
For the game I used the card activation system that is suggested in the book (i.e. a pack of playing cards containing a card for each unit).
All the best,
Bob
Kaptain Kobold,
ReplyDeleteIn this instance I did not use the special rules outlined in the scenario as I thought that they rather skewed the game too much in favour of the defenders.
All the best,
Bob
"For the game I used the card activation system that is suggested in the book (i.e. a pack of playing cards containing a card for each unit)."
ReplyDeleteThere is a card activation system in "One Hour Wargames"? Please tell me where as I couldn't find it.
Mike (and Astgamer),
ReplyDeleteI apologise for the mistake. You are right; it isn't in the book. I had jotted the card activation system down on my copy of Martin Rapier's variant, and thought that I had copied it down from the book. (I blame my age!)
The system is very simple; a set of unit activation cards is made up using one red playing card for each red unit and one black playing card for each of the opposing side's units. At the start of each turn the unit activation cards are shuffled and placed face down. The top card is turned over, and the colour of the playing card determines which side activates a unit. The next playing card is turned over, and the procedure is repeated. A unit can only be activated once each turn. Once all the cards in the stack of unit activation cards have been turned over - and each unit has been activated once - the turn is over and the set of unit activation cards are re-shuffled.
I hope that this clarifies the situation.
All the best,
Bob
Bob,
ReplyDeleteThanks for the clarification.
Some activation systems assign a particular card to each unit, rather than leaving the choice of unit to the player. Have you tried that with the OHW rules? If so, how well did it work? I suppose one could add a few extra unassigned 'wild cards', depending on the skill of the general and efficiency of his staff, communications systems &c., that would allow the commander to activate a unit of his choice to respond to a crisis. Worth a try?
As you know, I have little interest in WWII era games, but I always enjoy reading your battle reports - and admire your attractive stylised terrain.
Best wishes,
Arthur
Arthur1815 (Arthur),
ReplyDeleteI have not as yet used any other card activation systems with the OHW rules, but hope to do so in the fullness of time. If and when I do, I will certainly write about them on my blog. (I will certainly bear your suggestion in mind. They are - as usual - excellent.)
I have a couple more OHW wargames planned for later this week, and as yet I don't have any plans to use a card activation system when I stage them.
All the best,
Bob
Bob, my system for scoring hits is to use a small note pad. Write down the units in a column then mark hits for each unit as hash marks. Keeping track of the rounds can be done in the same way - with hash marks. Thanks for your game report. Very nice!
ReplyDeleteBrother Jim,
DeleteA simple but very effective solution! Thanks for sharing it.
All the best,
Bob