Yesterday morning, before fighting the latest battle of my current colonial mini-campaign, my wife and I went to visit the Crossness Pumping Station. It was one of the few days of the year when the Pumping Station is open to the public and has one of the restored beam engines is operating. It was also the venue for a local history event.
The Crossness Pumping Station was built as a result of the 'Great Stink' of 1858. This finally forced Parliament to accept Joseph (later Sir Joseph) Bazalgette's suggested solution to the problem of London's sewerage. London was growing, and the existing sewerage system was unable to cope, and just dumping raw sewerage in the Thames was not the answer. What Bazalgette proposed was the building of two huge collection sewers – one north of the River Thames and one to the south – into which would be fed sewerage from the existing network of sewers, supplemented by new feeder sewers built out into the growing suburbs. These main sewers were inclined from west to east, and used gravity (and rainfall) to move the sewerage eastwards to Abbey Mills on the north side of the Thames and Crossness on the south side. Two large pumping stations were built at those locations, each pumping the sewerage up to river level, where it was stored in reservoirs before being dumped into the Thames. Bazalgette chose the locations after considerable experimentation, having discovered that the river tides at these points would not sweep the sewerage back up the river but would move it out to sea twice every day.
The Pumping Station was designed by Sir Joseph Bazalgette (the Metropolitan Board of Works's Chief Engineer) and the architect Charles Henry Driver.


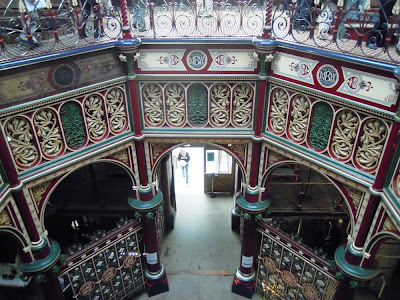
It was constructed between 1859 and 1865 and features some spectacular ornamental cast ironwork. The building was once described by Nikolaus Pevsner as being 'a masterpiece of engineering – a Victorian cathedral of ironwork'.




... the beam ...

... pulls the crank connecting rod up.

When steam is injected into the cylinders, the pistons push upwards ...

... rocking the beam ...

... which pushes the crank connecting rod down.

The crank converts the up/down motion of the crank connecting rod ...

... into a circular motion ...

... which turns the flywheel ...

... which can be seen in the background of this photograph.

They were originally single cylinder rotative beam engines with 4'0" diameter pistons, each having a 9'0" stroke. These each drove a 27'0" diameter flywheel. The rocking beam on each engine was 43'0" in length, and on either side of the central beam pivot there was a pump rod that was connected to 4'6" plungers working inside a 12'0" diameter barrel. These could lift 6 tons of sewage per stroke per engine, and worked at a speed of 11 revolutions per minute.
Between 1899 and 1901 the original Watt engines were rebuilt by Goodfellow and Co of Hyde, Manchester. They were converted from simple to compound engines (i.e. the original single cylinders were augmented by high and intermediate pressure cylinders) which increased their efficiency and power output. Other improvements were also made (e.g. steam-operated barring engines were fitted to help start the now very much heavier main engines) and the four 4'6" pump plungers were replaced by one 9'0" diameter plunger.
The Pumping Station was officially opened on 4th April 1865, by Edward, Prince of Wales. Other notables in attendance were Prince Alfred, the Duke of Cambridge, Prince Edward of Saxe-Weimar, the Archbishop of Canterbury, the Archbishop of York and the Lord Mayor of London.


The Crossness Pumping Station was built as a result of the 'Great Stink' of 1858. This finally forced Parliament to accept Joseph (later Sir Joseph) Bazalgette's suggested solution to the problem of London's sewerage. London was growing, and the existing sewerage system was unable to cope, and just dumping raw sewerage in the Thames was not the answer. What Bazalgette proposed was the building of two huge collection sewers – one north of the River Thames and one to the south – into which would be fed sewerage from the existing network of sewers, supplemented by new feeder sewers built out into the growing suburbs. These main sewers were inclined from west to east, and used gravity (and rainfall) to move the sewerage eastwards to Abbey Mills on the north side of the Thames and Crossness on the south side. Two large pumping stations were built at those locations, each pumping the sewerage up to river level, where it was stored in reservoirs before being dumped into the Thames. Bazalgette chose the locations after considerable experimentation, having discovered that the river tides at these points would not sweep the sewerage back up the river but would move it out to sea twice every day.
The Pumping Station was designed by Sir Joseph Bazalgette (the Metropolitan Board of Works's Chief Engineer) and the architect Charles Henry Driver.


It was constructed between 1859 and 1865 and features some spectacular ornamental cast ironwork. The building was once described by Nikolaus Pevsner as being 'a masterpiece of engineering – a Victorian cathedral of ironwork'.


The contractor's name, preserved for posterity.


Before and after: this shows the way in which the original paint scheme is being lovingly restored.

The original pumping engines were built by James Watt & Co, and were all named after members of the then Royal Family ("Victoria", "Prince Consort", "Albert Edward" (the Prince of Wales) and "Alexandra" (the Princess of Wales)).The "Prince Consort" pumping engine amidst the cast iron columns that support the upper floor of the building.

When the pistons on the engine are in the exhaust position ...The "Prince Consort" seen from the upper floor of the buidling.

... the beam ...

... pulls the crank connecting rod up.

When steam is injected into the cylinders, the pistons push upwards ...

... rocking the beam ...

... which pushes the crank connecting rod down.

The crank converts the up/down motion of the crank connecting rod ...

... into a circular motion ...

... which turns the flywheel ...

... which can be seen in the background of this photograph.

They were originally single cylinder rotative beam engines with 4'0" diameter pistons, each having a 9'0" stroke. These each drove a 27'0" diameter flywheel. The rocking beam on each engine was 43'0" in length, and on either side of the central beam pivot there was a pump rod that was connected to 4'6" plungers working inside a 12'0" diameter barrel. These could lift 6 tons of sewage per stroke per engine, and worked at a speed of 11 revolutions per minute.
Between 1899 and 1901 the original Watt engines were rebuilt by Goodfellow and Co of Hyde, Manchester. They were converted from simple to compound engines (i.e. the original single cylinders were augmented by high and intermediate pressure cylinders) which increased their efficiency and power output. Other improvements were also made (e.g. steam-operated barring engines were fitted to help start the now very much heavier main engines) and the four 4'6" pump plungers were replaced by one 9'0" diameter plunger.
The Pumping Station was officially opened on 4th April 1865, by Edward, Prince of Wales. Other notables in attendance were Prince Alfred, the Duke of Cambridge, Prince Edward of Saxe-Weimar, the Archbishop of Canterbury, the Archbishop of York and the Lord Mayor of London.

Its active career came to an end during the 1950s, its last major task being to assist with draining the water from the eastern part of the Royal Arsenal and Abbey Wood after the Great Flood of 1953.The brass plate that commemorates the opening of the Crossness Pumping Station.
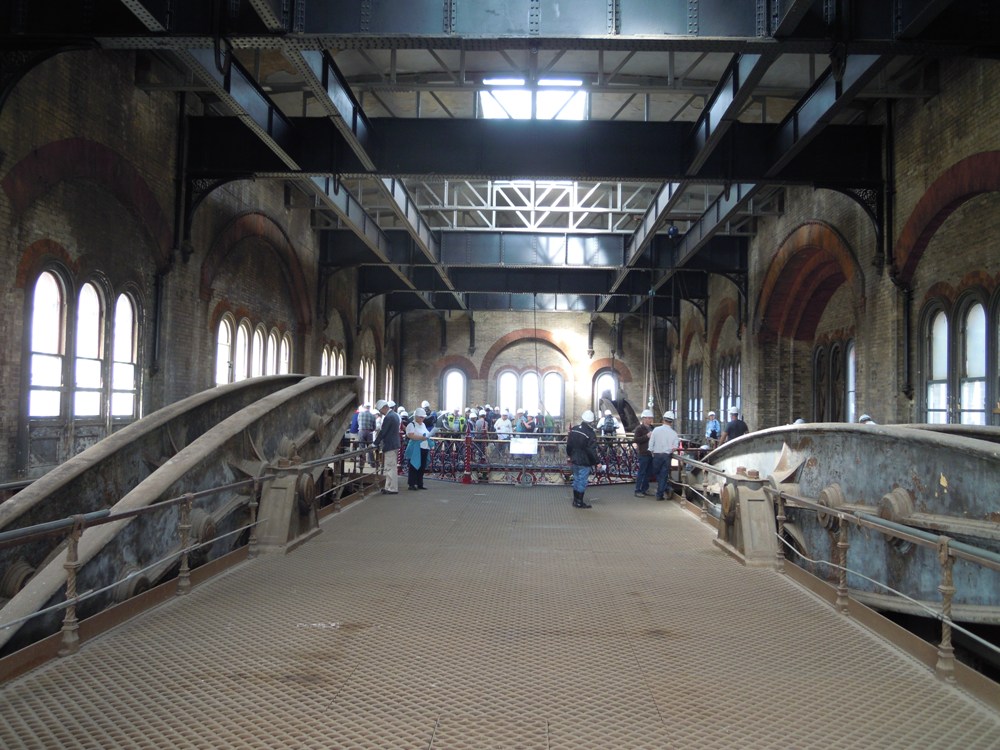
The upper floor of the pump house. All four pumping engines remain in place, and it is hoped that one day all of them will be fully preserved.





.jpg)


