For my second play-test I selected the third scenario/'mission' from the book. I made this choice because I wanted to see how the rules for armoured vehicles worked.

In this scenario the American forces had:

The Germans forces included:

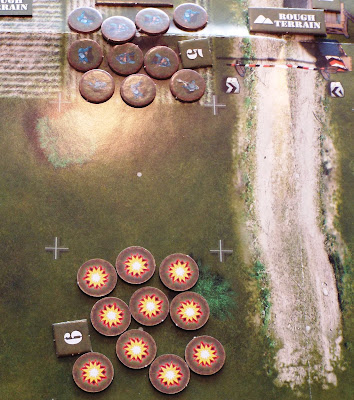
Starting Positions
Each side deployed in their respective Deployment Zones.

Turn 1
As both sides have two officers, one of whom can expend two Command Cards, both sides are dealt three Command Cards.
The Germans threw the highest D6 die score and moved first. They were dealt the following Command Cards:
Both the Tank Units moved ...

... and then fired.


As a result, the leading Sherman M4A2 Tank (+ 1 Lieutenant) Unit was hit and had its armour penetrated twice. Despite this, the Unit passed its Morale Check.
The Americans were dealt the following Command Cards:

They then opened fire on the nearest German Tank Units ... and inflicted damage on both! (Neither German Tank Unit failed their Morale Test.)


At this point the Germans played their Interrupt Command Card, and the Tiger Tank Unit fired at the Sherman M4A2 Tank (+ 1 Lieutenant) Unit, and damaged it yet again. Although damaged, the Unit still manage to pass its Morale Check.

The Americans then moved their remaining Tank Unit and left-hand Infantry Unit forward. The latter then fired at the German Panzer IV Tank Unit, but did it no damage.

Turn 2
For a second time the Germans threw the highest D6 die score and moved first. They were dealt the following Command Cards:
The Tiger Tank Unit fell back slightly after having fired at the Sherman M4A2 Tank (+ 1 Lieutenant) Unit ...

... which it hit, damaged, and pinned.

The Panzer IV Tank Unit moved forward and turned to engage the left-hand Sherman M4A2 Tank Unit ...

... which it also hit and damaged. (The American Tank Unit did not fail its subsequent Morale Check.)

The Germans then moved one of their Grenadier Units forward to support the Tank Units.

(At this point I realised that in error I had moved the German Tank Units and then fired rather than 'Fire then Move' as the Command Card stipulated. I decided to leave matters as they were, but to try to pay better attention to what was printed on the Command Cards in future!)
The Americans were dealt the following Command Cards:

... but neither managed to damage the German Tank Unit.
The Americans then chose to 'Fire and Move' with the central and right-hand M4A2 Tank Units at the German Tiger Tank Unit ...

... which they both hit. As a result of failing its Morale Check, the Tiger Tank Unit became pinned.

The central and right-hand M4A2 Tank Units then moved forward in order to threaten the very exposed German Grenadier Unit ... and in order to occupy the Objective.

As the Interrupt Command Card was unusable, the turn ended.
Turn 3
The Americans threw the highest D6 die score and moved first. They were dealt the following Command Cards:

... which they hit and destroyed!

The left-hand American Infantry Unit moved forward, and fired at the German Grenadier Unit immediately in front of it.

They inflicted 4 casualties, and the German Units became pinned when it failed its Morale Check.

The Germans were dealt the following Command Cards:

... which it hit and pinned. (The M4A2 Tank Unit failed its Morale Check.)

The unpinned German Grenadier Unit moved into the rough terrain to its right, and fired at the nearby American Infantry Unit ...

... on which it inflicted 6 casualties, causing it to be pinned when it failed its Morale Check.

As the remaining Command Card was unusable, the turn ended.
Turn 4
The Germans threw the highest D6 die score and moved first. They were dealt the following Command Cards:

The unpinned German Grenadier Unit fired at the nearby American Infantry Unit ...

... and wiped it out.
They then withdrew towards their Deployment Zone.

The Americans were then dealt the following Combat Cards:

At this point the Americans decided not to use any more of their Command Cards, and the turn - and the battle - ended.
The result was a resounding victory for the Americans, who had not only occupied the Objective but also destroyed a Tiger Tank Unit is the process. On the other hand, the Germans had managed to destroy an American Infantry Unit.
Comments

In this scenario the American forces had:
- 1 x Sherman M4A2 Tank + 1 Lieutenant
- 2 x Sherman M4A2 Tanks
- 1 Infantry Squad + 1 Lieutenant
- 1 Infantry Squad

The Germans forces included:
- 1 x Panzer IV Tank + 1 Lieutenant
- 1 x Tiger Tank
- 1 Grenadier Squad + 1 Lieutenant
- 1 Grenadier Squad

Starting Positions
Each side deployed in their respective Deployment Zones.

Turn 1
As both sides have two officers, one of whom can expend two Command Cards, both sides are dealt three Command Cards.
The Germans threw the highest D6 die score and moved first. They were dealt the following Command Cards:
- 'Either 1 Infantry Unit that is Dug In may Fire with 1 extra D6 OR 1 Artillery Unit may Fire with 1 extra AT D6.'
- '2 Vehicle Units may Move once each and then Fire once each.'
- '1 Unit may Fire during an enemy Move. This Fire must target the enemy Unit that Moved.' (Interrupt Command Card)
Both the Tank Units moved ...

... and then fired.


As a result, the leading Sherman M4A2 Tank (+ 1 Lieutenant) Unit was hit and had its armour penetrated twice. Despite this, the Unit passed its Morale Check.
The Americans were dealt the following Command Cards:
- '1 Vehicle Unit may Move once, and then 1 Infantry Unit may Move once then Fire once OR 1 Infantry Unit may Move then Fire with 1 extra AT dice for each AT weapon it carries.'
- '2 Vehicle Units may Move once each and then Fire once each.'
- 'Either an Infantry Unit regains up to 2 men OR A Vehicle Unit regains 1 Hit Dice.' (Interrupt Command Card)

They then opened fire on the nearest German Tank Units ... and inflicted damage on both! (Neither German Tank Unit failed their Morale Test.)


At this point the Germans played their Interrupt Command Card, and the Tiger Tank Unit fired at the Sherman M4A2 Tank (+ 1 Lieutenant) Unit, and damaged it yet again. Although damaged, the Unit still manage to pass its Morale Check.

The Americans then moved their remaining Tank Unit and left-hand Infantry Unit forward. The latter then fired at the German Panzer IV Tank Unit, but did it no damage.

Turn 2
For a second time the Germans threw the highest D6 die score and moved first. They were dealt the following Command Cards:
- '1 Infantry Unit may Move using 3 times its normal move. If the Unit is targeted by Interrupt Fire or Stay Frosty, it does not receive a Save OR Move 1 Vehicle with +2 and 1 free 90 degree turn.'
- 'Either 2 Infantry Units may Fire then Move with +1 OR 2 Vehicle Units may Fire then Move.'
- 'Play on a pinned or retreating Unit after resolving any set of Morale Checks for that Unit. Automatically rally the Unit to A-OK.' (Interrupt Command Card)
The Tiger Tank Unit fell back slightly after having fired at the Sherman M4A2 Tank (+ 1 Lieutenant) Unit ...

... which it hit, damaged, and pinned.

The Panzer IV Tank Unit moved forward and turned to engage the left-hand Sherman M4A2 Tank Unit ...

... which it also hit and damaged. (The American Tank Unit did not fail its subsequent Morale Check.)

The Germans then moved one of their Grenadier Units forward to support the Tank Units.

(At this point I realised that in error I had moved the German Tank Units and then fired rather than 'Fire then Move' as the Command Card stipulated. I decided to leave matters as they were, but to try to pay better attention to what was printed on the Command Cards in future!)
The Americans were dealt the following Command Cards:
- '2 Infantry Units may Fire then Move with +1 OR 2 Vehicle Units may Fire then Move.'
- '2 Vehicle Units may Fire once each.'
- '1 Unit may Move during an enemy Move. The Unit may not declare an Assault.' (Interrupt Command Card)

... but neither managed to damage the German Tank Unit.
The Americans then chose to 'Fire and Move' with the central and right-hand M4A2 Tank Units at the German Tiger Tank Unit ...

... which they both hit. As a result of failing its Morale Check, the Tiger Tank Unit became pinned.

The central and right-hand M4A2 Tank Units then moved forward in order to threaten the very exposed German Grenadier Unit ... and in order to occupy the Objective.

As the Interrupt Command Card was unusable, the turn ended.
Turn 3
The Americans threw the highest D6 die score and moved first. They were dealt the following Command Cards:
- '2 Vehicle Units may Fire once each.'
- '1 Unit may Move with +2, and then Fire Once.'
- '1 Unit may Move during an enemy Move, but must end its Move further away from the Unit's nearest enemy. The Unit may not declare an Assault.'

... which they hit and destroyed!

The left-hand American Infantry Unit moved forward, and fired at the German Grenadier Unit immediately in front of it.

They inflicted 4 casualties, and the German Units became pinned when it failed its Morale Check.

The Germans were dealt the following Command Cards:
- '2 Vehicles may Fire once each.'
- '1 Infantry Unit that is Dug In or in cover may Fire with 1 extra D6 OR 1 AT Unit may Fire with 1 extra AT dice.'
- 'Either 1 Infantry Unit with Rifles may Move then Fire using Rifles. Re-roll once for each miss when firing at a target within 2 squares OR 1 vehicle Unit may Move once and Fire all its weapons once each.'

... which it hit and pinned. (The M4A2 Tank Unit failed its Morale Check.)

The unpinned German Grenadier Unit moved into the rough terrain to its right, and fired at the nearby American Infantry Unit ...

... on which it inflicted 6 casualties, causing it to be pinned when it failed its Morale Check.

As the remaining Command Card was unusable, the turn ended.
Turn 4
The Germans threw the highest D6 die score and moved first. They were dealt the following Command Cards:
- '1 Infantry Unit may Move using 3 times its normal move. If the Unit is targeted by Interrupt Fire or Stay Frosty, it does not receive a Save OR Move 1 Vehicle with +2 and 1 free 90 degree turn.'
- '1 Infantry Unit may Fire once then Move with +2. Rough Terrain cost 1 to enter OR 1 Vehicle Unit may Move and Assault. It gains +1 to Morale Checks during this Order.'
- 'Either an Infantry Unit regains up to 2 men OR A Vehicle Unit regains 1 Hit Dice.' (Interrupt Command Card)

The unpinned German Grenadier Unit fired at the nearby American Infantry Unit ...

... and wiped it out.

They then withdrew towards their Deployment Zone.

The Americans were then dealt the following Combat Cards:
- '1 Infantry Unit may Move using 3 times its normal move. If the Unit is targeted by Interrupt Fire or Stay Frosty, it does not receive a Save OR Move 1 Vehicle with +2 and 1 free 90 degree turn.'
- '1 Unit may Move with +2 and then Fire once.'
- '1 Unit may Fire during an enemy Move. This Fire must target the enemy Unit that Moved.' (Interrupt Command Card)

At this point the Americans decided not to use any more of their Command Cards, and the turn - and the battle - ended.
The result was a resounding victory for the Americans, who had not only occupied the Objective but also destroyed a Tiger Tank Unit is the process. On the other hand, the Germans had managed to destroy an American Infantry Unit.
Comments
- The addition of armoured vehicles adds another dimension to the game, and I found it even more enjoyable that my first play-test.
- Once Units get pinned, you have a devil of a job getting them going again.
- The Interrupt Command Cards are very useful, but in a solo game only by the side that goes first can use them. I suspect that this is not a problem in a normal face-to-face battle.
- I have found these rules simple to learn and use, but the results they produce are quite subtle and not predictable.


An excellent report. I feel like I have a good idea of how the game plays (though I may be mistaken!) and the game sounded interesting.
ReplyDeleteRoss Mac,
DeleteI am very pleased that you enjoyed this battle report. I find writing about play-tests in this way helps me to get to grips with the rules. I work on the principle that if I can explain how the battles unfold to someone who wasn't there, and they understand what happened, I have understood and have used the rules fairly well.
All the best,
Bob
Same here, thanks Bob
DeleteSteve-the-Wargamer,
DeleteI'm glad that you found this battle report helpful!
I have since discovered that I was using some of the mechanisms incorrectly, and will be writing a blog entry about where I went wrong.
All the best,
Bob
Is it possible to get an outright kill on armour or does the system rely on multiple hits an accumulated loss?
ReplyDeleteNorm,
DeleteMy understanding of the rules is that damage is cumulative.
All the best,
Bob
Good report on the game mechanics Bob. It is clear what sort of game you are buying into.
ReplyDeleteI'm a bit confused with some of the artwork on the cards. The Sherman with the Lieutenant is described as an M4A2 which was never used by US forces unless it was modified as a DD tank and it has the white armour markings on the turret which were not used in combat as far as I know.
The other Sherman cards, also M4A2 have British infantry alongside and do not have the white markings.
The rest of the US cards are clearly American, some of them have 'American' attributes.
It looks to me that the 'Allies' are lumped together into a homogenous force which they clearly were not and that is a shame as it vastly oversimplifies the period.
The German cards are not a lot better in that the Panzer IV is displayed without schurzen or even schurzen brackets which would have been a rarity in NW Europe and the Tiger card bears a picture of both a Tiger 1 and a Tiger 2.
All in all I think this tells me that this production is purely a game and not a serious wargame which is probably intentional. I think they may also have fallen back on their original artwork because they could do so at minimal cost.
A game for nostalgic players, which is OK but it wouldn't attract myself.
Jim Duncan,
DeleteI am pleased that you found my blog entry helpful, even if the game is not one that you find particularly attractive. To my mind it has some interesting mechanisms that I have enjoyed trying out ... and may well copy in a modified format at some time in the future.
I must admit that I had not paid much attention to the artwork that had been used in the cards ... but now that you have mentioned it, some of the choices do seem to be a little odd.
I had hoped that that the Force Cards would have been split into national groups, but the designers have chosen not to do that. That said, I have split them into three 'packs': German, American, and British.
All-in-all it's a fun game that fits into a single box the size of an A4 ring binder. It can be stored easily, and will be an excellent game to take on holiday or to have available for quick games.
All the best,
Bob
iirc the illustrations are lifted straight from the Airfix box art. They certainly look very familiar.
DeleteSo we can expect to see olive green Stugs and Panthers in the desert:)
Martin Rapier,
DeleteI suspect that we will!
All the best,
Bob
Thanks for these AARs Bob- really appreciated.
ReplyDeleteLeigh Neville,
DeleteThanks for your kind comment. I am very pleased that you have enjoyed these blog entries.
All the best,
Bob
It's a good looking game Bob, I like the artwork. My only gripe would be seeing those heavy Panzers penetrated by M4 Shermans! Two AP hits and the Sherman survived both? Still, it's an attractive game and I can see it being entertaining.
ReplyDeleteGood write up.
'Lee,
DeleteThe Tiger should have made mincemeat of the Sherman Tanks ... but didn't because - as I have since discovered - I was not using the Tank vs. Tank combat rules correctly ... and I will be writing a blog entry that explains where and how I went wrong.
All the best,
Bob
Taking it away on holiday with me and hope to get some games played, Tony
ReplyDeleteA.W. Kitchen (Tony),
DeleteI think I that taking the game on holiday is an excellent idea. I am sure that you will enjoy using it.
All the best,
Bob
Great write up - thanks.
ReplyDeleteFurgie
Furgie,
DeleteCheers! I'm glad that you enjoyed reading this battle report.
All the best,
Bob
Just looking at your setup Bob, you're missing 4 lots of edge cover and a square cover under the objective. The edge cover really makes a big difference to the shooting in this scenario as would the Objective being Square cover.
ReplyDeleteFurgie,
DeleteI had not realised that the rules regarding edge and square cover worked like that. I will re-read that section of the rules to try to understand what I have misunderstood.
All the best,
Bob