Pages

Thursday, 7 October 2010

Putting the 'T' into faculty

Well, the faculty meeting took place this evening ... and for once it took less than thirty minutes!

The Head of Faculty had been to a training session about how to run a meeting ... and took what she had been taught to heart. We were all told that if we felt that one of the other people there was either taking too long to get to the point, or was wandering off at a tangent, all we had to do was to make the 'timeout' sign with our hands, and they had to stop.

It worked!

One attendee started to talk about an agenda item, and almost immediately began one of their long and – if past experience is to go on – irrelevant anecdotes. Within seconds, a forest of hands was making the 'T' sign and they had to stop. So rather than spending an hour discussing items that should have only taken us ten minutes to ponder over, we got lot more done in less time.

Even more on Chance Cards

Although I had decided to put the idea of adding the use of tactical 'chance cards' to my version of BATTLE CRY to one side, that stalwart pair of Gaels – Conrad Kinch and Donogh – have sent me copies of some tactical 'chance cards' that they produced to use with their version of BATTLE CRY.

The cards that they sent me were specifically designed for the Battle of Gettysburg, but they have reinvigorated my enthusiasm for including some sort of tactical 'chance card' in my version of BATTLE CRY.

So it is a big 'Thanks!' to them ... and a session with my desktop publishing program awaits me at sometime over the weekend.

Wednesday, 6 October 2010

Order, counter-order, disorder

It is alleged that Gaius Petronius Arbiter once wrote that
We trained hard ... but it seemed that every time we were beginning to form up into teams we would be reorganised. I was to learn later in life that we tend to meet any new situation by reorganising; and a wonderful method it can be for creating the illusion of progress while producing confusion, inefficiency, and demoralisation.
This sort of sums up my professional life at the moment. I have been sat in my office for the last hour waiting to be be told when the planned INSET (In Service Training) session booked for today will start. The session was supposed to start at 2.00pm ... but the person who is supposed to be running it has not yet turned up.

I began to do some lesson preparation ... and was then told to stop what I was doing and to go to another room where the INSET was about to start.

It didn't.

After sitting there for some time, I gave up and drifted back to my office to do some work ... and almost as soon as I had started, I was told that the INSET had been cancelled ... and I was supposed to attend a faculty meeting instead.

I am now waiting to be told when the faculty meeting will start ... and where it will be held ... which is why I have time to write a blog entry whilst I am at work.

Confusion reigned ... and we all got wet!

PS. I have just been told that the faculty meeting has been cancelled! Order, counter-order, disorder ...

Tuesday, 5 October 2010

Just another day at the chalkface ...

After some very sound advice, I have redacted the text of yesterday's blog entry. Many thanks to all of you who sent me messages of support.

Normal service will be resumed as soon as possible.

Monday, 4 October 2010

Just another day at the chalkface ...

More about Chance Cards

What I did not make clear in yesterday's blog entry about 'chance cards' was how I intended to use them.

The idea was that the pack was shuffled, and at the beginning of each turn a single 'chance card' was dealt to each side. The side could then either chose to use it or discard it at the end of the turn. A side was not allowed to retain a 'chance card' at the end of a turn; any unused cards were to be added to the discard pile, and when all the 'chance cards' had been used, the discard pile was to be shuffled and re-used.

Simple ... and if I had remembered to use use them they might even have been very effective!

Sunday, 3 October 2010

Chance Cards

During the play-test I wrote about in yesterday’s blog entry, I mentioned trying – unsuccessfully – to use a set of tactical 'chance cards'.

The cards were originally designed to be used with a set of colonial wargames rules I designed some time ago entitled HEROES OF VICTORIA'S EMPIRE (or HoVE for short). I found the pack whilst tidying up my wargames room, and decided to try them out (after a few minor changes) as a possible avenue for further modifications of Richard Borg's BATTLE CRY rules.

The pack of 'chance cards' contains 54 cards made up as follows:
  • 18 x 'Dashed hard luck!' cards: No tactical advantage this turn
  • 12 x 'Enhanced firepower!' cards: A unit may fire twice this turn
  • 12 x 'Faster movement!' cards: A unit may move an additional hex this turn
  • 9 x 'Hand-to-hand fighting!' cards: A unit throws an additional dice if fighting an enemy unit in an adjacent hex
  • 3 x 'Rally!' cards: A unit may ignore any forced retreats this turn
Had I remembered to use the 'chance cards' after the first two turns of the play-test, I might have been able to judge whether or not they were worth persevering with. As it was, I forgot to use them so they might as well go back into storage for the time being.

Saturday, 2 October 2010

Modified 'Battle Cry': Play-test 3

Having seen the effects of Infantry charging guns that were behind fixed defences, I decided to set up a scenario in which I could deploy Cavalry. For some reason, I gravitated towards a situation that was Crimean in origin rather than American, hence the similarity to the events of the 'Charge of the Light Brigade' at Balaclava.

Note: I decided to experiment with a pack of tactical ‘chance cards’ that I had designed, but 'forgot' to use them after the second turn as I got too engrossed in the action. I will probably not use them again.

Scenario
A Union force of four Cavalry units (including one made up of generals because I only had nine Union Cavalry figures!) was given the task of taking three Confederate Artillery units that were drawn up at the end of a valley. The Confederate Artillery was supported by two units of Confederate Cavalry.

Turn 1
The Union Cavalry moved up the valley towards the Confederate position, but initially remained out of range.

Turn 2
The Union troops continued to move forward, but they were now in range of the Confederate guns, which opened fire.
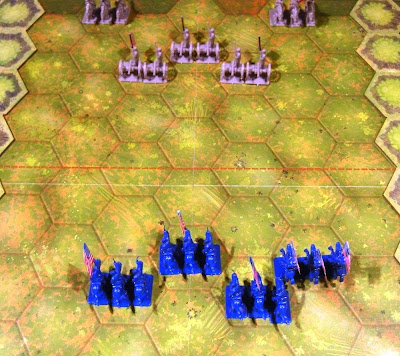
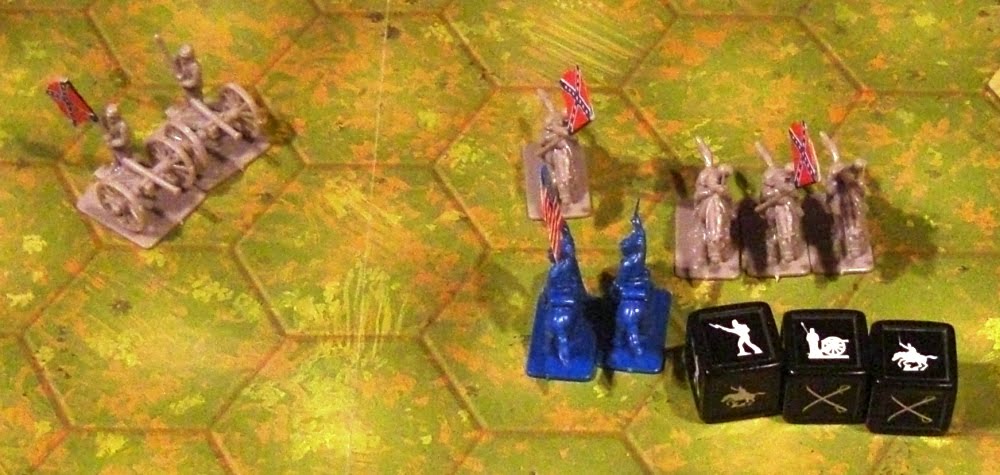
The right-hand Confederate Artillery fired at the right-hand Union Cavalry units, and killed one figure as well as forcing the one of the Cavalry units to retreat one hex. (This was as a result of a 'chance card' being drawn that allowed a battery to fire twice in one turn.) The centre Confederate Artillery unit fired at the Union Cavalry unit that was opposite it, and the latter emerged unscathed, unlike the left-hand Cavalry unit that lost a figure to artillery fire from the left-hand Artillery unit.

Turn 3
The next move brought the Union Cavalry up to the Confederate guns, and the right-hand Cavalry unit engaged the right-hand Confederate Artillery unit. It was so effective that it destroyed one of the Artillery unit's two guns.
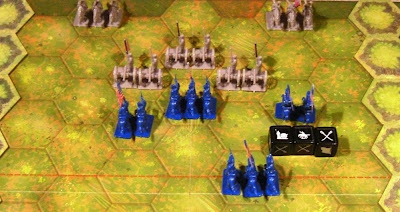
The centre Union Cavalry unit fought hand-to-hand with the Confederate Artillery unit that was opposite it, and it also managed to destroy a Confederate gun.

The left-hand Cavalry unit was less successful, and made no headway against the left-hand Confederate Artillery unit.

It was now the Confederate's turn to fire back, and the right-hand Artillery unit inflicted a casualty on the right-hand Union Cavalry unit as well as forcing it to retire one hex.

The centre Confederate Artillery unit fire at the Union Cavalry unit in front of it, and it also lost a figure and had to withdraw one hex.

The left-hand Artillery unit fired at the Union troops to their front, and wiped the unit out.

Turn 4
The Union troops continued to press forward, and the right-hand Cavalry unit destroyed the remains of the right-hand Confederate Artillery unit.

The Cavalry unit that was now the leftmost Union unit was equally successful in its fight with what had been the central Confederate Artillery unit, and the loss of the second Artillery unit seemed to place the entire Confederate position in jeopardy.

Despite this, the Confederates were not yet beaten, and the last remaining Artillery unit fired back with deadly effect, wiping out the left-hand Union Cavalry unit.

The right-hand Confederate Cavalry unit now charged the right-hand Union Cavalry unit ... and swept it into oblivion.

The left-hand Confederate Cavalry unit followed this example, and charged to last remaining Union Cavalry unit, and inflicted a casualty upon it.

Turn 5
The Union Cavalry engaged their attackers with vigour, and inflicted two casualties on the Confederate unit opposite it.
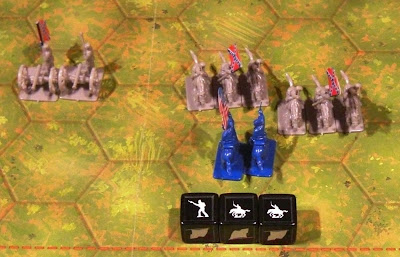
The Confederate Artillery swung round and fired at the Union Cavalry unit ... and missed!

It was then the turn of the Confederate Cavalry to engage their opponents in hand-to-hand combat. The right-hand Confederate unit killed one figure ...

... and the last surviving figure in the Union unit was killed by the second Confederate Cavalry unit.

The battle was over. The Union force had been wiped out, but the Confederates had lost two Artillery units and their Cavalry was somewhat depleted.

Conclusion
This play-test produced a reasonably realistic and historical result, something that may surprise some people. It was great fun to fight, and it gave me the opportunity to try out the idea of tactical 'chance cards' in a game. The fact that I 'forgot' to use them indicates that they are probably not necessary, but I still have them should I wish to use them again in the future.

Modified ‘Battle Cry’: Play-test 2 – Error

Mea culpa! Mea maxima culpa!

It has been pointed out to me that there appears to be a discrepancy in the blog entry I wrote about the recent play-test of my modified version of Richard Borg’s BATTLE CRY … and there is.

Turn 4 should read as follows:
The Union first line had been heavily depleted, but their sacrifice had enabled the second line to continue their advance untouched. The Confederate Artillery opened fire on the right-hand Union Infantry unit, which was forced to retreat three hexes.
Sorry for this mistake in the report, but it was written in rather a bit of a hurry yesterday, and I misread my notes and did not refer to the photographs to check that what I was writing was correct.

I hope that this did not spoil your enjoyment when reading the blog entry.

Friday, 1 October 2010

Modified 'Battle Cry': Play-test 2

Turn 1
The first line of Union attackers advanced two hexes towards the Confederate defences, which opened fire at extreme range, destroying one figure from the right-hand Union unit and forcing the left-hand unit to fall back one hex.

Turn 2
Whilst the second line of attackers remained at the start line, the first line continued their advance. They were again fired upon by the Confederate Artillery units, and this time the centre Union infantry unit lost a figure whilst the two flanking units were each forced to retreat one hex.

Turn 3
Both the first and second line of Union troops moved forward, and the first line were now very close to the Confederate defences. This drastically increased the effectiveness of the Confederate Artillery. The right-hand Union Infantry unit suffered two casualties, the centre unit was wiped out ...

... and the left-hand unit lost a single figure.

Turn 4
The Union first line had been heavily depleted, but their sacrifice had enabled the second line to continue their advance untouched. The Confederate Artillery opened fire on the right-hand Union Infantry unit, which was wiped out.

The left-hand Union Infantry unit was also hit, lost two figures and was forced to fall back one hex.

The centre unit of the Union second line was also engaged by the Confederate Artillery, but the fire was ineffective.

Turn 5
The Union second line was now able to advance until it was within a short distance of the Confederate defences, and the defenders fired their Artillery in the hope that they would be able to destroy the Union attackers before more than just the left-hand unit reached the earthworks.

The right-hand Union Infantry unit was wiped out ...

... the left-hand unit was forced to withdraw two hexes ...

... and the central unit of the Union second line lost a single figure.

Turn 6
The Union advance was far more successful than expected, and by now two units were in the earthworks and were poised to cross the moat. The Confederate Artillery was firing at almost point blank range at the attackers, and the right hand Union Infantry unit lost two figures.

The centre unit also lost two figures ...

... but left-hand unit only lost one, leaving the second line unit that was behind it untouched.

Turn 7
The Union attackers advanced into the moat, and fired at the Confederate defenders. Because the defenders were uphill of the attackers, each of the firing Union units only three dice.

The right-hand Union Infantry unit's fire forced the Confederate Artillery unit opposite it to retreat ...

... as did the centre Union unit. However, because the Confederate Artillery unit could not retreat one hex due to the Infantry unit that was behind it, it lost a figure and a cannon.

The left-hand Union Infantry unit's fire also forced the Confederate Artillery unit opposing it to retreat one hex.

The Union units were able to follow up their assault by moving into the hexes vacated by the retreating Confederate Artillery, and the play-test ended with two Union Infantry units poised to fight the Confederate defenders inside the fort.

Conclusions
The modified version of the rules worked much better without the rule that allowed 'flags' to be exchanged for figures, and I have now removed it from the draft. The play-test was interesting to fight through, and the result was an interesting one. Whether or not the result would be that same if I was to re-fight it again is open to debate ... but I suspect that it would not be too different.