Chapter 1 – The British plan their revenge
Once Sir Hector Boleyn-Green had brought his command to safety after the incident at the Kybosh Pass that had led to the capture of Fort Chunderbad, he began planning his counter-attack. He knew that Mohamed Bashir Khan would expect him to return with a punitive expedition, and would plan accordingly. Sir Hector therefore determined not to do the obvious – which was to move up to the Kybosh Pass in order to recapture and reoccupy Fort Chunderbad – but to do the unexpected and attack Durbal, the capital of Gaziristan.
To do this Sir Hector selected the best troops available. These were:

Chapter 2 – Mohamed Bashir Khan prepares his defences
The British preparations were conducted in secrecy, but word of them soon reached the ears of those who were sympathetic to Gaziri independence. They, in turn, passed it on to merchants who were travelling from Chindia to Gaziristan, who communicated this to Mohamed Bashir Khan. Mohamed realised, with some shock, that he had almost been outwitted by the infidel Sir Hector Boleyn-Green.
Mohamed immediately took steps to fight off any British incursion into Gaziristan to capture Durbal. He sent messengers to the chieftains of the clans that made up the Bathani tribe (the Munir Khel, the Kybosh Khel, and the Jakzi Khel) to send as many tribesmen as they could spare to Durbal. He knew that he could trust these men above all others in Gaziristan as many of them were directly or indirectly related to him.
Whilst waiting for these reinforcements to arrive, Mohamed and his small bodyguard of fanatical retainers occupied the Great Fort of Durbal – the Bella Histar – and began repairing its crumbling and decayed walls. Once the population of Durbal had been 'encouraged' to help, the necessary repairs were completed in a matter of days, and when the tribesmen of the Bathani tribe arrived Mohamed felt confident that he could repulse the infidel invaders with ease.
The defenders of the Bella Histar included:

Chapter 3 – The attack on Durbal
Before the Winter snows had melted sufficiently to allow his expedition to pass over the High Chindu Mountains, across the Great Chindu and Atman Valleys, and onto the Durbal Plateau, Sir Hector ordered his troops to advance as close to the Gaziristan-Chindian border as was possible. He hoped that this would acclimatized his troops to the terrain and the weather. It also allowed him to advance into Gaziristan as soon as the snows melted, and it was his hope that this would catch the Gaziris unprepared, and would allow him to reach Durbal unopposed.

Sir Hector's plan was even more successful than he had hoped. As soon as the snows had melted enough to allow his troops to cross the Chindu Mountains, he ordered the advance. The British bypassed any Gaziri settlements in the Great Chindu Valley and Atman Valley that we close to their axis of advance, with the result that they were able to reach the Durbal Plateau unopposed. The British advance was not, however, unseen. News soon reached Mohamed Bashir Khan that the British were coming, and would soon reach Durbal.

Mohamed ordered the Bathanis to occupy the Bella Histar and to prepare to defend it – and Durbal – to the death.

On reaching the outskirts of Durbal, Sir Hector deployed his troops with the Royal Surrey Regiment on the left wing, the MacBean Highlanders in the centre (supported by the Gatling Gun Detachment from the Yorkshire Fusiliers), and the Middlesex Rifles on the right. X Battery of the Royal Artillery – which Sir Hector accompanied – was deployed between the Highlanders and the Middlesex Rifles.

The British plan of attack was simple. The artillery would pound the Gaziri defences whilst the infantry – supported by the Gatling Gun Detachment – would mount an assault on the walls of the Bella Histar.
The opening shots of the battle were indicative of what was to come. The first shot fired by the British artillery damaged one of the Gaziris' cannons and killed a member of its gun crew. Despite the personal intervention of Mohamed Bashir Khan, the cannon's fire remained ineffective for the rest of the battle, and, as will be seen, this allowed the Middlesex Rifles to advance right up to the walls of the Bella Histar without loss.

The impetuous nature of the Gaziris was not well suited to defending the Bella Histar, and one group of defenders climbed over the walls of the fort and charged the MacBean Highlanders. This stalled the Highlander's advance, as they were forced to close ranks and prepare to fire at the oncoming Gaziris.

The Gaziris' charge was stopped in its tracks by the superior firepower of the Highlanders. However another group of defenders saw the effect of this attack on the British and they also sallied forth. They charged the Royal Surrey Regiment, who were unable to stop them.

The Royal Surrey Regiment was forced back by the ferocity of the Gaziri charge, and suffered 25% casualties during the melee with the tribesmen. However, on the right flank, the Middlesex Rifles had by now reached the walls of the Bella Histar, and finding them undefended, they had climbed over the walls and into the fort.

The Gaziri defences were now breached, and realising that Durbal was going to be captured by the British, Mohamed Bashir Khan made good his escape. Whilst Mohamed was running from the fort and into the city, Sir Hector had moved up to the Royal Surrey Regiment, and taken them under his personal command. Their rifle fire – augmented by the fire of the Gatling Gun Detachment – destroyed the group of Gaziris who had forced them back. In the meantime the MacBean Highlanders were firing volleys into the other Gaziris who remained outside the walls of the fort whilst the Middlesex Rifles were slowly but surely winkling out the rest of the Bella Histar's defenders.

Once the remaining Gaziri tribesmen had been killed or had surrendered, Sir Hector ordered his troops to occupy the Bella Histar and make temporary repairs to its defences. Next day he ordered that the disarmed prisoners be set free in order that they could return to their villages to spread the word that Mohamed Bashir Khan's power had been destroyed.
Chapter 4 – The aftermath
In the weeks after the capture of the Bella Histar and Durbal Sir Hector attempted to trace what had happened to Mohamed Bashir Khan. There was a vague rumour that he had been seen in the north of Gaziristan with someone who fitted the description of Colonel Nicolai Rippoff, but there was no evidence to support this and it remained an unconfirmed sighting of the fugitive.
Of more importance to Sir Hector was the security of the newly appointed British Resident, Sir Loudon Charivari. Initially Sir Loudon was housed in the Bella Histar, alongside the small garrison that Sir Hector now commanded, but this arrangement neither suited Sir Loudon nor Sir Hector. A walled house in Durbal was refurbished and became the new British Residency in Durbal. Its opening was as much a political as a social occasion, and it is perhaps surprising to note that one of the Gaziri guests was Grand Mullah of Durbal. He was a very politically astute man, and had realised that, for the time being at least, he had to be on cordial terms with the British. His attendance was sign to all but the most ardent Gaziri nationalists that the British presence had to be tolerated. He knew that in the fullness of time the British garrison would be withdraw to deal with a crisis somewhere else in the Empire, and when that happened the Gaziris could reclaim their independence.
Sir Hector returned to England six months after his short but decisive campaign in Gaziristan. He was received by the Queen at Windsor, and was rewarded with the award of a baronetcy (he became Lord Boleyn-Green of Durbal) and a gift of £50,000. The British infantry units that took part in the campaign in Gaziristan – the Macbean Highlanders, the Royal Surrey Regiment, the Middlesex Rifles, and the Yorkshire Fusiliers – were all awarded the battle honour 'Durbal'.
Modelling Notes
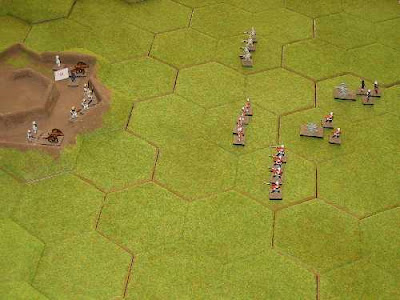
The troops featured in the photographs are 15mm-scale Essex Miniatures and Irregular Miniatures figures. The Gaziri cannon are Irregular Miniatures and the British cannon and Gatling Guns are very old Peter Laing models. The terrain (including the fort) is made by Kallistra, and is marked in 10cm hexagons. The buildings were from a variety of different manufacturers including Hovels.
The rules used were Redcoats and Natives.
Once Sir Hector Boleyn-Green had brought his command to safety after the incident at the Kybosh Pass that had led to the capture of Fort Chunderbad, he began planning his counter-attack. He knew that Mohamed Bashir Khan would expect him to return with a punitive expedition, and would plan accordingly. Sir Hector therefore determined not to do the obvious – which was to move up to the Kybosh Pass in order to recapture and reoccupy Fort Chunderbad – but to do the unexpected and attack Durbal, the capital of Gaziristan.
To do this Sir Hector selected the best troops available. These were:
- 1st Battalion, MacBean Highlanders
- 2nd Battalion, Royal Surrey Regiment
- 1st Battalion, Middlesex Rifles
- Gatling Gun Detachment, Yorkshire Fusiliers
- X Battery, Royal Artillery

Chapter 2 – Mohamed Bashir Khan prepares his defences
The British preparations were conducted in secrecy, but word of them soon reached the ears of those who were sympathetic to Gaziri independence. They, in turn, passed it on to merchants who were travelling from Chindia to Gaziristan, who communicated this to Mohamed Bashir Khan. Mohamed realised, with some shock, that he had almost been outwitted by the infidel Sir Hector Boleyn-Green.
Mohamed immediately took steps to fight off any British incursion into Gaziristan to capture Durbal. He sent messengers to the chieftains of the clans that made up the Bathani tribe (the Munir Khel, the Kybosh Khel, and the Jakzi Khel) to send as many tribesmen as they could spare to Durbal. He knew that he could trust these men above all others in Gaziristan as many of them were directly or indirectly related to him.
Whilst waiting for these reinforcements to arrive, Mohamed and his small bodyguard of fanatical retainers occupied the Great Fort of Durbal – the Bella Histar – and began repairing its crumbling and decayed walls. Once the population of Durbal had been 'encouraged' to help, the necessary repairs were completed in a matter of days, and when the tribesmen of the Bathani tribe arrived Mohamed felt confident that he could repulse the infidel invaders with ease.
The defenders of the Bella Histar included:
- Bathani tribesmen of the Munir Khel clan
- Bathani tribesmen of the Kybosh Khel clan
- Bathani tribesmen of the Jakzi Khel clan
- 2 smooth-bore cannon (originally supplied by Colonel Nicolai Rippoff) crewed by Bathanis who had been trained by the Russians.

Chapter 3 – The attack on Durbal
Before the Winter snows had melted sufficiently to allow his expedition to pass over the High Chindu Mountains, across the Great Chindu and Atman Valleys, and onto the Durbal Plateau, Sir Hector ordered his troops to advance as close to the Gaziristan-Chindian border as was possible. He hoped that this would acclimatized his troops to the terrain and the weather. It also allowed him to advance into Gaziristan as soon as the snows melted, and it was his hope that this would catch the Gaziris unprepared, and would allow him to reach Durbal unopposed.

Sir Hector's plan was even more successful than he had hoped. As soon as the snows had melted enough to allow his troops to cross the Chindu Mountains, he ordered the advance. The British bypassed any Gaziri settlements in the Great Chindu Valley and Atman Valley that we close to their axis of advance, with the result that they were able to reach the Durbal Plateau unopposed. The British advance was not, however, unseen. News soon reached Mohamed Bashir Khan that the British were coming, and would soon reach Durbal.

Mohamed ordered the Bathanis to occupy the Bella Histar and to prepare to defend it – and Durbal – to the death.

On reaching the outskirts of Durbal, Sir Hector deployed his troops with the Royal Surrey Regiment on the left wing, the MacBean Highlanders in the centre (supported by the Gatling Gun Detachment from the Yorkshire Fusiliers), and the Middlesex Rifles on the right. X Battery of the Royal Artillery – which Sir Hector accompanied – was deployed between the Highlanders and the Middlesex Rifles.

The British plan of attack was simple. The artillery would pound the Gaziri defences whilst the infantry – supported by the Gatling Gun Detachment – would mount an assault on the walls of the Bella Histar.

The opening shots of the battle were indicative of what was to come. The first shot fired by the British artillery damaged one of the Gaziris' cannons and killed a member of its gun crew. Despite the personal intervention of Mohamed Bashir Khan, the cannon's fire remained ineffective for the rest of the battle, and, as will be seen, this allowed the Middlesex Rifles to advance right up to the walls of the Bella Histar without loss.

The impetuous nature of the Gaziris was not well suited to defending the Bella Histar, and one group of defenders climbed over the walls of the fort and charged the MacBean Highlanders. This stalled the Highlander's advance, as they were forced to close ranks and prepare to fire at the oncoming Gaziris.

The Gaziris' charge was stopped in its tracks by the superior firepower of the Highlanders. However another group of defenders saw the effect of this attack on the British and they also sallied forth. They charged the Royal Surrey Regiment, who were unable to stop them.

The Royal Surrey Regiment was forced back by the ferocity of the Gaziri charge, and suffered 25% casualties during the melee with the tribesmen. However, on the right flank, the Middlesex Rifles had by now reached the walls of the Bella Histar, and finding them undefended, they had climbed over the walls and into the fort.

The Gaziri defences were now breached, and realising that Durbal was going to be captured by the British, Mohamed Bashir Khan made good his escape. Whilst Mohamed was running from the fort and into the city, Sir Hector had moved up to the Royal Surrey Regiment, and taken them under his personal command. Their rifle fire – augmented by the fire of the Gatling Gun Detachment – destroyed the group of Gaziris who had forced them back. In the meantime the MacBean Highlanders were firing volleys into the other Gaziris who remained outside the walls of the fort whilst the Middlesex Rifles were slowly but surely winkling out the rest of the Bella Histar's defenders.

Once the remaining Gaziri tribesmen had been killed or had surrendered, Sir Hector ordered his troops to occupy the Bella Histar and make temporary repairs to its defences. Next day he ordered that the disarmed prisoners be set free in order that they could return to their villages to spread the word that Mohamed Bashir Khan's power had been destroyed.
Chapter 4 – The aftermath
In the weeks after the capture of the Bella Histar and Durbal Sir Hector attempted to trace what had happened to Mohamed Bashir Khan. There was a vague rumour that he had been seen in the north of Gaziristan with someone who fitted the description of Colonel Nicolai Rippoff, but there was no evidence to support this and it remained an unconfirmed sighting of the fugitive.
Of more importance to Sir Hector was the security of the newly appointed British Resident, Sir Loudon Charivari. Initially Sir Loudon was housed in the Bella Histar, alongside the small garrison that Sir Hector now commanded, but this arrangement neither suited Sir Loudon nor Sir Hector. A walled house in Durbal was refurbished and became the new British Residency in Durbal. Its opening was as much a political as a social occasion, and it is perhaps surprising to note that one of the Gaziri guests was Grand Mullah of Durbal. He was a very politically astute man, and had realised that, for the time being at least, he had to be on cordial terms with the British. His attendance was sign to all but the most ardent Gaziri nationalists that the British presence had to be tolerated. He knew that in the fullness of time the British garrison would be withdraw to deal with a crisis somewhere else in the Empire, and when that happened the Gaziris could reclaim their independence.
Sir Hector returned to England six months after his short but decisive campaign in Gaziristan. He was received by the Queen at Windsor, and was rewarded with the award of a baronetcy (he became Lord Boleyn-Green of Durbal) and a gift of £50,000. The British infantry units that took part in the campaign in Gaziristan – the Macbean Highlanders, the Royal Surrey Regiment, the Middlesex Rifles, and the Yorkshire Fusiliers – were all awarded the battle honour 'Durbal'.
Modelling Notes
The troops featured in the photographs are 15mm-scale Essex Miniatures and Irregular Miniatures figures. The Gaziri cannon are Irregular Miniatures and the British cannon and Gatling Guns are very old Peter Laing models. The terrain (including the fort) is made by Kallistra, and is marked in 10cm hexagons. The buildings were from a variety of different manufacturers including Hovels.
The rules used were Redcoats and Natives.


Splendid little war sir!
ReplyDeleteTradgardmastare,
ReplyDeleteThank you very much for you kind comment. It was very enjoyable to fight.
All the best,
Bob